GH DIVA 1.0 LAB NOTES:
Topics To Cover:
- Downloading DIVA
- Getting started
- Components
Hello Everyone, welcome to DIVA 1.0!
Below is everything you will need to know to start using DIVA for climate analysis and glare analysis. Similar to Ladybug, DIVA is a plug-in for Grasshopper to run several simulations, such as solar radiation analysis, daylight autonomy, and glare analysis. However, it does not produce graphical illustrations for a particular climate (e.g. charts and graphs) like Ladybug does.
Download DIVA:
- To download DIVA, visit http://solemma.net/Buy-Edu-Lic-40.html. or https://solemma.com/Buy.html For more information about the capabilities of DIVA, visit https://solemma.com/Diva.html
- Fill out the online form.
- After 1-2 business days, you should receive an email with a license that will expire on near the end of the year.
- Once you have received the email, click the link to begin the installation process.
- After you install DIVA, the next time you open Rhino you may have to verify your credentials.
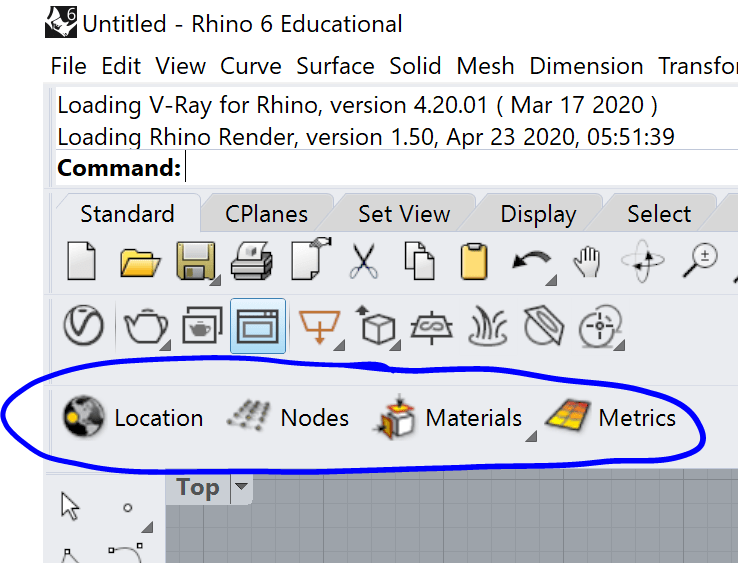
- Once installed, you should see new icons below the Rhino default toolbar and when you open Grasshopper you should see DIVA 4 and Archsim at the top of the toolbar. Archsim is installed during the installation of DIVA automatically

Getting Started:
When installed DIVA will appear in Rhino and in Grasshopper. In each location, the same functions exist. The only difference is opening DIVA in Grasshopper allows a more streamline analysis process, meaning you can easily make changes to the Grasshopper “definition”, aka “script” if you wanted to adjust things like geometry, material reflectivity, analysis period, etc.
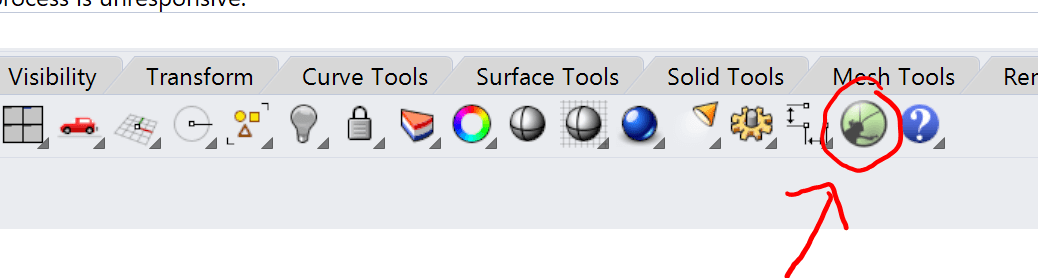
- To start, open Grasshopper by typing “Grasshopper” in the Rhino command line or by clicking on the Grasshopper icon in the Rhino toolbar. A new window will appear once Grasshopper is open.
- Click on DIVA at the top of the toolbar.

- To start using DIVA, simply click on a component within the .Simulation group and drag it into the Grasshopper workspace.

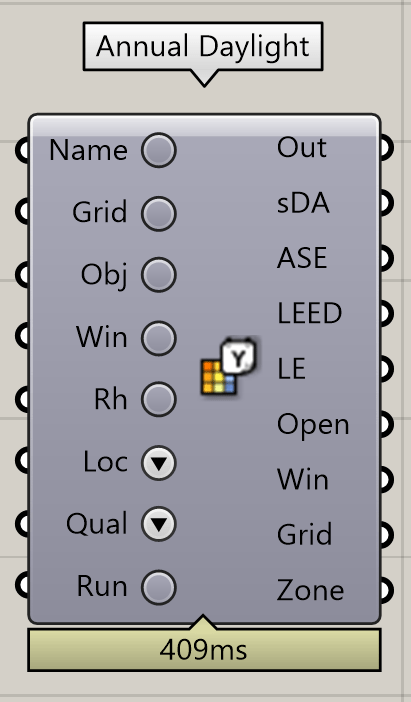
- To start using Diva, click on a component with the .Simulation group and drag it into the Grasshopper workspace. You will notice the component has several inputs. Most of these inputs are the same for all the simulation components within DIVA, however, a couple DIVA specific components may have a few more additional inputs depending on the component. The main inputs are in bold below with a description as to what additional components get plugged into it.

- Name –> Panel. This is the name of the file that DIVA would automatically save the analysis under.
- Grid–> Daylighting Grid
- Obj –> Scene Object
- Location –> click down arrow and select .epw file once you download the file. (See the steps to download .epw files below.)
- Run –> Boolean Toggle

The Daylighting Grid component requires one or more geometry components that are referenced in from Rhino and a sider to control the size of the grid.
The Scene Object component requires one or more geometry components that are referenced in from Rhino and to define the reflectance percentage for each object. Scene Objects are geometry that impact your building in some way. Examples of Scene Objects may include, surround buildings, vegetation, ground plane, etc. Note if you want to reference geometry for surrounding buildings, ground plane, or other geometry break into separate instances such that one geometry component corresponds to one Scene Object components so that you can adjust the material reflectance values accordingly. These would all be connected to the Obj input of the analysis component.
Add the Grid Viewer component to the Grid output of the analysis component to view the results.

Steps to download .epw files per website:
Climate.onebuilding:
- Navigate to the location you want.
- Click on the link to download the data. Note: If available, chose the file that is a TMYx.2004-2018 file type as that has the most recent weather data.

- Extract the data from the .zip folder and save to your Local Disk –> DIVA –> WeatherData.

EnergyPlus
- Navigate to the location you want.
- Click on Download All to download the data or you can right-click on Download All –>Copy link address.

- If you download the weather data, extract the data from the .zip folder, and save to your Local Disk –> DIVA –> WeatherData.

DIVA Component Basics
Radiation Map – this component is used to run solar radiation simulations. Click here for a video tutorial regarding how to run this simulation.
Sun Path – this component creates a visual diagram showing the sun’s position in the sky for a defined time of the year, month, or day. Click here for a video tutorial regarding how to run this simulation.

Annual Daylight – computes annual climate-based daylight metrics. Click here for a video tutorial regarding how to run this simulation.
Daylight Factor – computes daylight factor on a grid. The definition assembly is similar to the Annual Daylight component.

Illuminance – computes point-in-time illuminance. The definition assembly is similar to the Annual Daylight component.

Check out this page for more tutorials created by Solemma LLC, the developers of DIVA.
