CAMERA SETTINGS
Topic_01: Saving a View
1. Next to the Viewport name (i.e. Perspective) click the drop down menu > Set view > Named Views…
2. A dialog window appears. Near the top left select the “Save as” icon. Name the view.
3. You have successfully saved a view! You should see a thumbnail preview in the dialog box.
4. Now when you navigate to the Viewport drop down menu, you should see your newly created view under “Named Views”

Topic_02: Place Camera and Target
1. Make a Line about 5-10 feet long. Using Gumball, move vertically on the blue axis to roughly 5 feet (eye level).
2. In the drop down menu next to “Perspective” viewport scroll down to Set Camera> Place Camera and Target.
3. Command line will prompt to specify the camera point > Choose one endpoint of the line.
4. Command line will prompt to specify the target point > Choose the opposite endpoint of the line.
5. Save your view!!! (Topic_01). The line you created is just a guide line to set up the view and may be deleted. You can draw guidelines at different points in your model to place the camera and create different views.

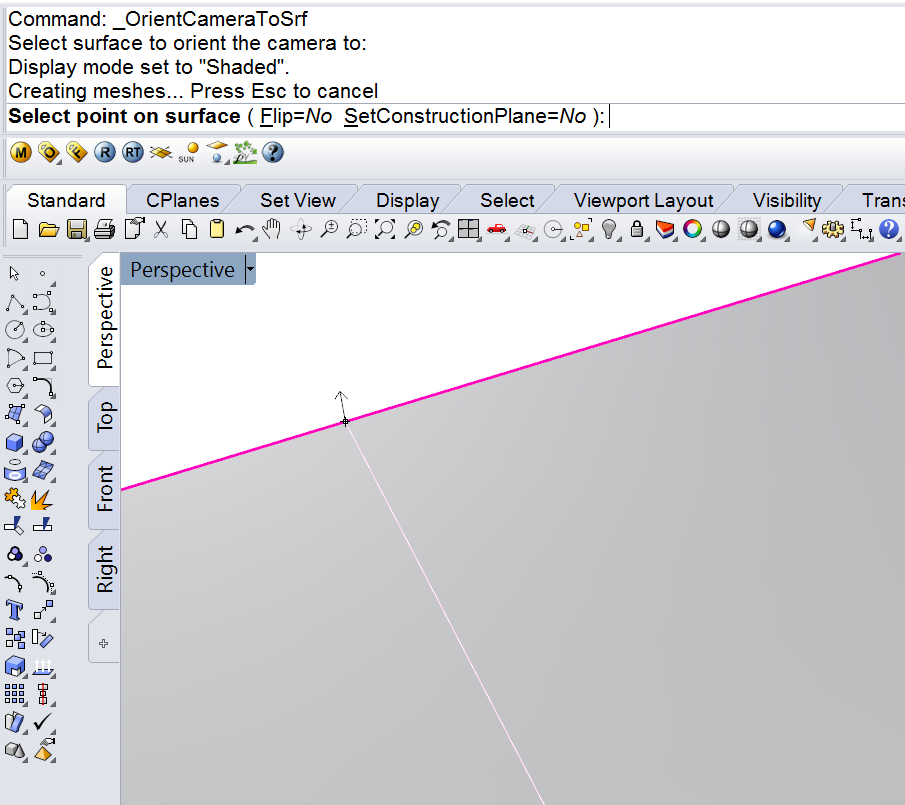
Topic_03: Orient Camera to Surface
1. If you want to orient your view to a particular surface plane, Orient Camera to Surface can be beneficial.
2. In the drop down menu next to “Perspective” viewport scroll down to Set Camera > Orient Camera to Surface.
3. Select surface > Now specify a center point.
(Note*** Since you can’t snap to a midpoint on a surface it sometimes helps to actually draw a curve on the surface so you can snap to the mid point of the curve.)
Once you hover over a center point, notice the small arrow that appears near the point you just referenced.
4. BEFORE YOU CLICK THE CENTER POINT: In the command line toggle Flip to change to direction of the arrow. Contrary to what you may believe, you actually want the arrow facing towards yourself, NOT the object
5. Save your view!!! (Topic_01)
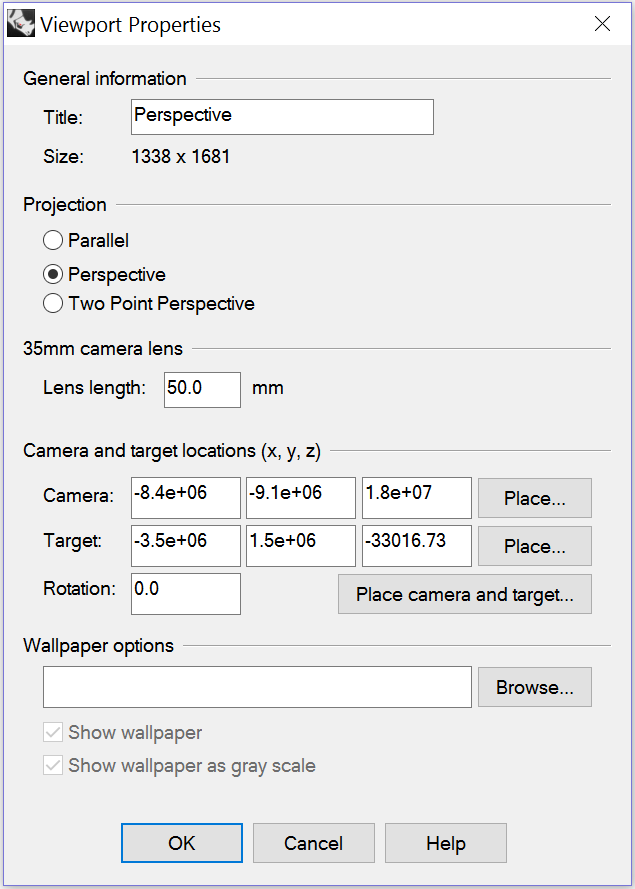
Topic_04: Viewport Properties
1. In the drop down menu next to “Perspective” viewport scroll down to Viewport Properties > a dialog box appears.
2. Look for the Camera Lens option; by default it usually is set to “50mm.” Explore the range you can get from this option by inputting a new value such as 30mm (Makes the lens capture a wider scene); A value of a 15mm will exaggerate this even more. If you want to revert to default settings just open up the viewport properties again and change the lens to 50mm.