Environment Settings, Sun, Sky
NOTES IN PROGRESS . FINAL EDIT UNDERWAY
There are a number of options availble for simulation the general atmosphere associated with rendering light and shadows and materials. Some documentation used to develop this tutorial are published on line in the V-Ray for Rhino manual published on-line at:
https://docs.chaosgroup.com/display/VRAYRHINO/V-Ray+Sun+and+V-Ray+Sky+%7C+SunLight
For more general on-line tutorials and reference materials on V-Ray see https://docs.chaosgroup.com/display/VRAYRHINO
Environment Settings, Sun, Sky and Texture Mapping
There are a number of options availble for determining the the general atmosphere assocaited with rendering, light and shadows studies. Some documentation used to develop this tutorial are published on line in the vV-Ray for Rhino manual published on-line at:
https://docs.chaosgroup.com/display/VRAYRHINO/V-Ray+Sun+and+V-Ray+Sky+%7C+SunLight
For more general on-line tutorials and reference materials on V-Ray see https://docs.chaosgroup.com/display/VRAYRHINO
PART 1. Render a Catenary Curve Vautl
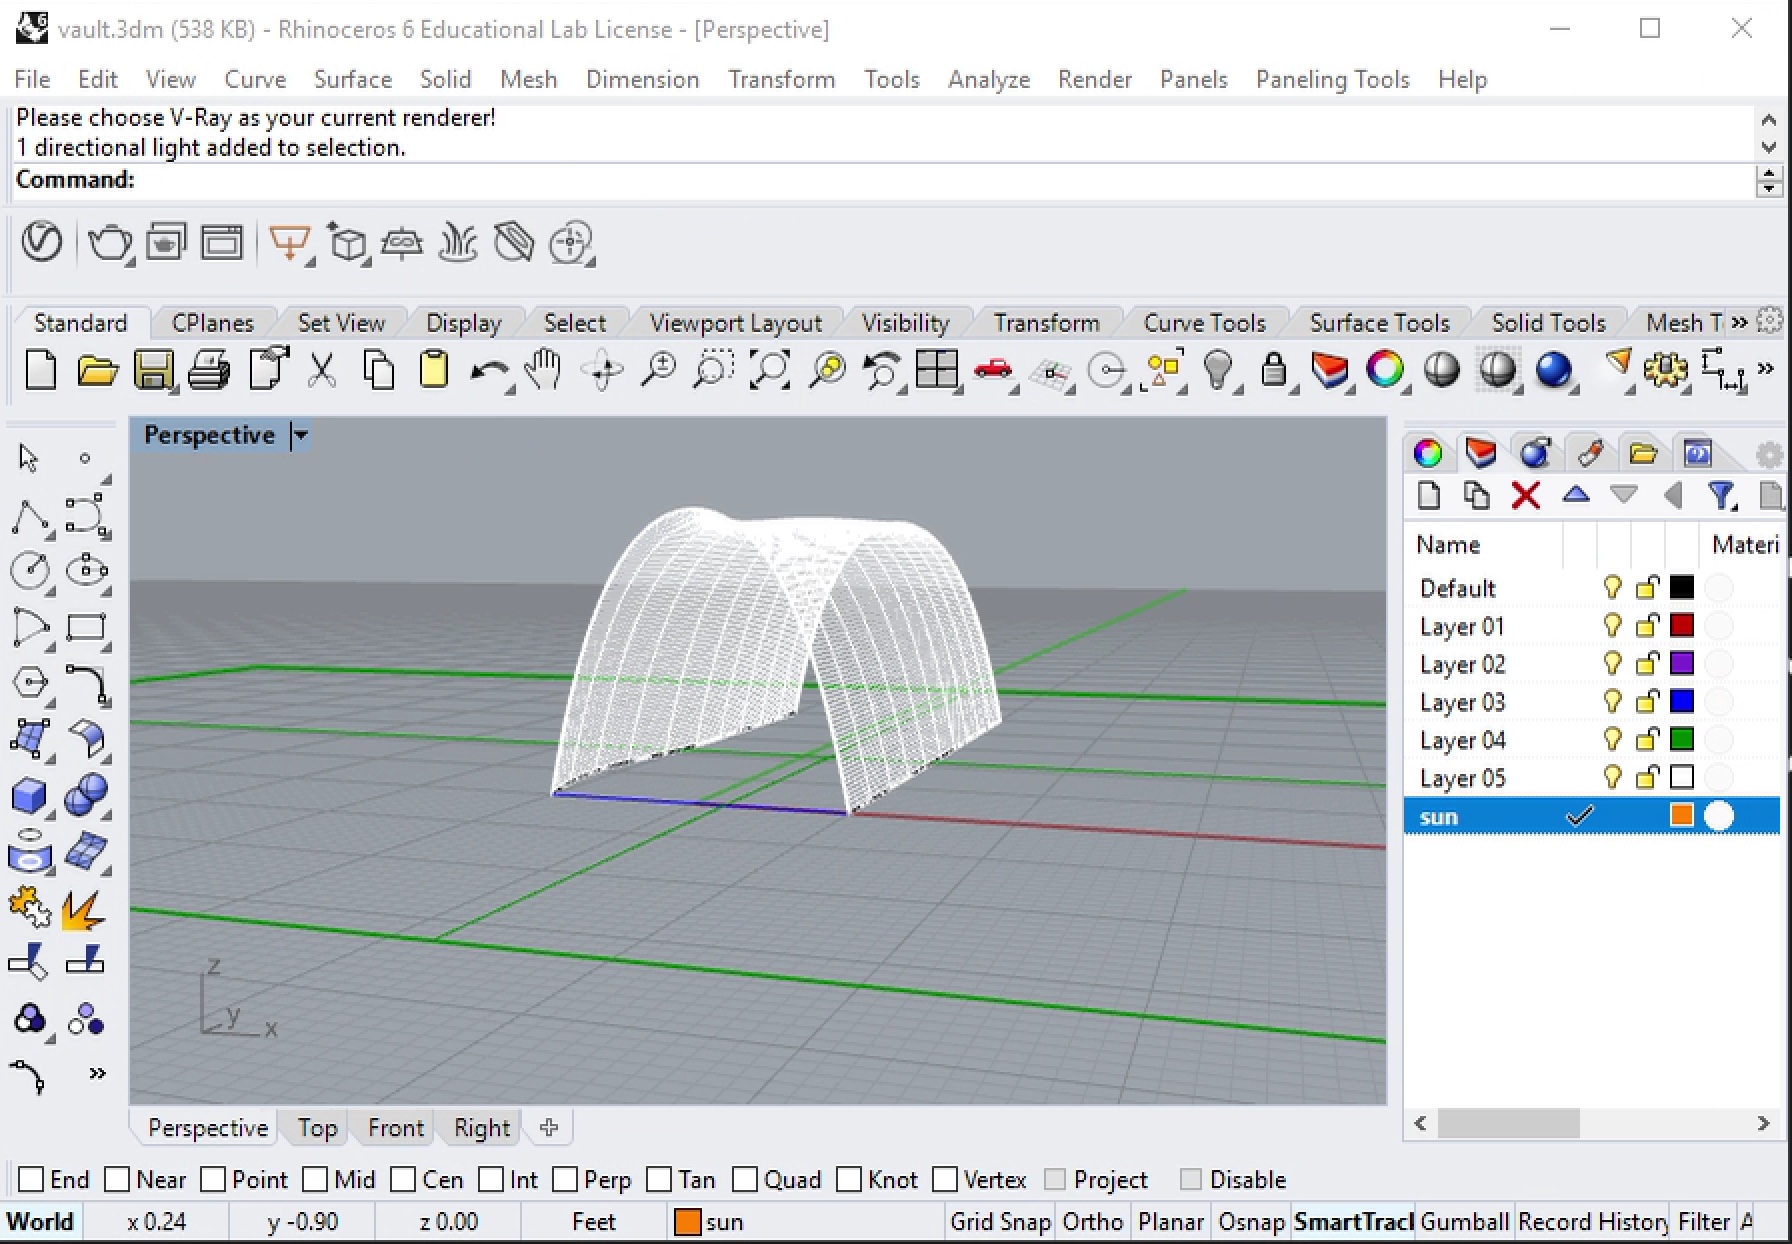
Create a Rhino File with a ground surface, catenary curve generated vault such as was done in the catenary curves and vault tutorialand add a layer for a sunlight and create the 3d model below. The “sunlight” layer will be used to place a V-Ray sun .
2. Within Rhino, go to the menu item “Render>Current Renderer>V-Ray for Rhino” to ensure that V-Ray is active.
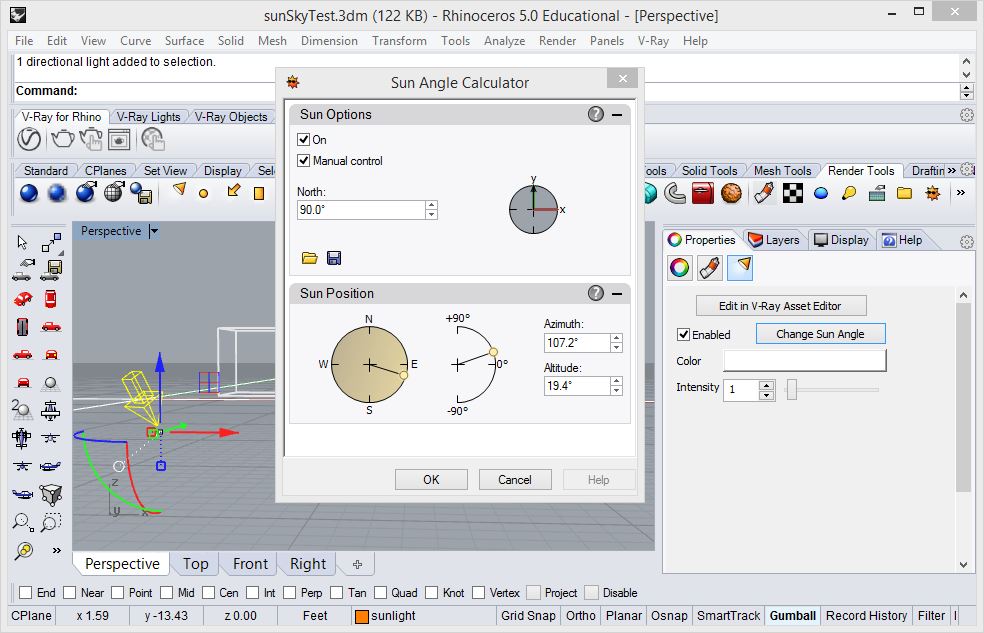
Go to non-V-Ray Rhino Render Tab, and toggle off the standard Rhino “sun” symbol. Next, go to the “V-Ray Lights” panel and select sun control icon to open “Sun Angle Calculator”.
Within the “Sun Angle Calculator”, set the Sun Options to “On”, and determine the time and day of the year, as well as set the location either by picking a city (e.g., Richmond, VA) or entering the exact latitude and longitude.
Alternatively, as we did in the workshop, select the “Manual Control” method and used the simpler dialog box as shown below to adjust the azimuth and altitude more directly.
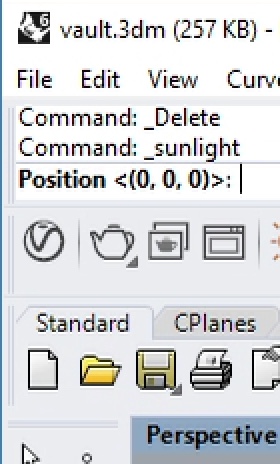
Select OK in the dialog box above and then at the Rhino command prompt note that the default location of “Position <0,0,0>” is indicated.
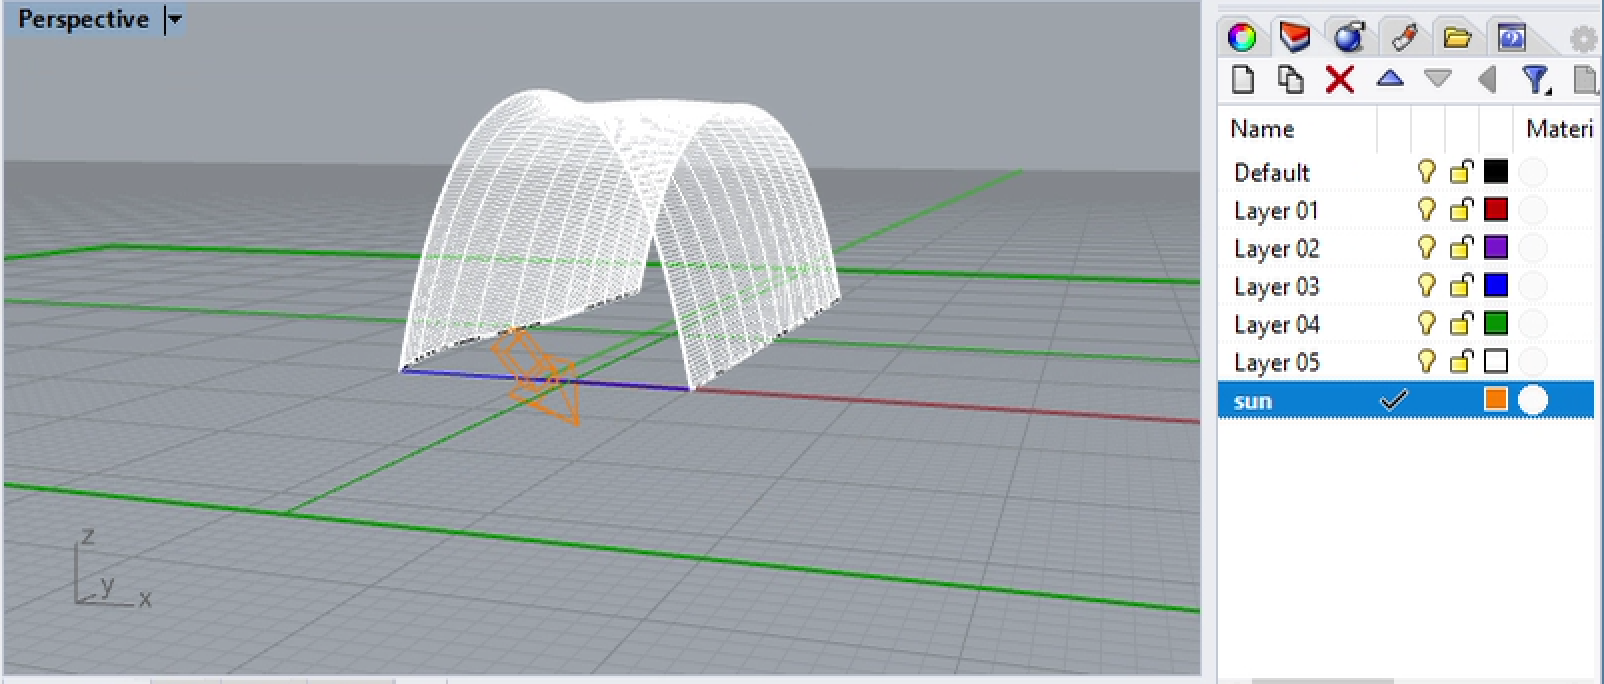
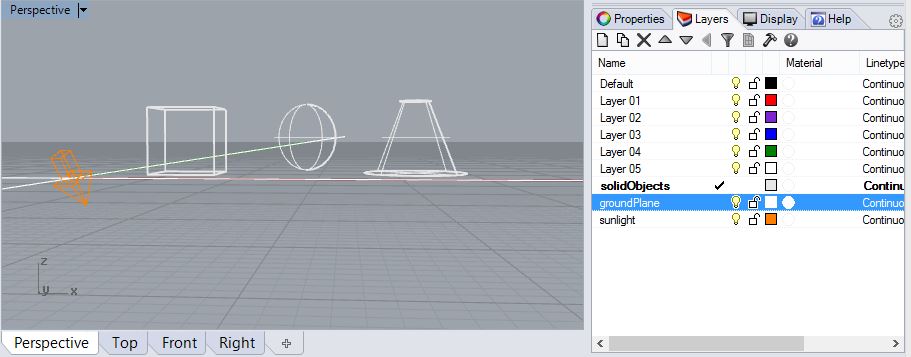
With the mouse cursor placed with the left-mouse button in the command prompt area, select the return key or right mouse button to place the sun light symbol at the origin of the x-y plane. Adjust the perspective view similar to an eye-level camera position and horizon line as shown in the “Perspective” view window below. Note that the “sun” symbol is visible as an 3D arrow in the foreground of the “Perspective” view window below.
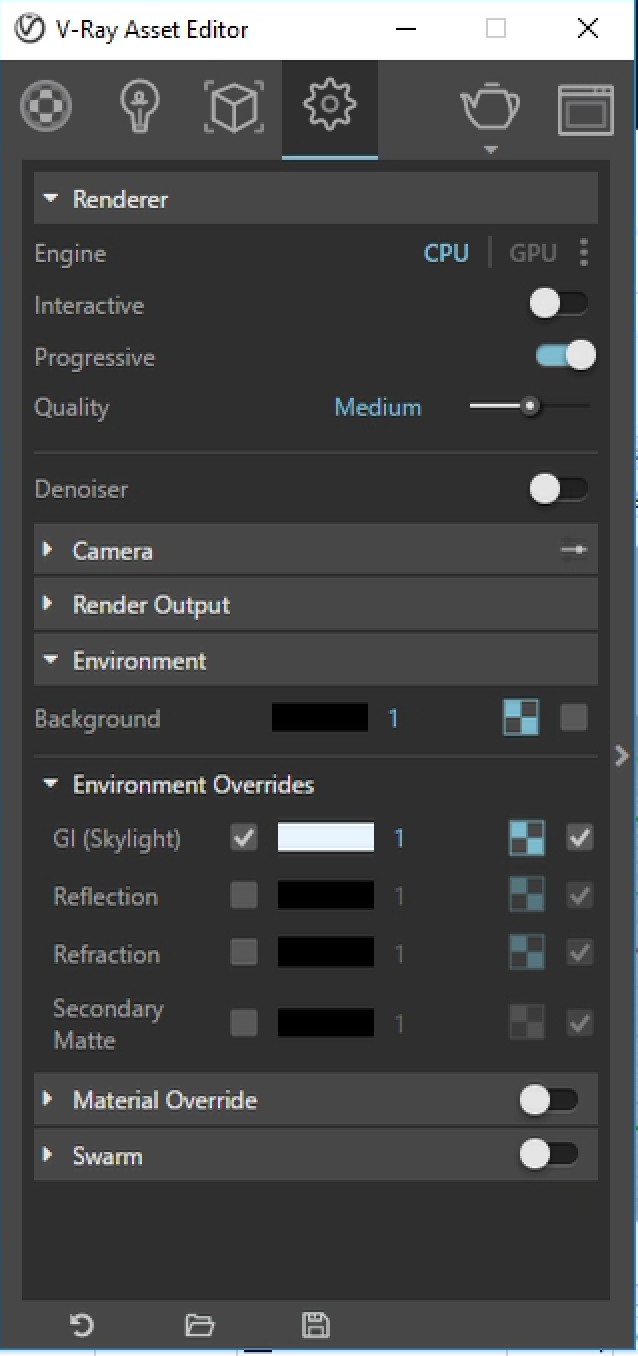
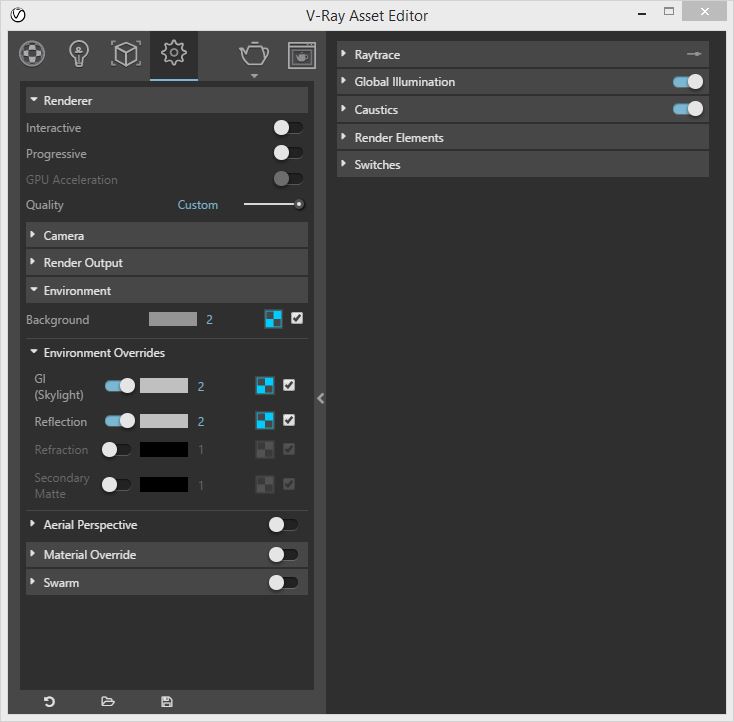
2. Within the V-Ray Asset Editor, go to the “Environment” tab, turn on the GI Skylight option by selecting the checked-box (see checked-box in the screen capture below), and then also select the blue and black checker-box icon to the right of the checked-box .
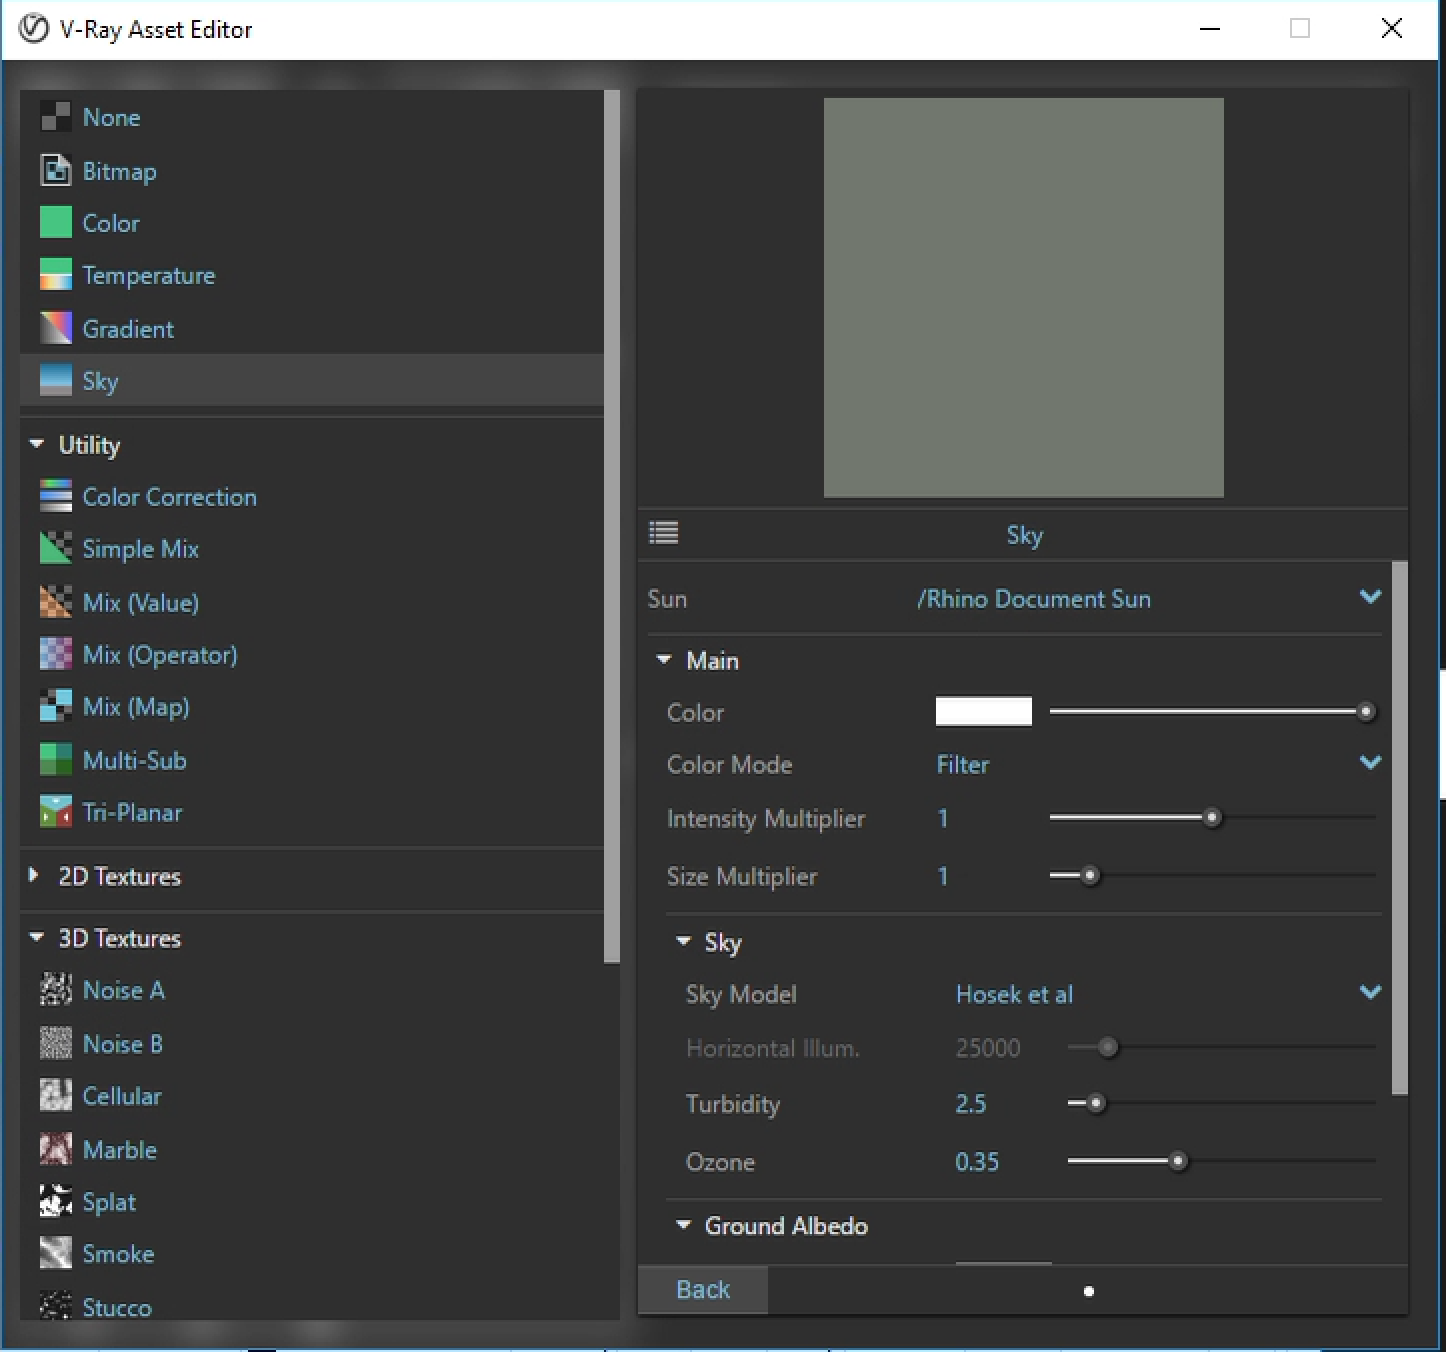
3. An expanded dialog box that opens to the right. Select the symbol wih horizontal lines on the right-hand size and choose the “sky” option from options that appear to the upper left of the dialog box.
The dialog box on the right-hand side will change as in the following image.
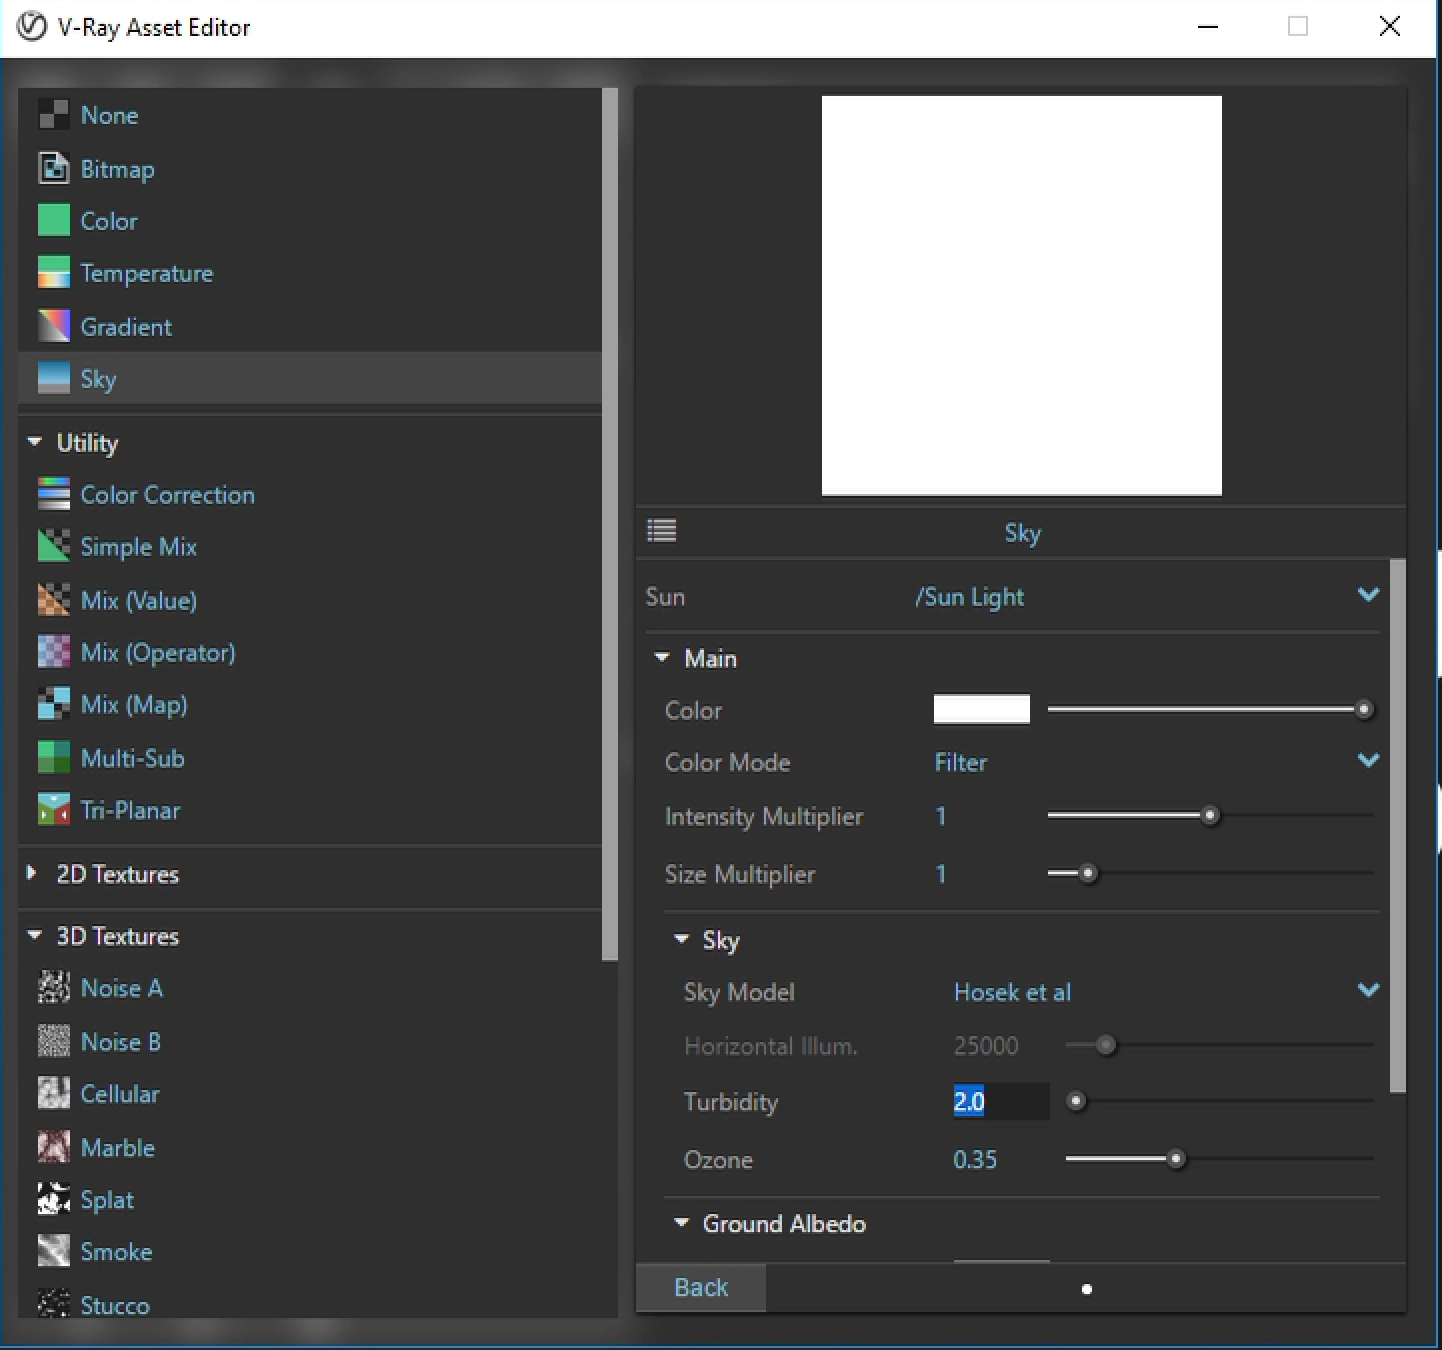
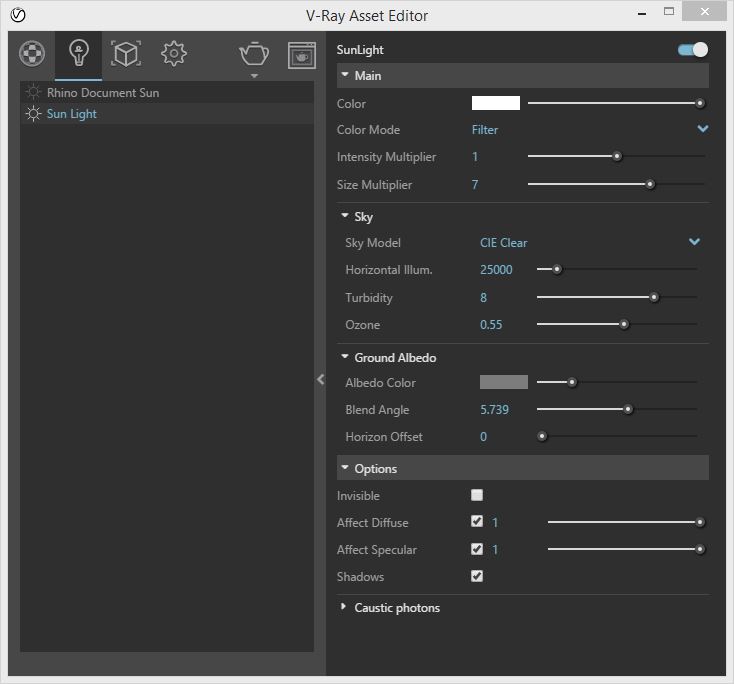
4. Switch the Sun from “/Rhino Document Sun” to “/Sun Light” (the V-Ray sun) and set the “Turbity” (i.e, quality the air) to 2.0. Note that the default ‘Sky model” is “Hosek at al”, a particular simulation method, and one of three options available. You may wish select “Hosek et al” in the dialog box and then change over to “Preetham et. al.” for an alternative trial run.
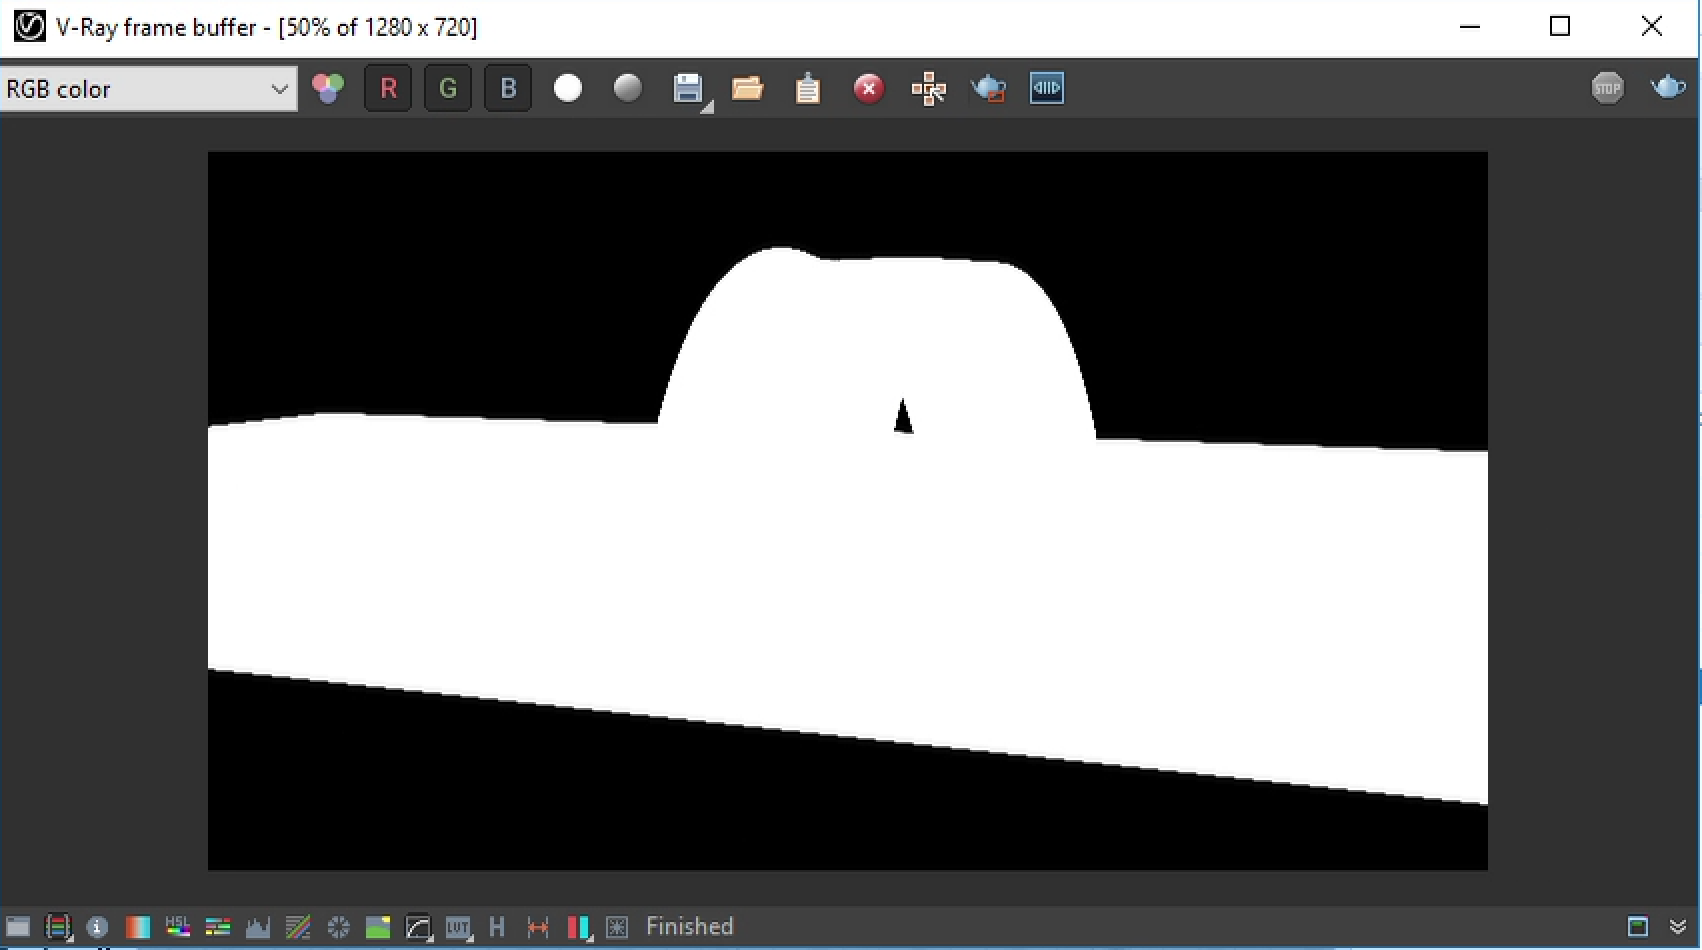
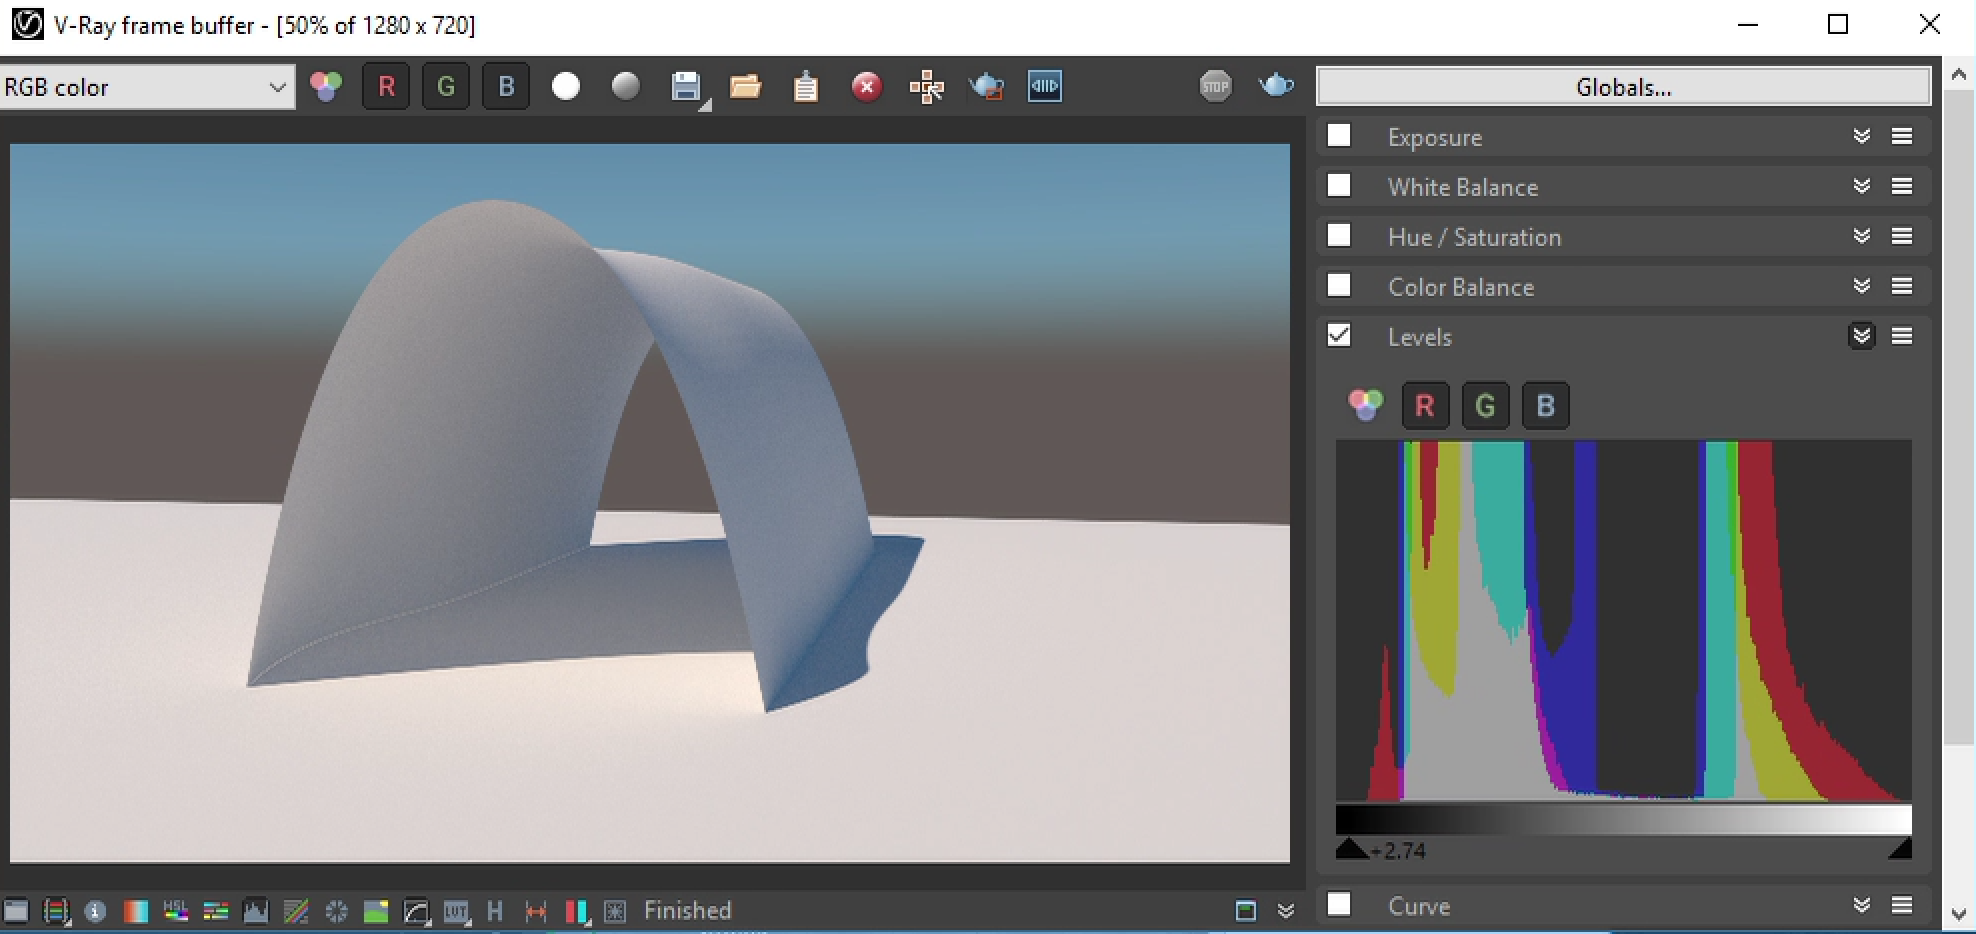
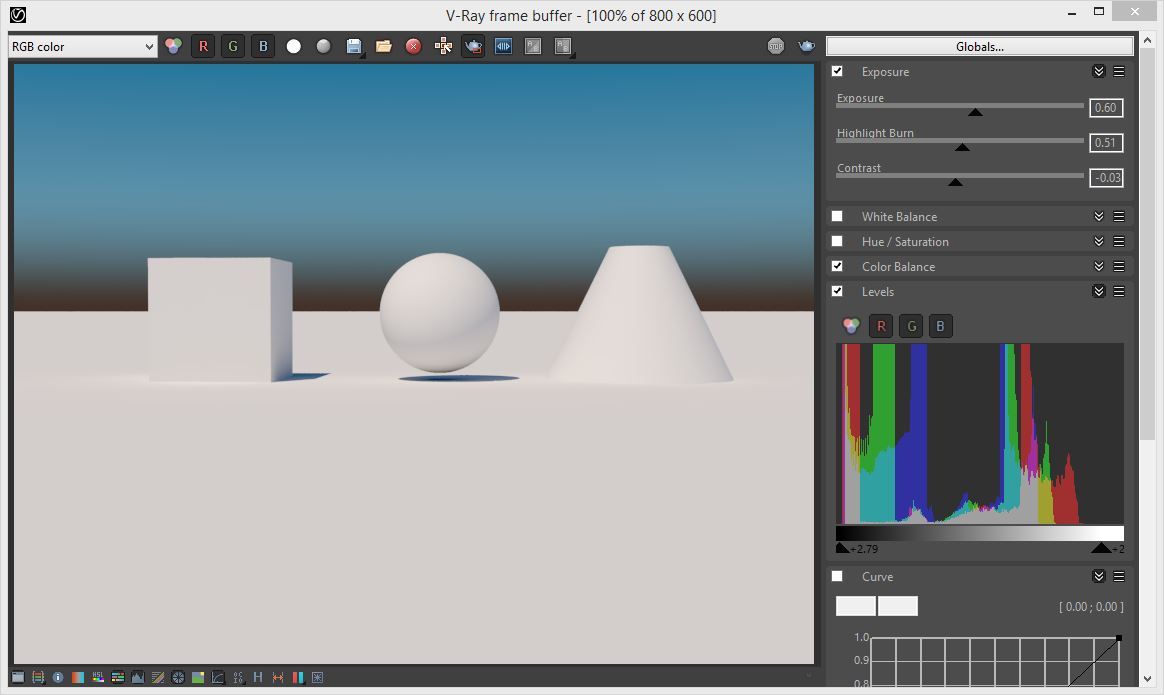
5. Do a test rendering in V-Ray. The initial result will appear to be overexposed.
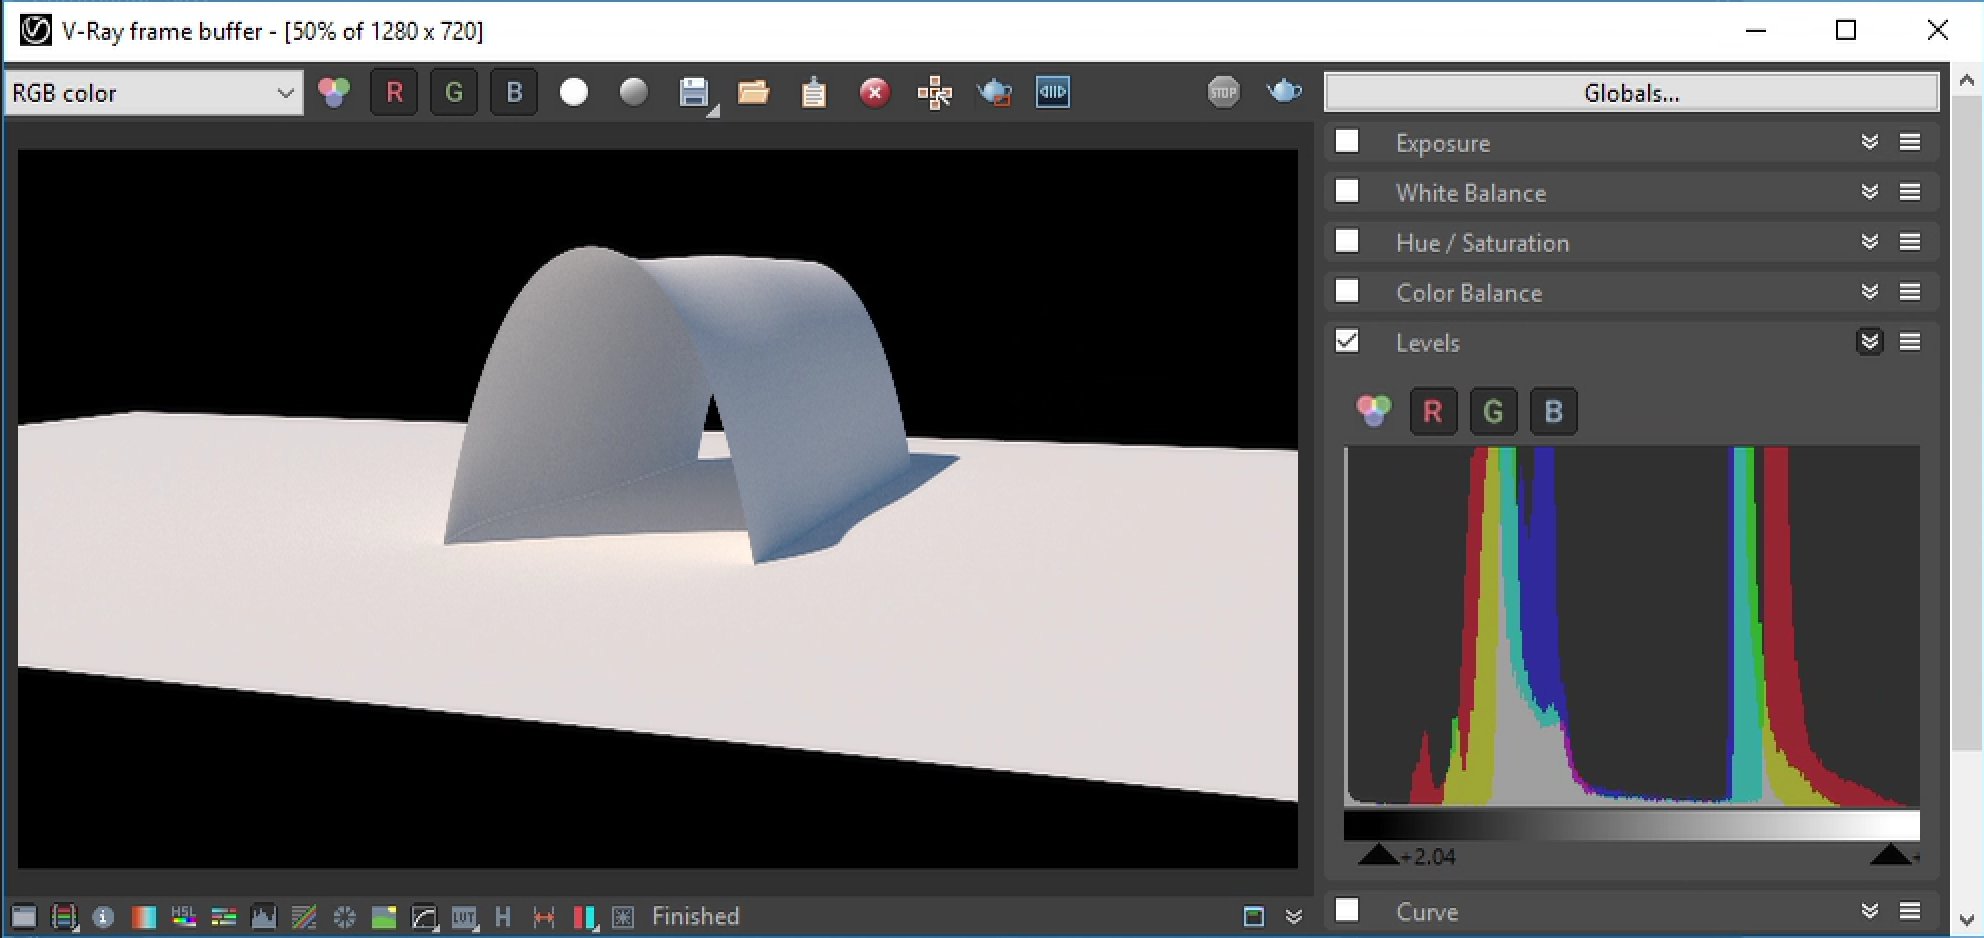
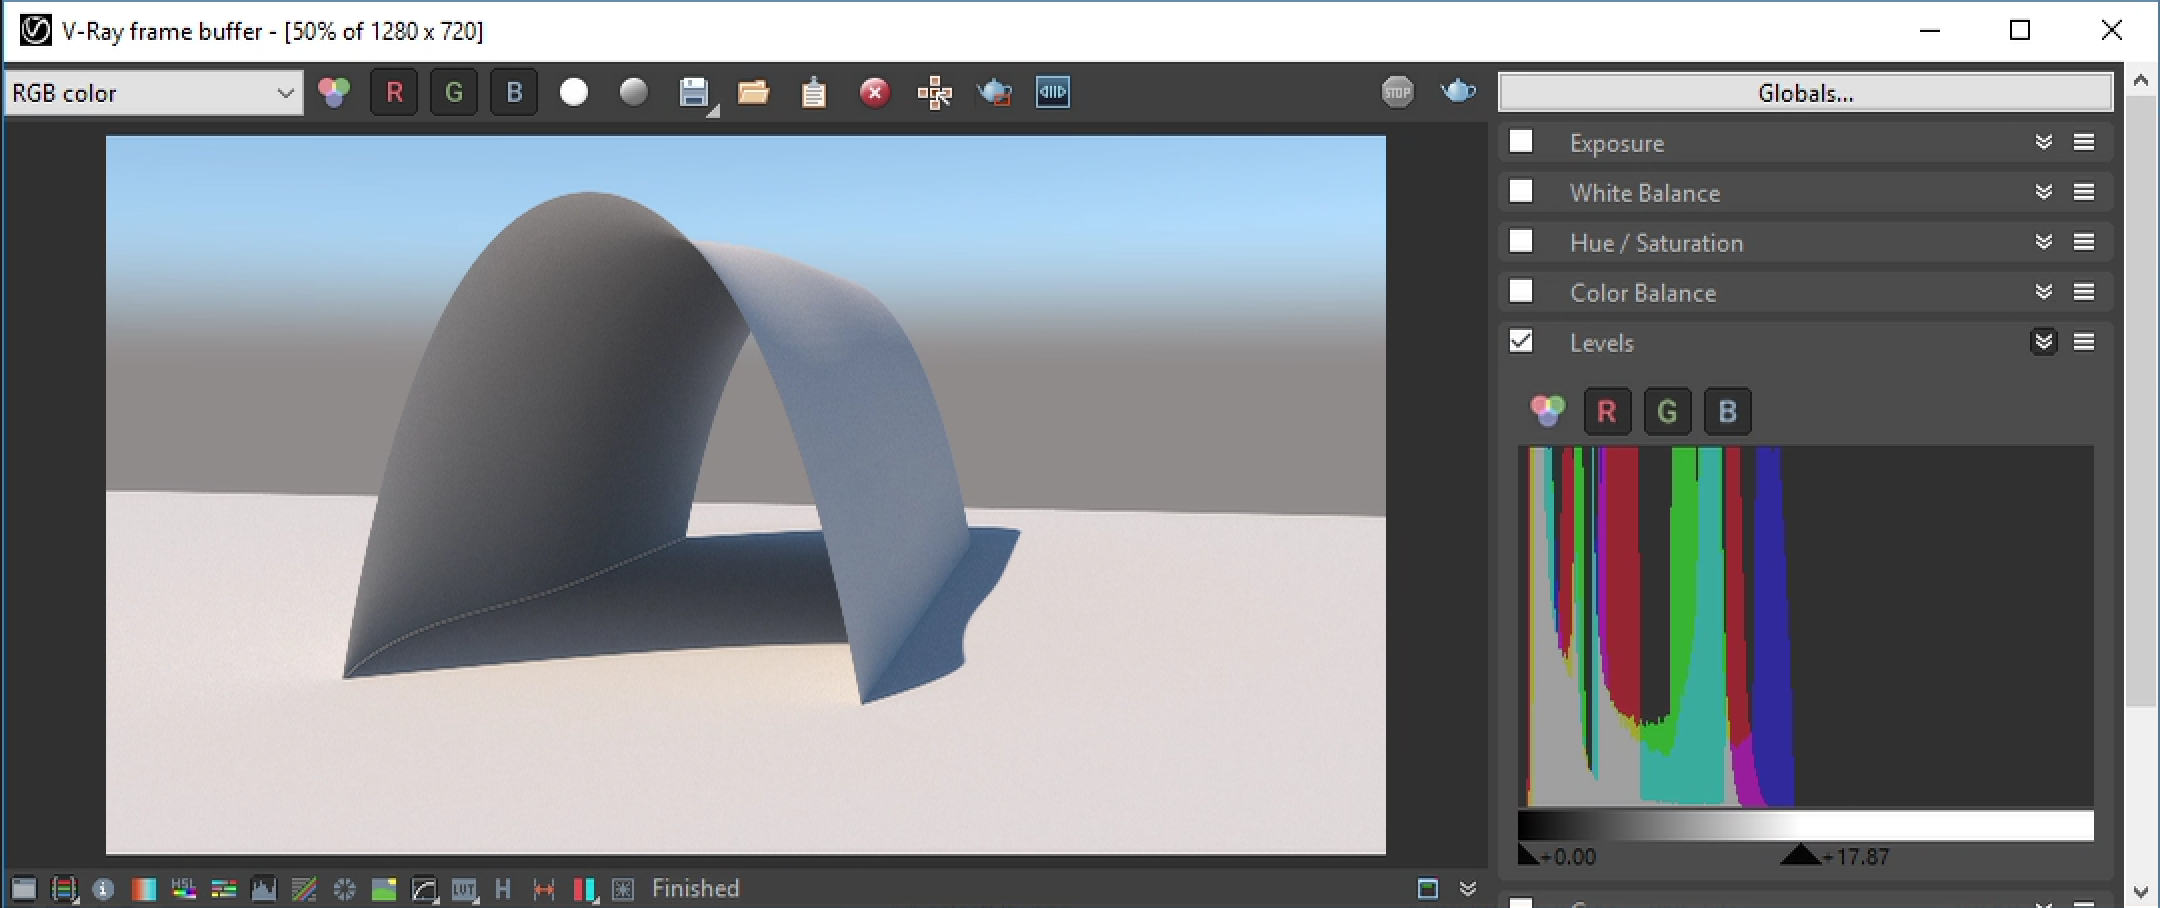
6. Select the icon in the lower left-hand corner of the V-Ray frame buffer window and use the “Levels” option in the V-Ray frame buffer in the expanded dialag box to adjust light balance. That is adjust the upward poining triangles below the color histogram. The left-most triangle controls the cutoff value for the minimum color “black”. The right-most triangle controls the cutoff value for the maximum color “white”.
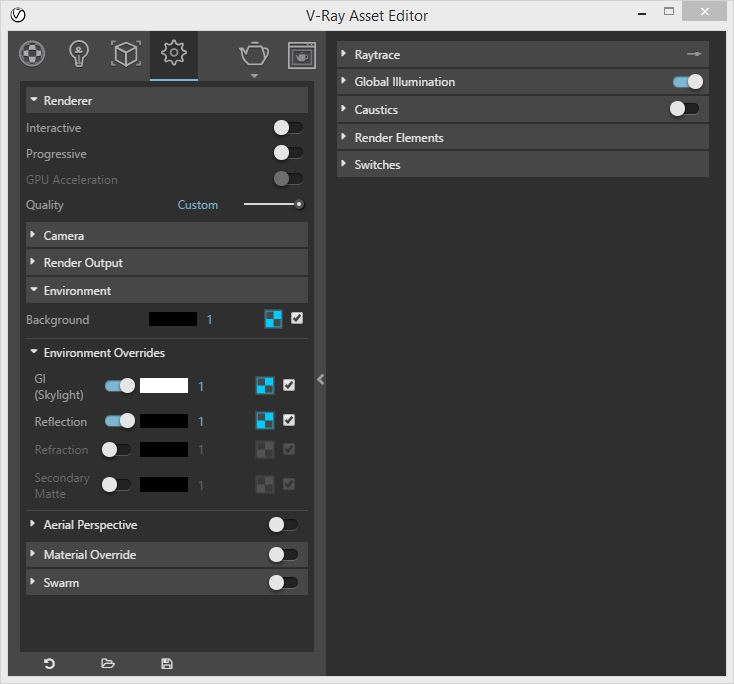
7. Now turn on the “GI Background”, “Reflection” and “Refraction” options, and using the same methodology as above, add the same simulated Sky to each of these “Environmental Overrides”.
8. Re-render the same view and note that the lighting is more diffuse and a background sky is now simulated.
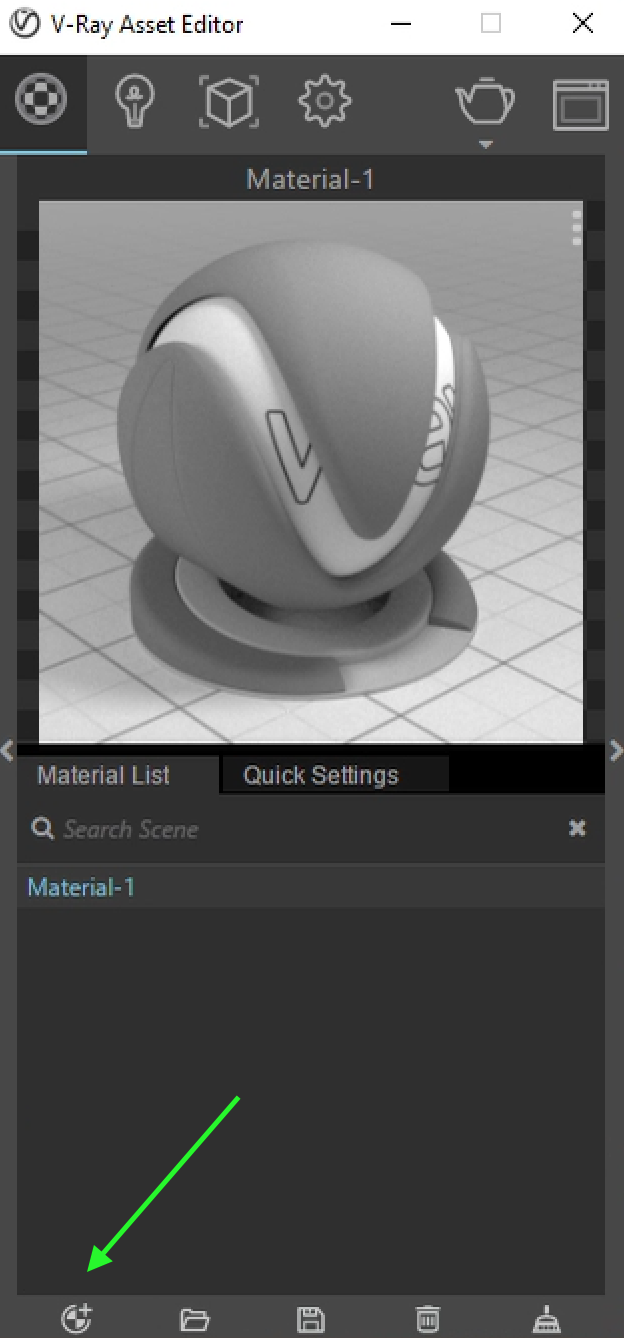
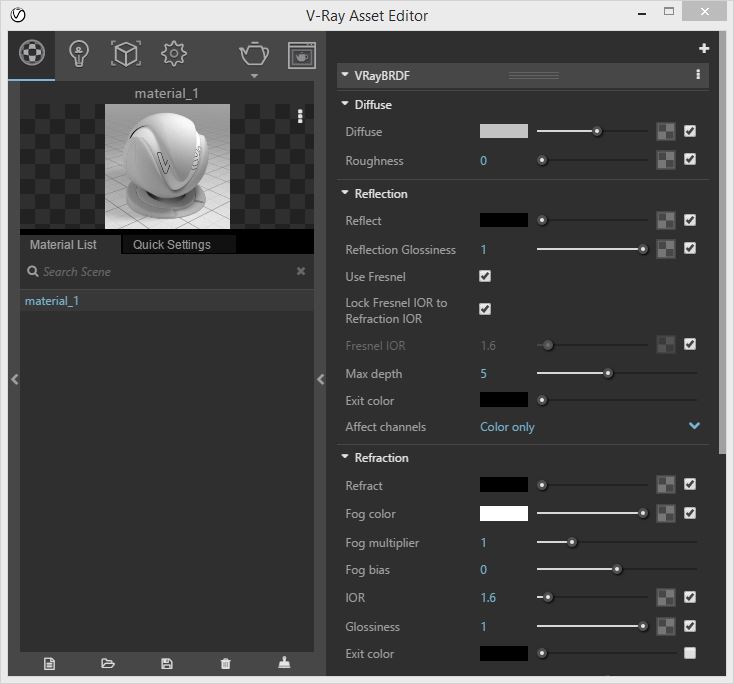
9. Conintining with the V-Ray Asset Editor, now create a neutral gray Generic material, name it “material_1”. To begin, select the first tab at the top-left of the V-Ray Asset Editor to change the dialog box to the material creation tools. Next select the icon in the lower left hand corner of the dialog box (see green arrow in the image below) to create a “Generic” material. Right-click on the material and rename it “material_1”.
Next, select the right pointing “greater than” math symbol “>” on the right hand margin of the dialog box to expand it in order to include the material properties.
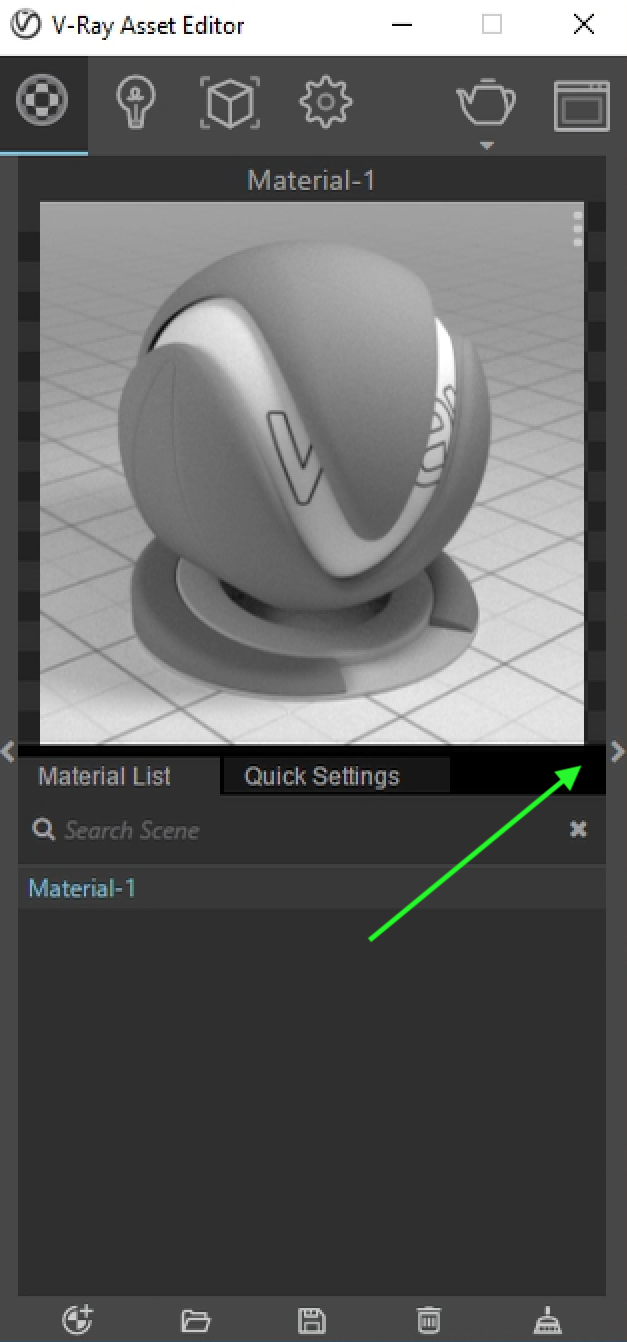
On the right hand side of the expanded dialog box , drag the diffuse light slider to the right to go from dark gray to neutral gray.
In Rhino pre-select the vault surface and ground surface, and then with the “shift” keydepressed, right-click on the name “material-1” and using the popup menu apply the material to the two selected surfaces.
10. Re-render the same view and note the higher contrast range of the result.
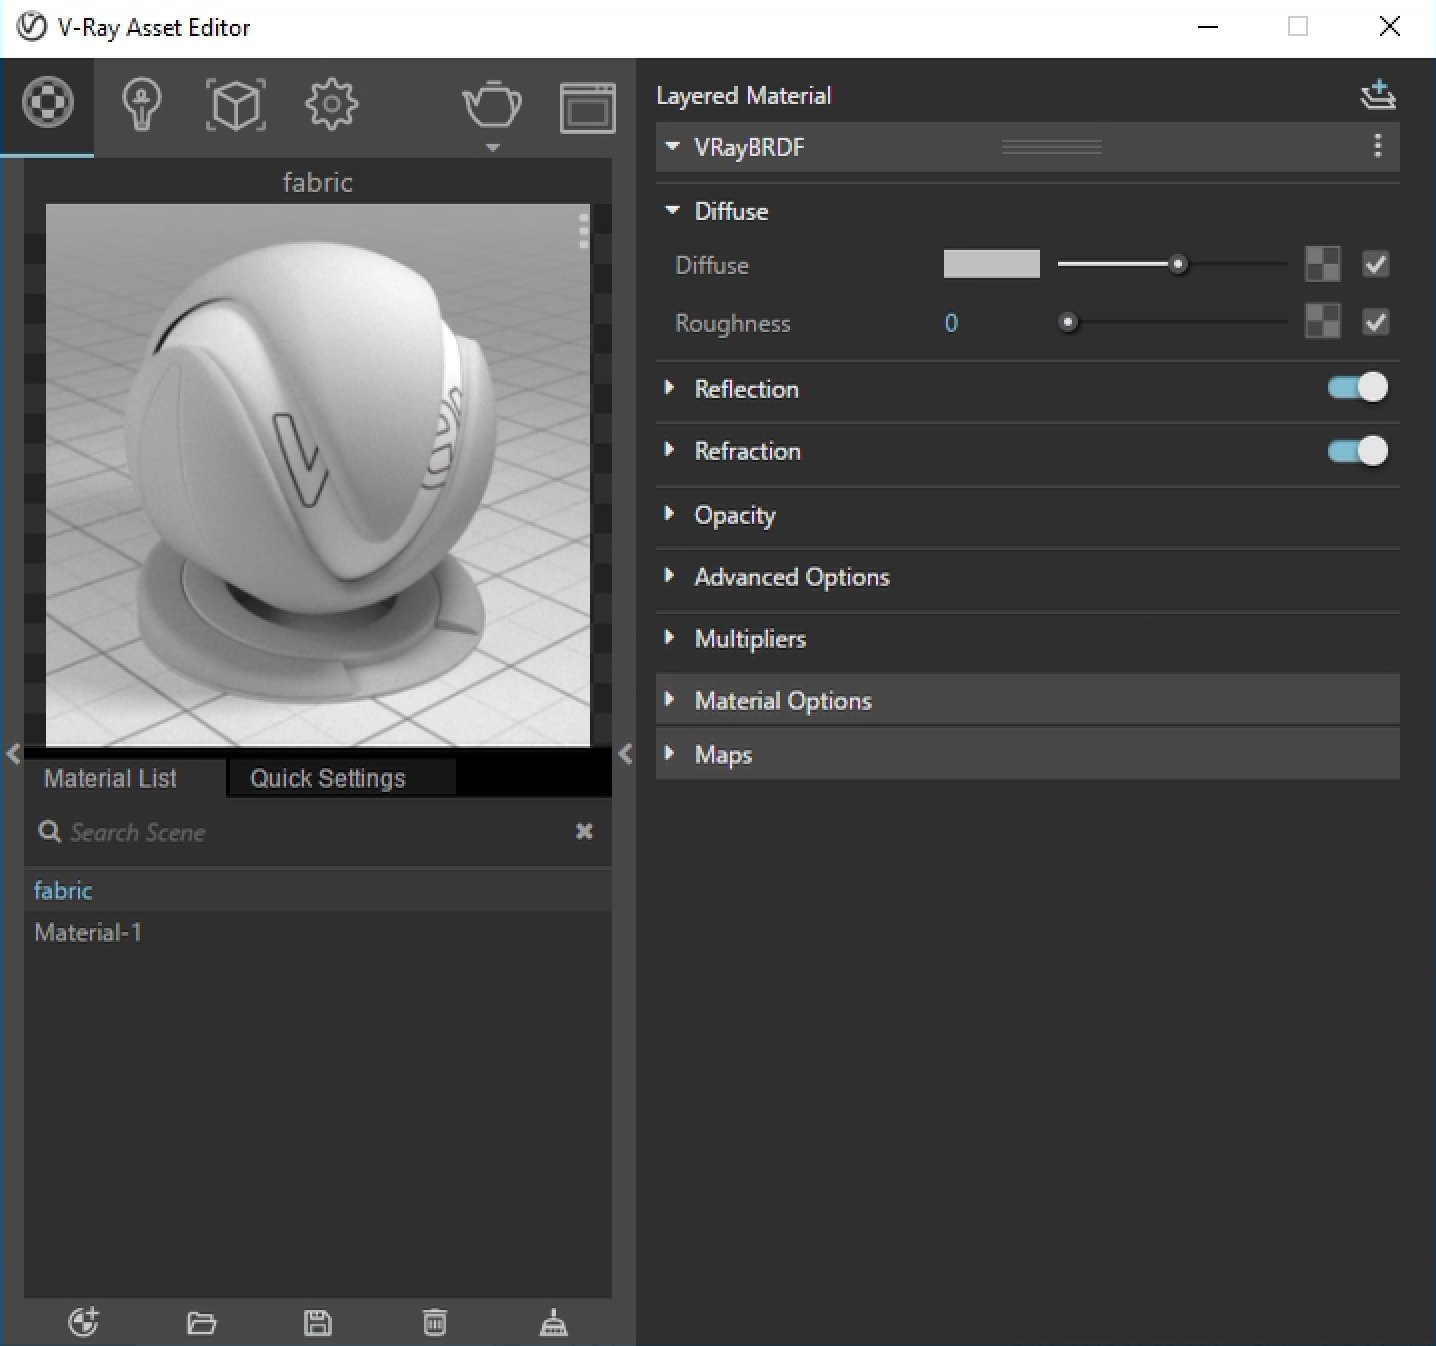
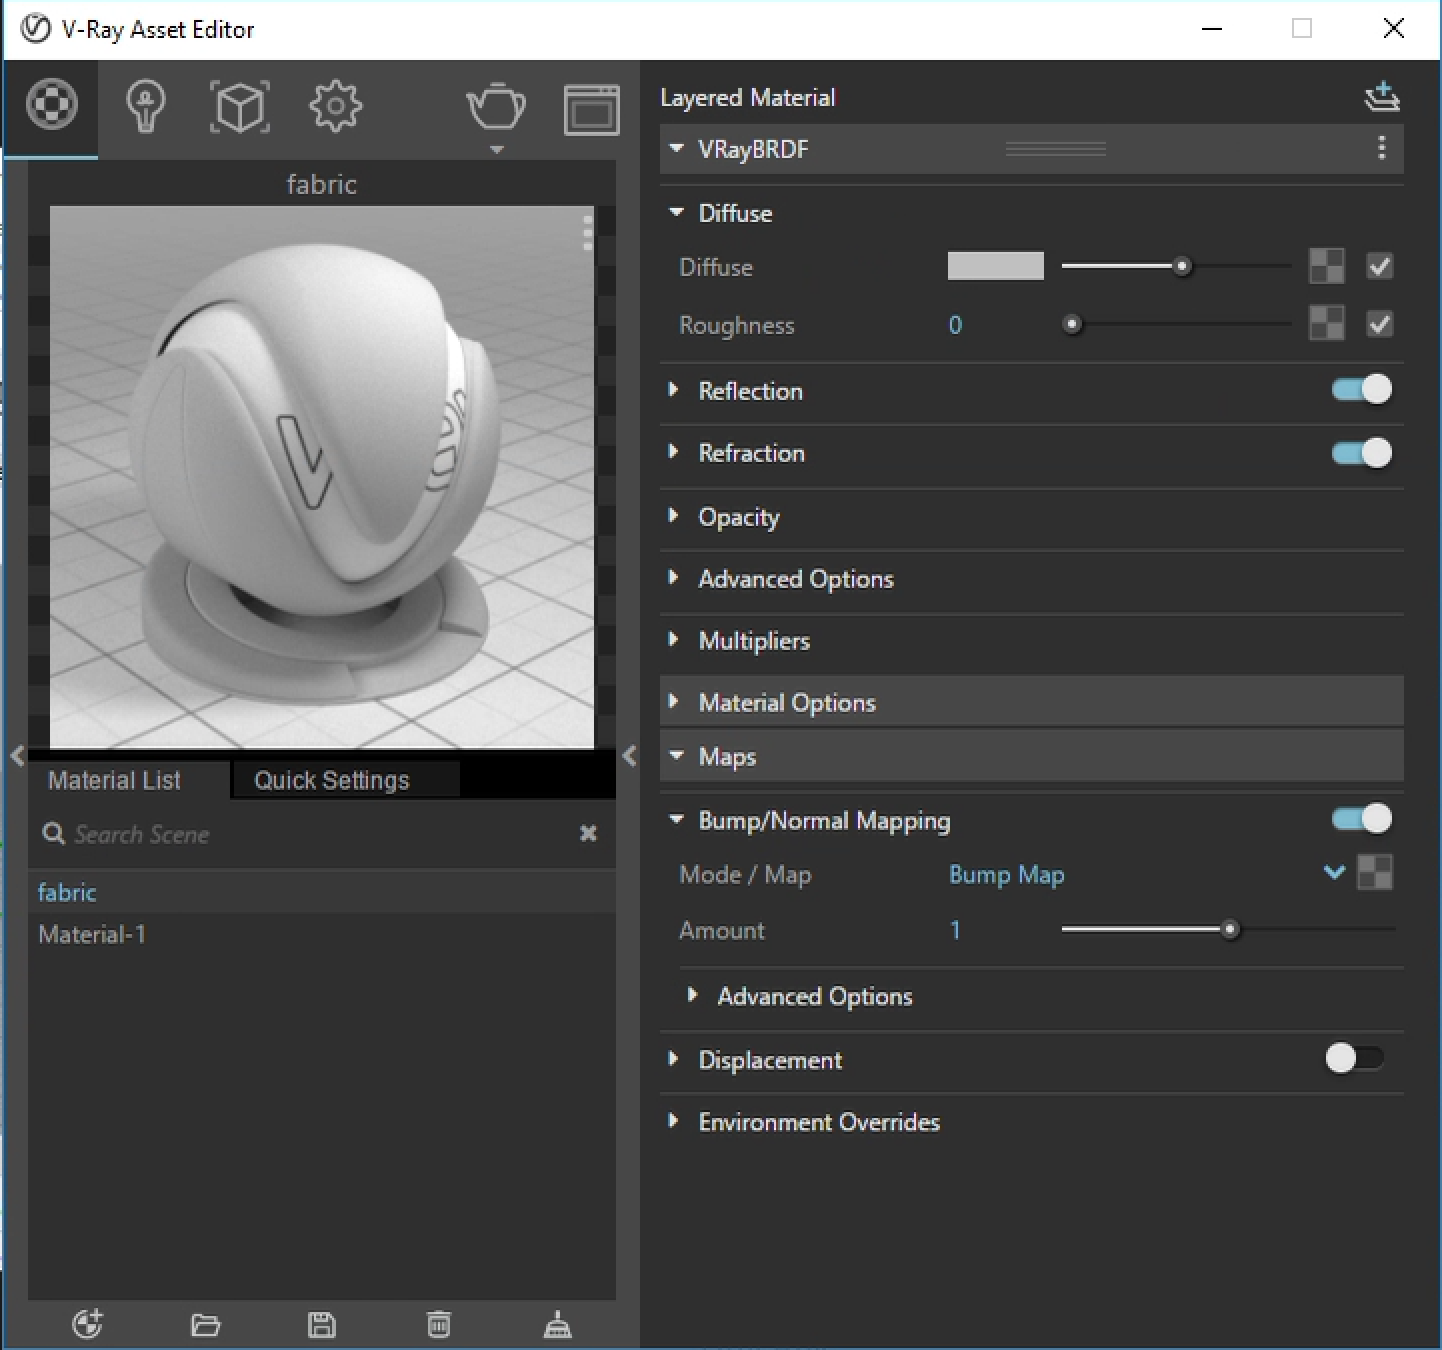
11. Go back to the V-Ray Asset Editor and create a new material named “fabric”.
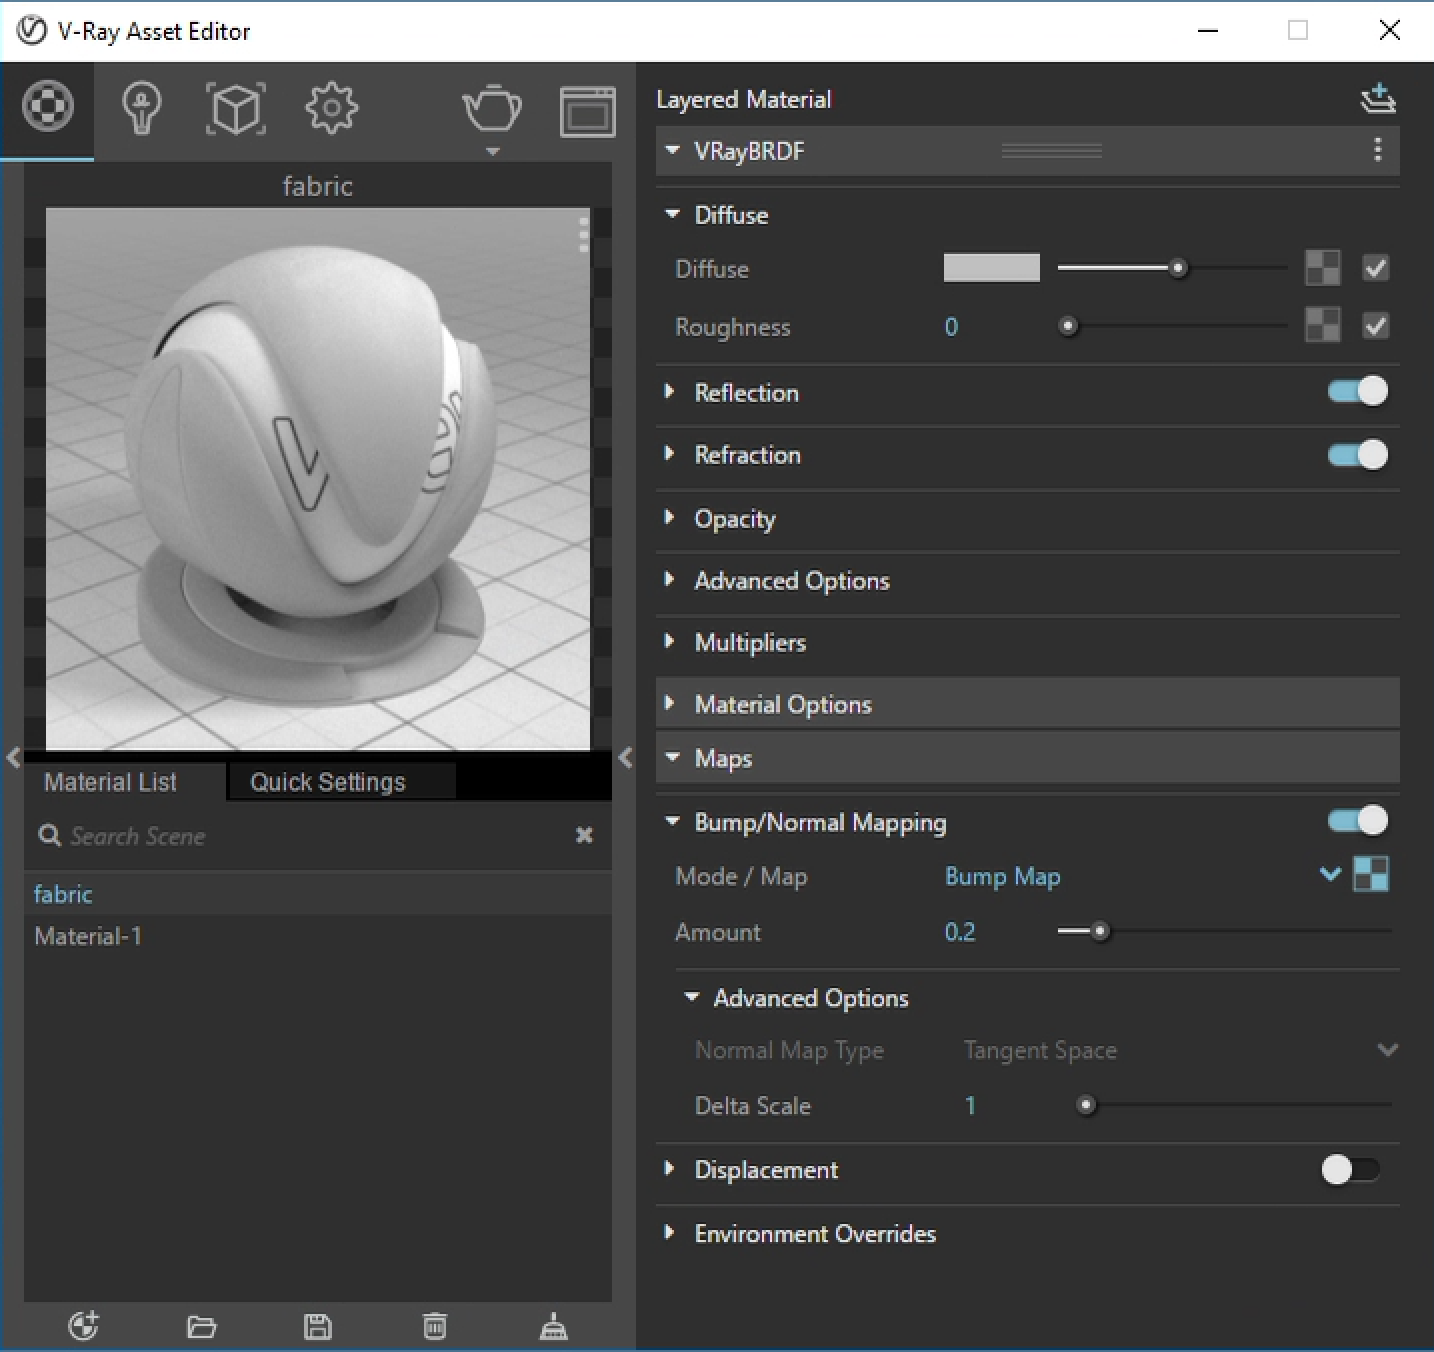
Open the “Maps” tab on the right hand side, open the “Bump/ Normal Mapping” sub-tab, and move the slider to the right so that it is active.
Set the amount of the bump map to 0.2 for a more subtle weight.
Select the checked icon to the right of the words Bump Map, and select the “cloth” option from the left-hand side of the dialog box.

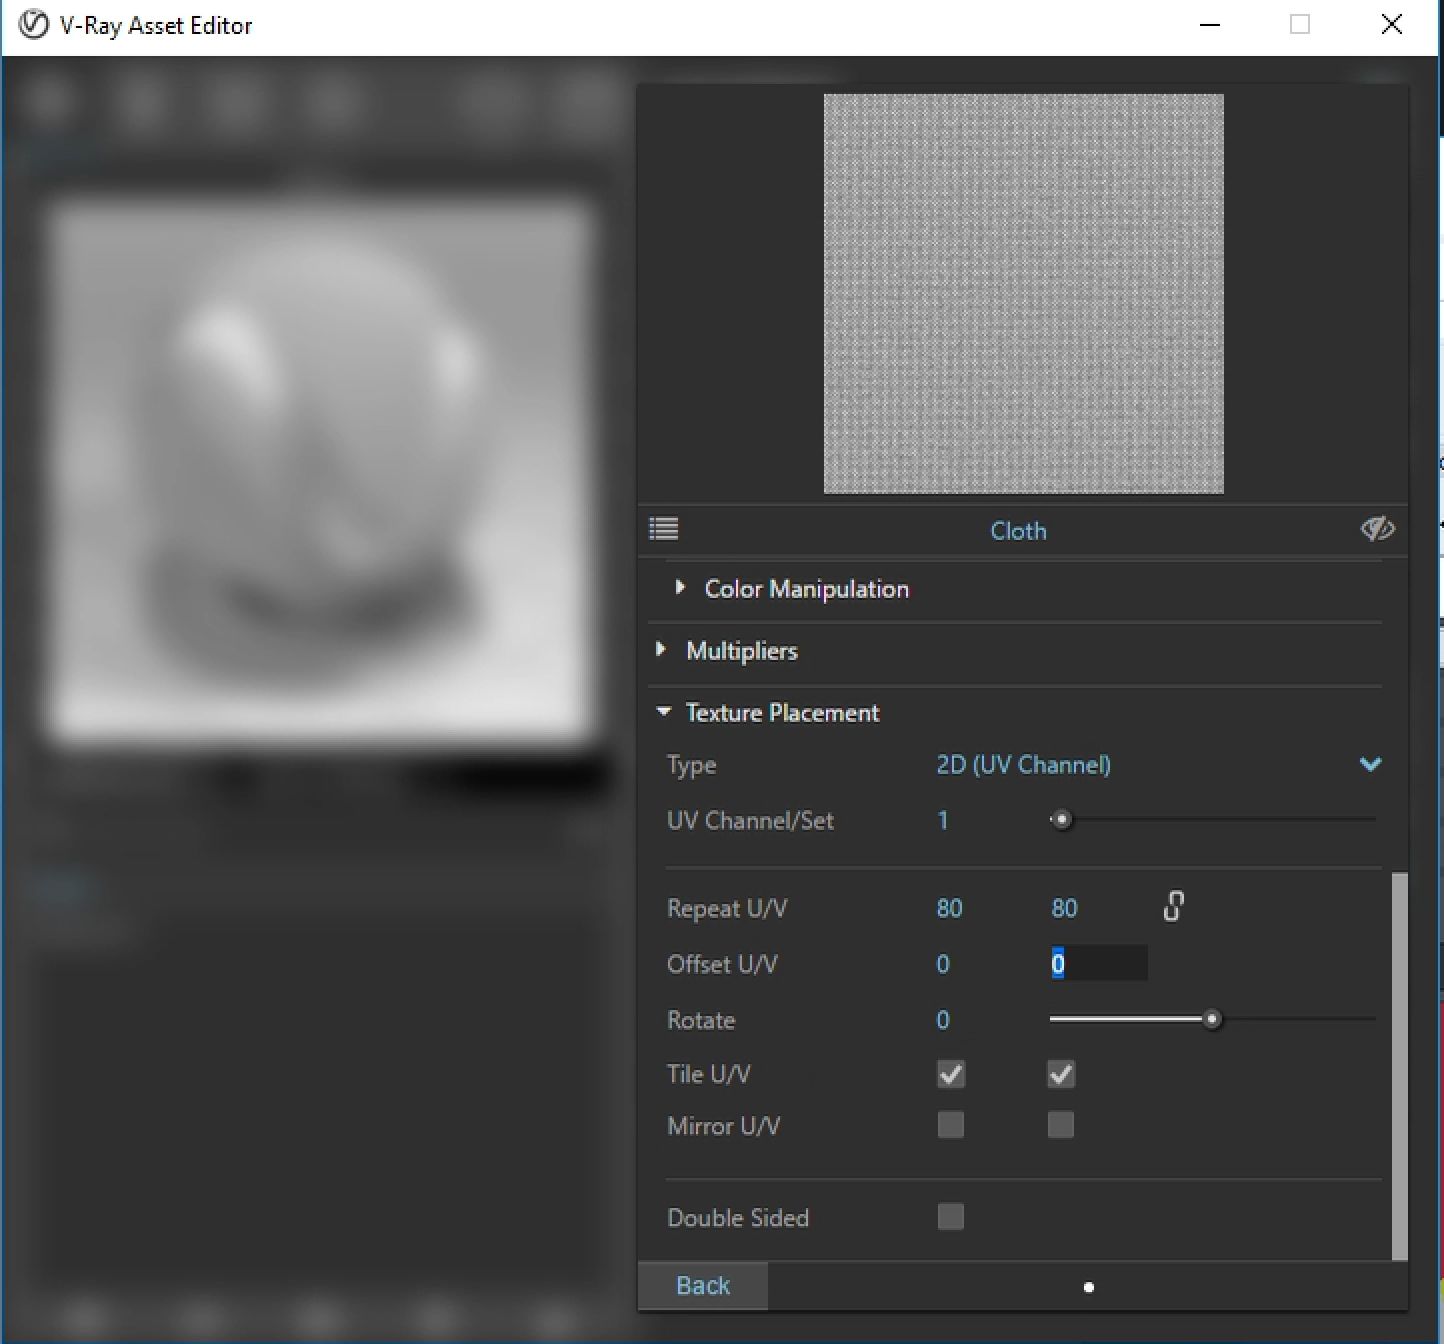
Once the cloth is selected, expand the parameters of the bump map on the right-hand side of the dialog box that follows. Open up the “Texture Placement” options, and change the values of Repeat U/V to 80 x 80 for a higher density pattern and then select the “back” button. This will increase the density of the cloth pattern result in a smaller scale of is more appropriate.
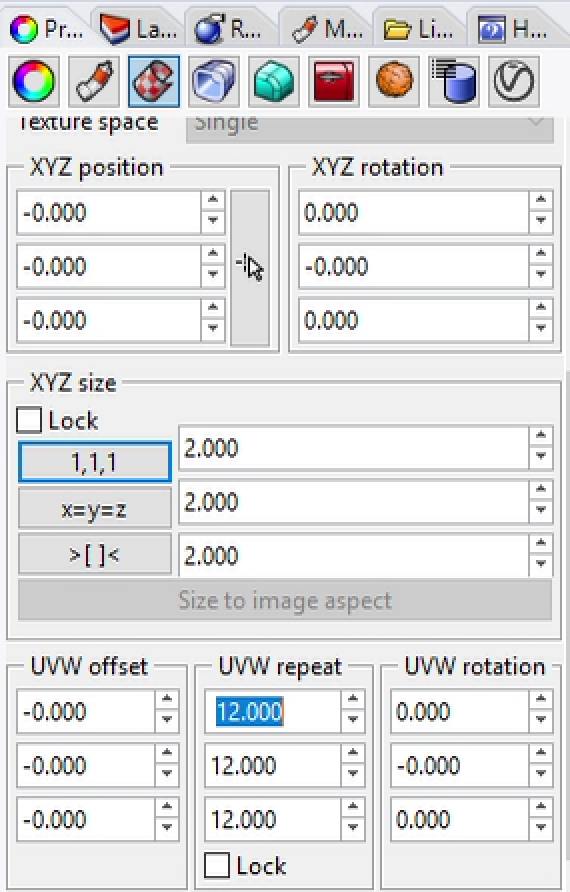
Select the “Back” button and then apply the cloth to the vault similar to the method used to apply “material-1” to the ground. Now, with the vault selected from the Rhino view window, select the “Properties” tab on the right-hand side of Rhino application window and open the texture mapping tab (the orange checker board pattern). Select the “Apply Surface Mapping” map option for simplicity (in the workshop we did a more complex “cylindrical” map option for a more exact mapping process).
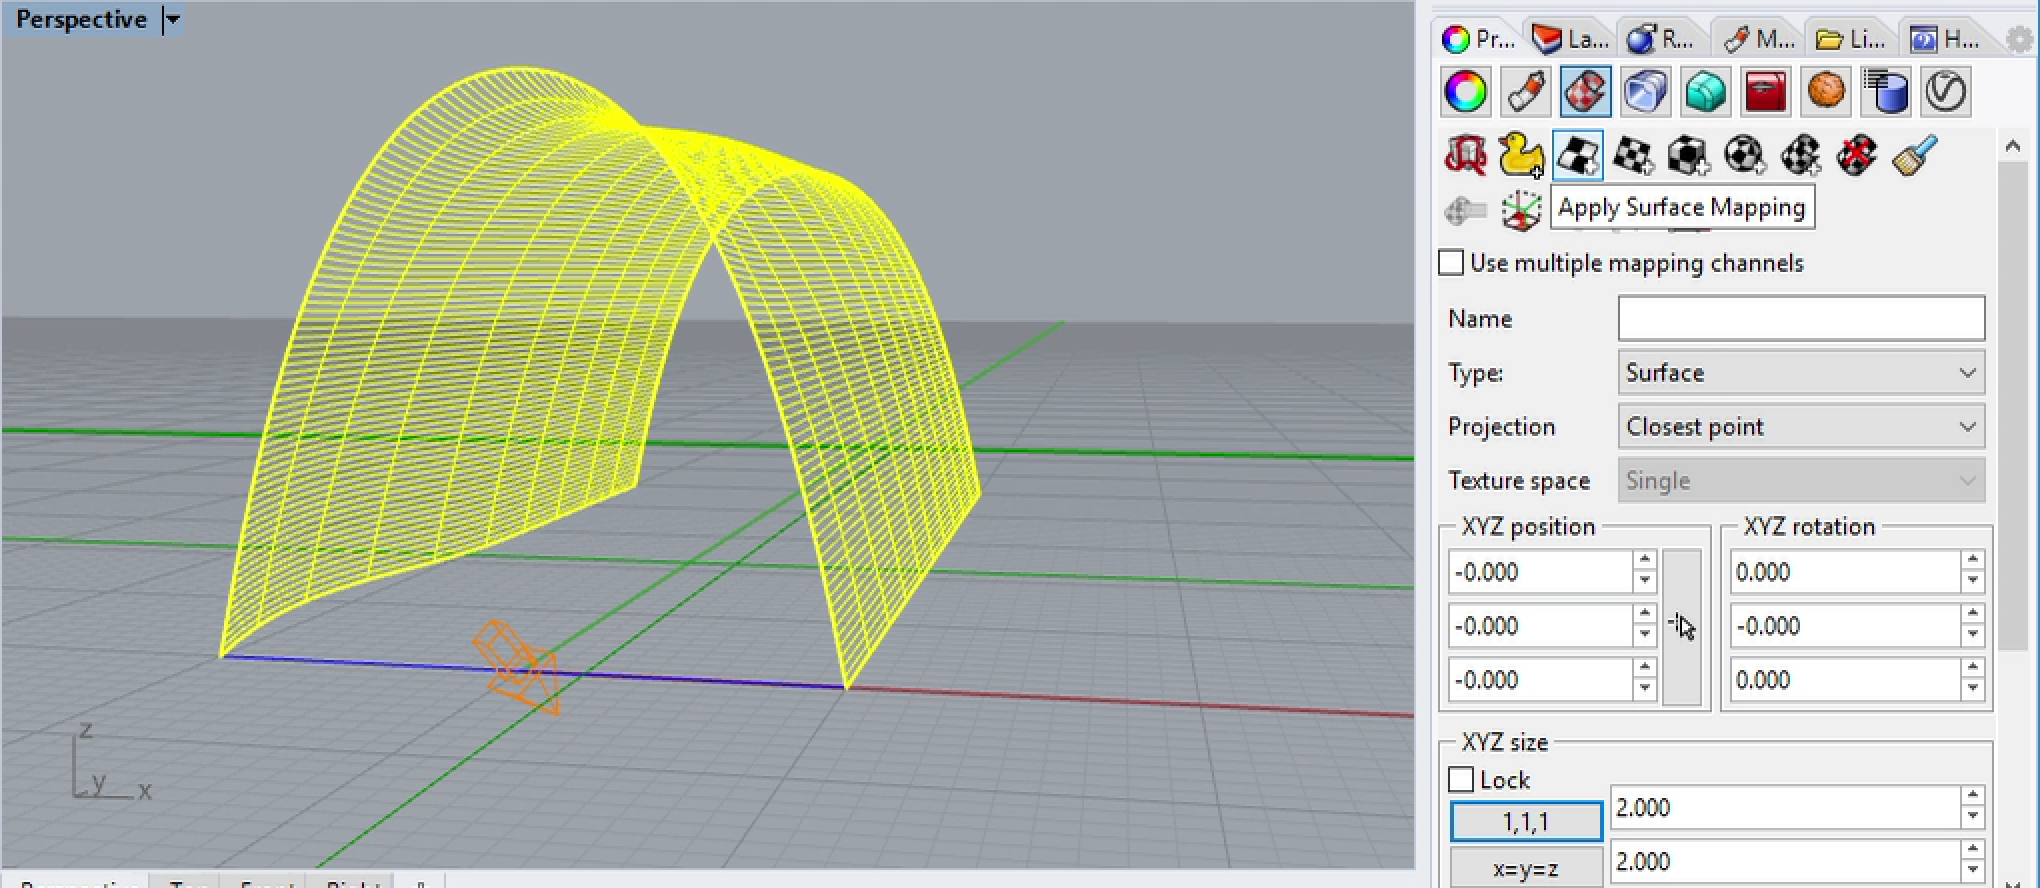
In the parameters on the area of the texture mapping dialogue box, change XYZ size to 2.0, 2.0, 2.0 for the X, Y, Z parameters, and also change the UVW repeat to 12, 12, 12 to densify the pattern in all three surface directions.
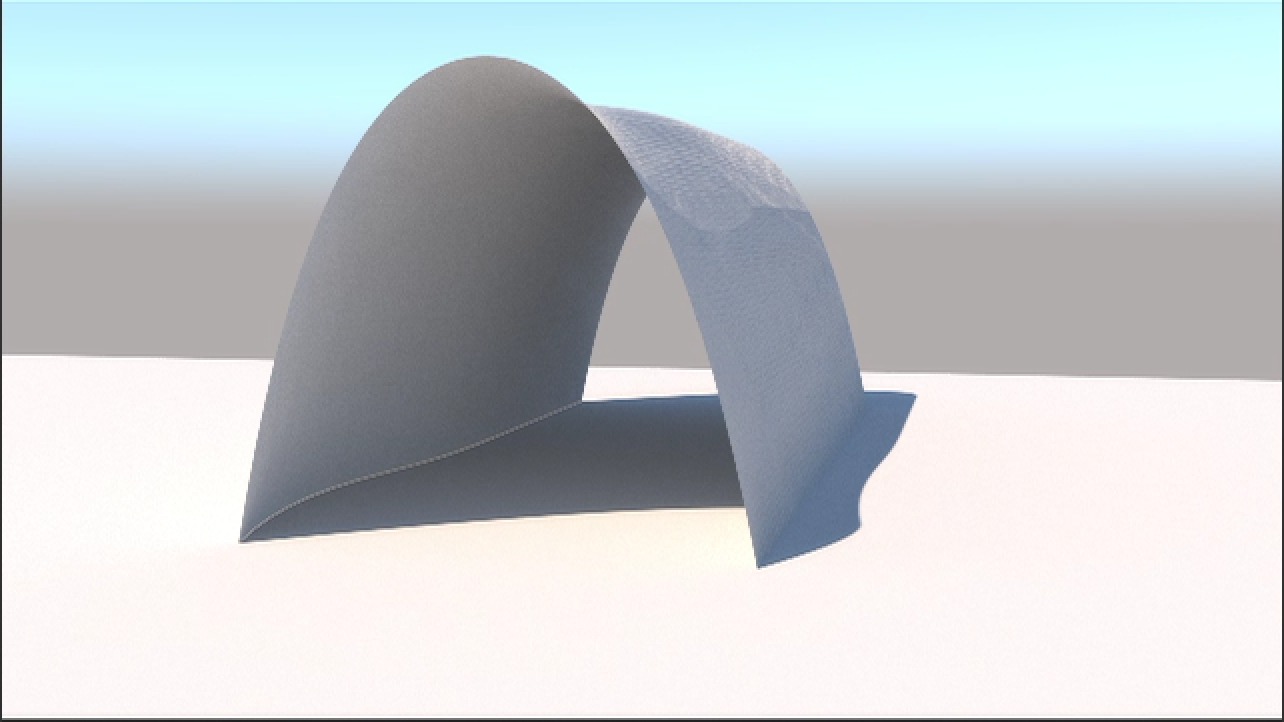
Render the view in V-Ray. The result in the case below needs to be densified and the weight lighter by returning the the earllier parameters. If the the cloth weight is lowered to 0.1, and the texture map X, Y, Z size is lowered to 1 x 1 x 1 and the UVW pattern is repeated 24 x 24 x 24 times it would yield a slightly less noisy result (not shown). Alternatively a random noise bump map could also be effective as an abstract alternative.
Create one more material in the V-Ray Asset Editor, expand the properties dialog on the right, and give it the parameters shown where the “Duffuse” color is set to a light gray, “Reflection Color” is set to a very light gray, and, most importantly, the “Fesnal” option is checked on and the “Reflection IOR” value is set to 20. The “Fresnel IOR” values for some common materials (see http://viscorbel.com/vray-materials-theory/) are :
water 1.33
plastic 1.45
glass 1.5 – 1.8
diamond 2.5
compound materials like wood, stone and concrete 3 – 6
metals 20 – 100

Create a sphere inside Rhino adjacent to the vault, apply the aluminium material to it. In addition, rather than use a cloth bump map, a simpler appraoch is to use a “noise” bump map following the same procedure with nearly the same parameters. At the scale of representation, the noise pattern is easier to control and abstractly appears to be superior. These changes resulted in the following rendering.
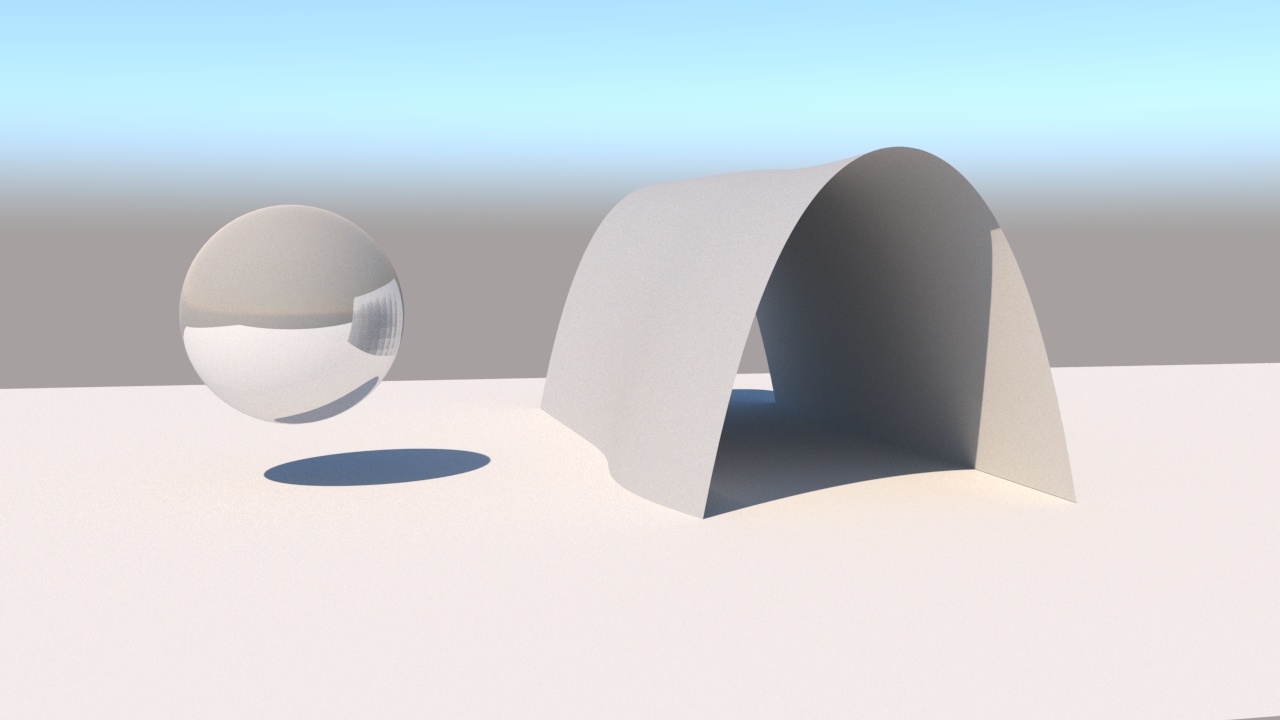
In order to explore materials and V-Ray Sky options more completely, Part 2 has been added beyond the sequence we followed in the workshop.
PART 2. Caustics, Indirect Caustics and Materials.
1. Begin a new Rhino file with 3 solid objects located and flat plane and a V-Ray sun similar to the methods illustrated in part I above, change the perspective view to an eye-level camera position so that the far edge of a plane is visible in the view as a horizon line.
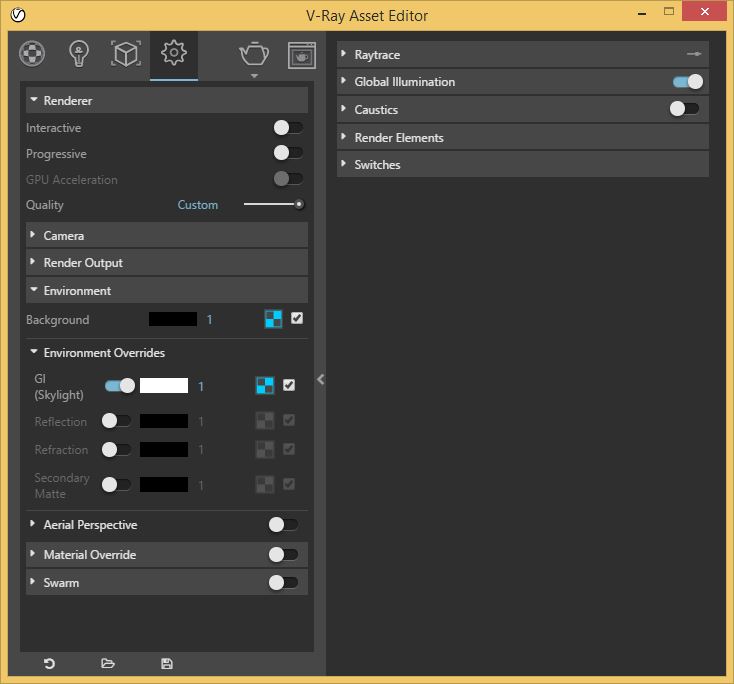
2. Within the V-Ray Asset Editor, go to the “Environment” tab, select the checker-box icon adjacent to “Reflection/refraction (background), and add a “sky” as per the techniques used in part I above . Set the “Sky Model” to “Preetham et. al. and set “Turbity to 2.0.
3. Do a test rendering in V-Ray and use the “Levels” option in the V-Ray frame buffer to adjust light balance.
4. Now turn on the GI Skylight.
5. Select the checker box and then select the Sky option with the Preetham et. all. simlulation again similar to the method of workshop 6.
6. Re-render the same view and note that the tone of the materials is a little warmer.
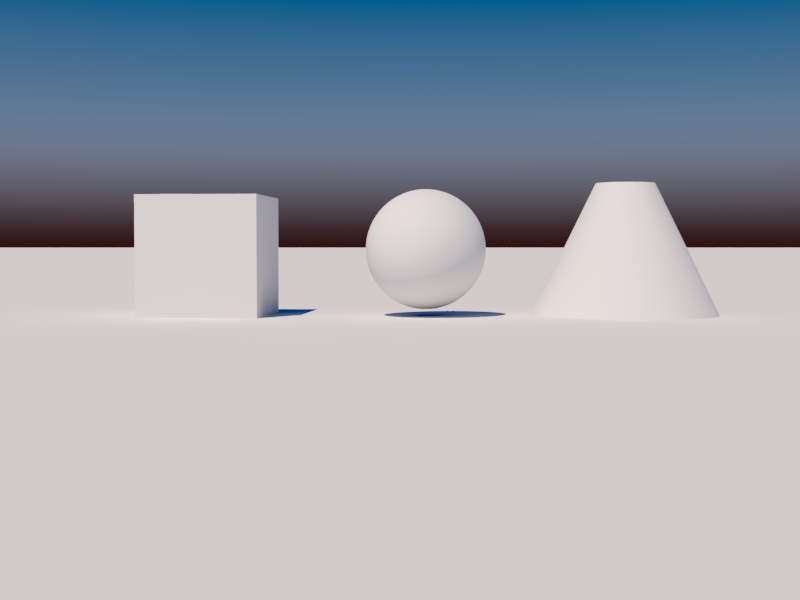
7. Now, similarly again to workshop 6, activate the switch on “Refection”, select the checker box, and add the Preetham et. al simulated Sun to it.
8. Now create a neutral gray Generic material, name it “material_1” and apply it to the objects and ground plane.
9. Re-render the same view and note the higher contrast range of the result.
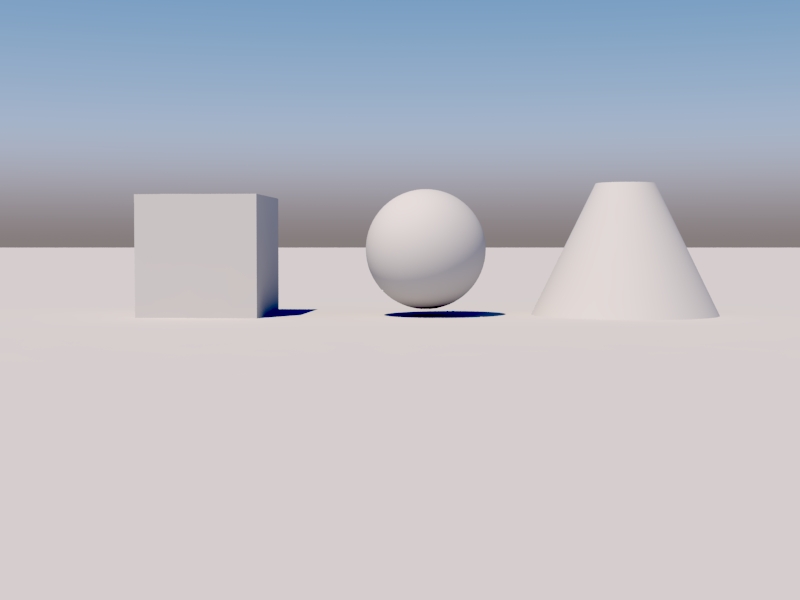
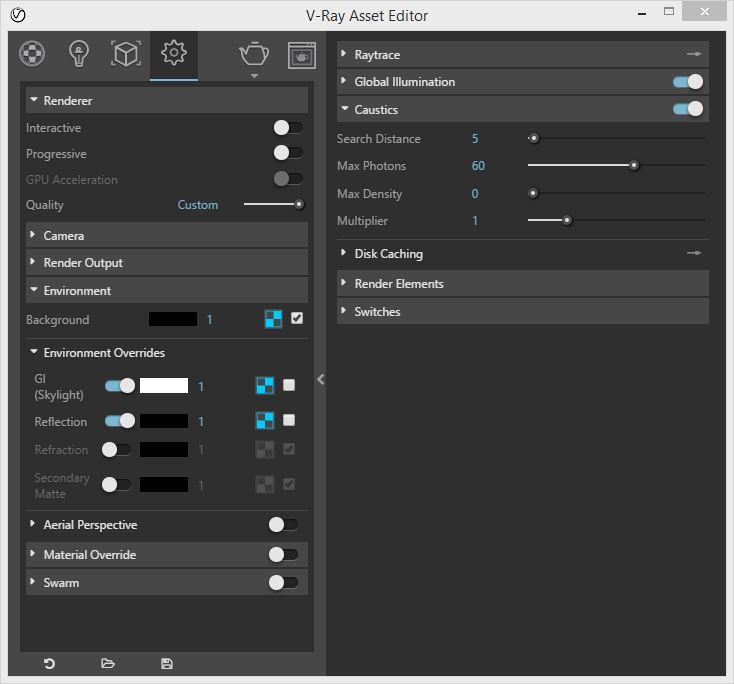
9. Now go to the “Caustics” tab, and select the check-box for “Caustics” to turn caustics on.
5. Do another test rendering in V-Ray. Given the lack of transparent surfaces there’s very little difference if any between the two renderings.
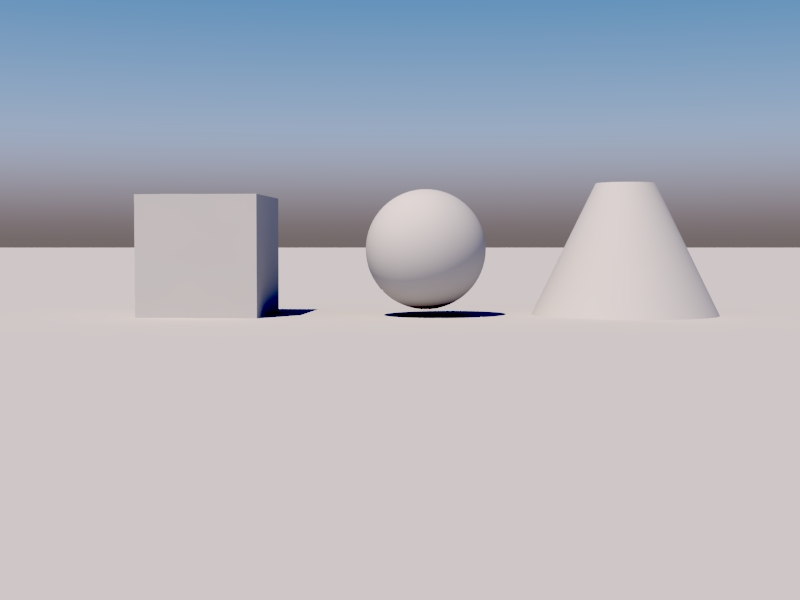
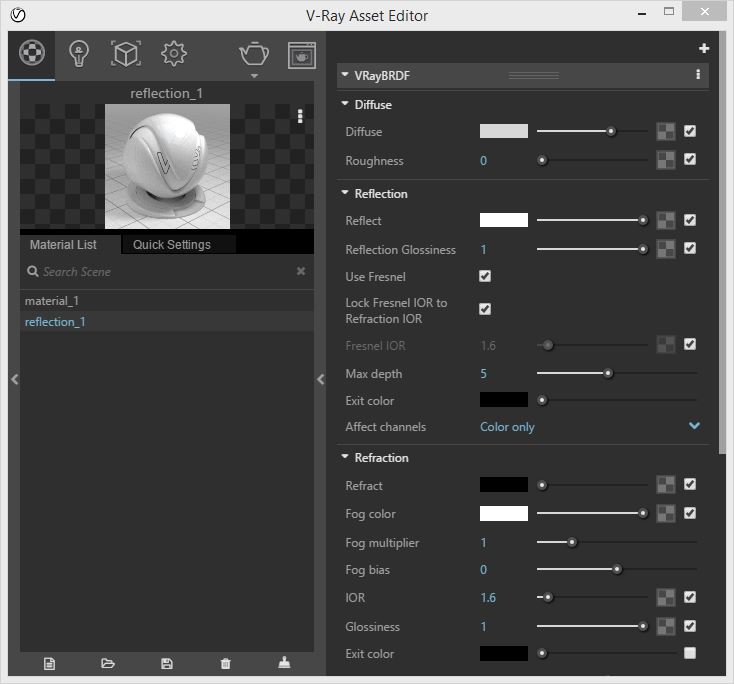
6. However, with the V-Ray materials editor create a light gray “generic ” material named “reflection_1”. Set the reflection color to white and and apply it to the three solid objects.
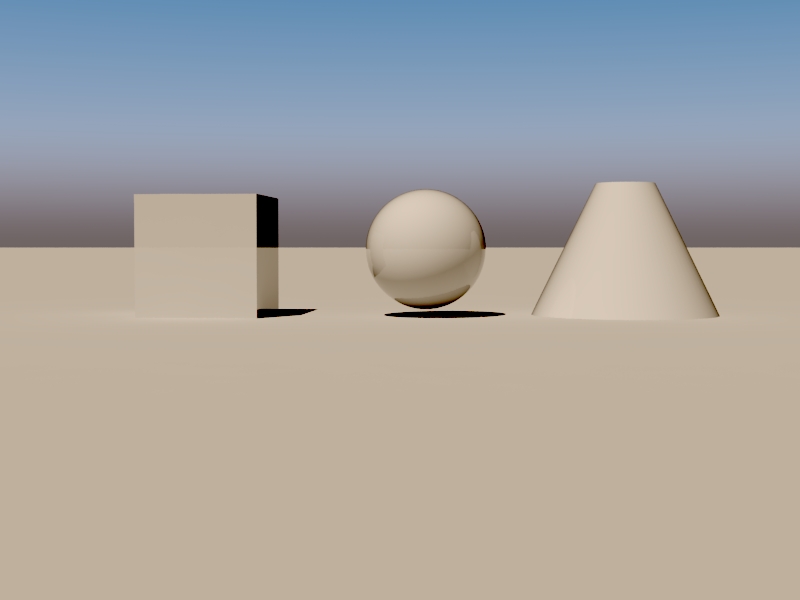
7. Re-render the same perspective view with caustics on and note the basic similarity in terms of the overall lighting and the casted shadows to the earlier renderings but for the less flat appearance of the solid objects with a subtle hint of blue on the edge of the sphere and cone..
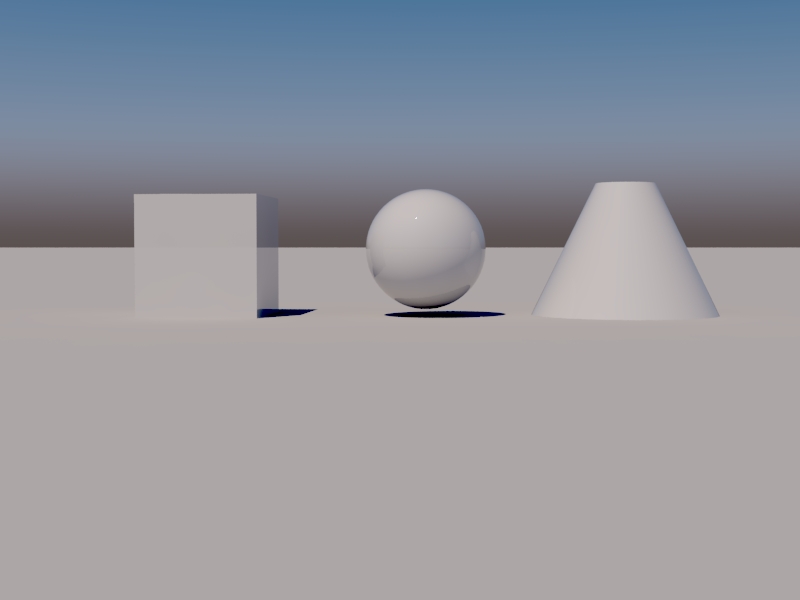
8. Now, however, within the V-Ray Options dialog box, turn off the “on” check-box for “GI (Skylight)” and :Reflection”
9. Re-render the image and note the higher contrast in comparison to the image under step 7. Here, the overall rendering appears warmer and the contrast range is about the same. The contribution of the Sky illumination has been lowered and the proportion of direct sun color temperature to color appears to have been increased.
10. Turn back on the check boxes for “GI (Skylight)” and” Reflection”, but also turn on the option for “Ambient Occlusion” on the right under “Global Ilumination” in the dialog box below.
11. Re-render and note the higher contrast range on the sphere comparison with the images under steps 7 and 11. The overall impact appears to be slighlty softer and more diffuse. with still a hint of warm sun color temperature.

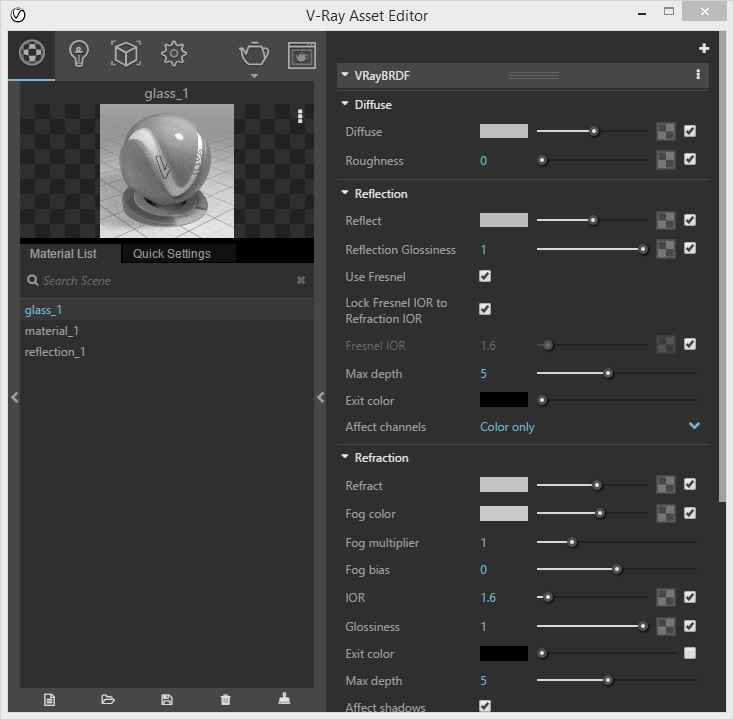
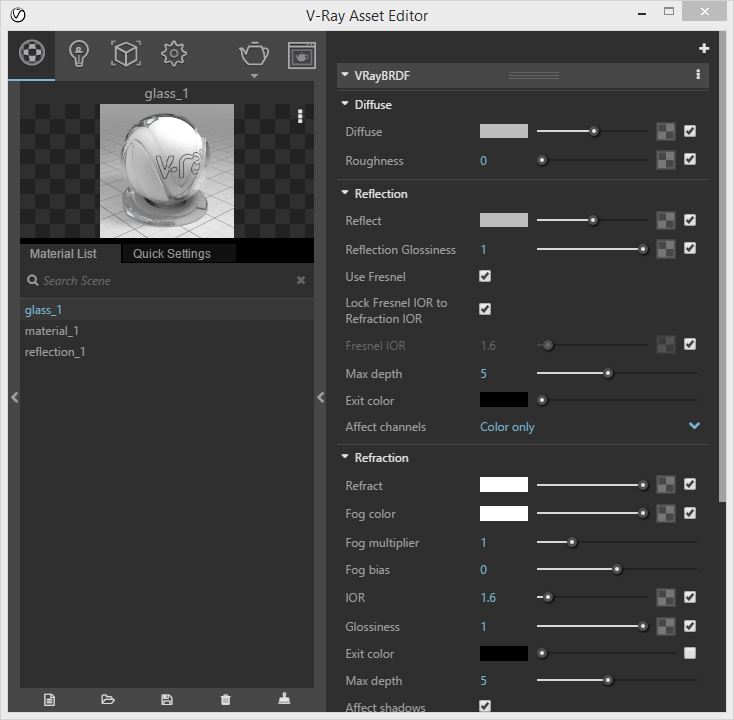
12. Create a V-Ray material named “glass_2” with a light-gray color for diffuse color, reflection color, refraction color and fog, per the techniques explored in workshop 7.
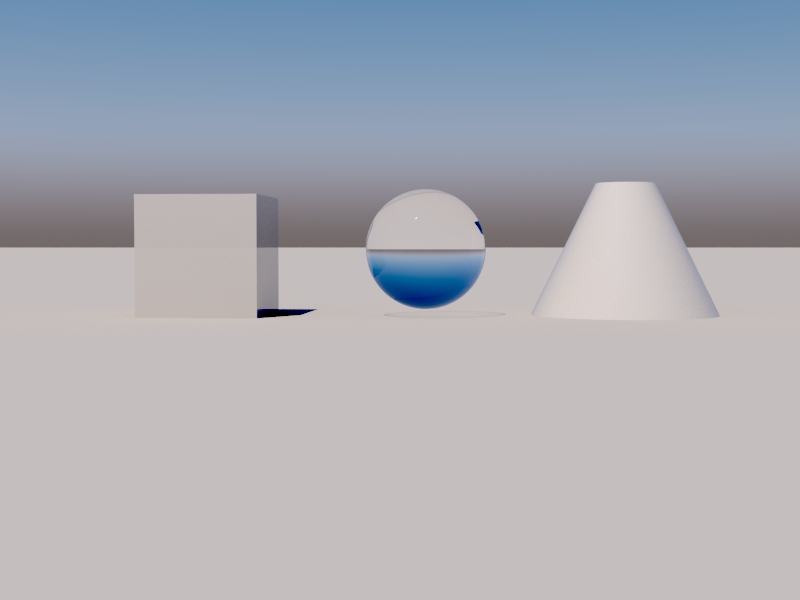
13. Apply “glass_1” to the sphere and re-render with “GI (Skylight)” and “Reflection” switched to off.
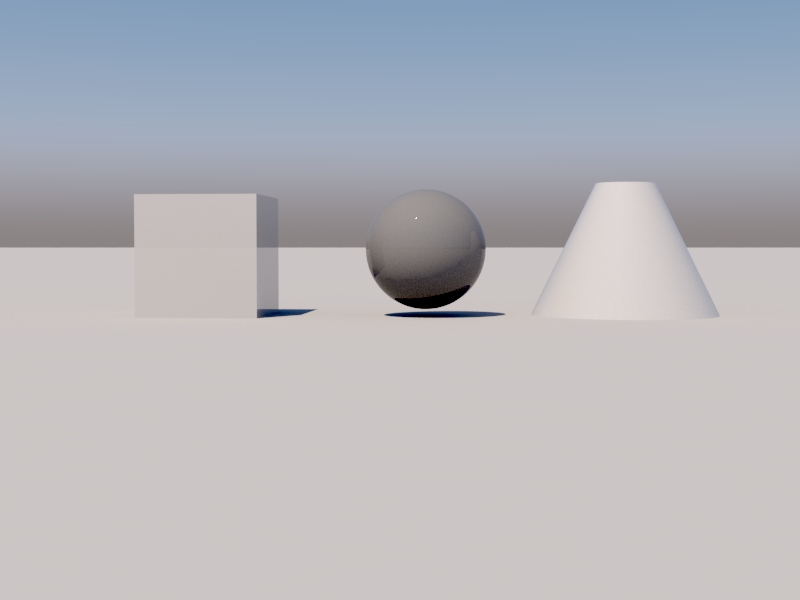
14. Switch back on”GI (Skylight)” and “Reflection” and render again The rendering as a whole appears less flat. Note for example the greater difference in contrast between the shadows cast by the box and those cast by the sphere, and notice too the slighlty improved sharpness of the relflection on the cube and on the sphere
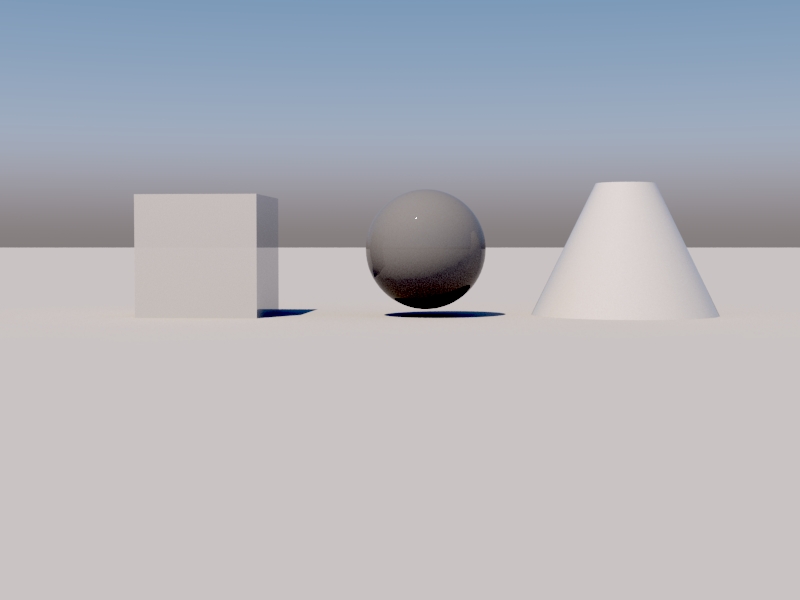
15. Change the fog and reflection colors of “glass_1” to white and re-render.
Note that appart from the transparency of the sphere the overall intereflection of light is significantly changed.
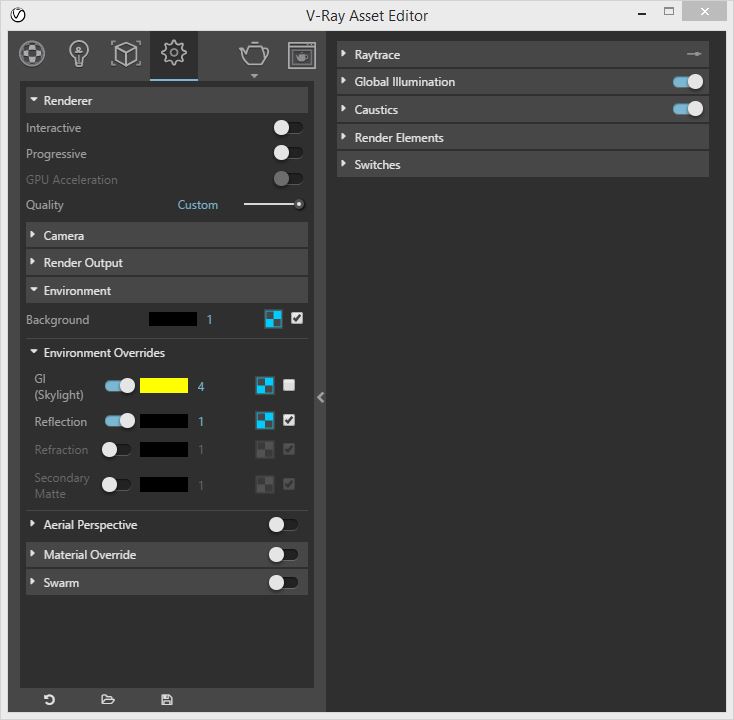
16. Within the V-Ray option editor, go to the “Environment” tab, set the GI (Skylight) color to yellow, change the intensity to 4.0 and switch of the check-box for the Preetham et. al. simulatio on the right.
15. Re-render the image for a more distincly yellow tint to the overall rendering of surfaces.
Part II. Exploring texSky properties.
1. Return to the “Background”, “GI(Skylight)” and “Background” skies, and reset the “Sky Model” to “CIE Clear”.
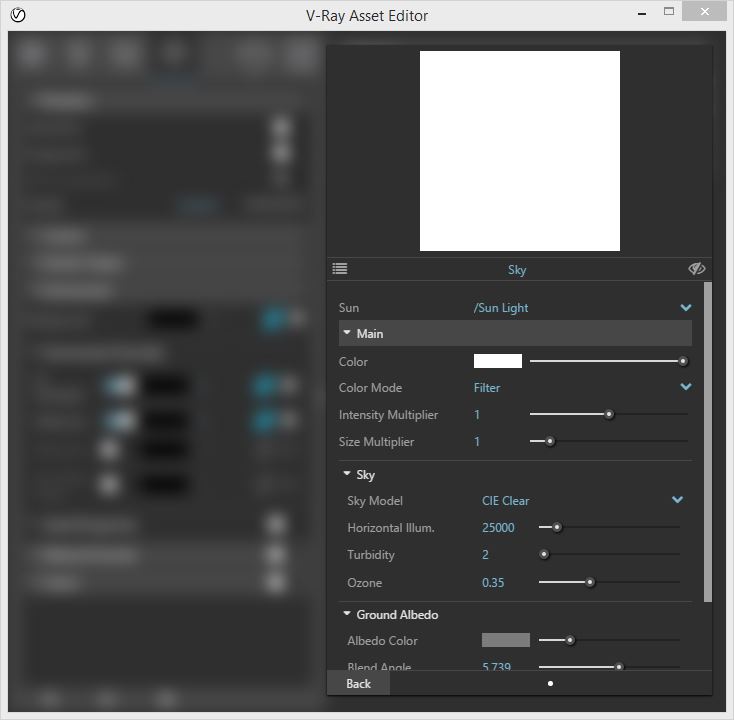
2. Set the color of the “GI (skylight)” back to the color black at inensity of 1. Re-render and note the difference with the last rendering of Part 1 with respect to the more solid blue color and less diffuse appearance of the background sky.
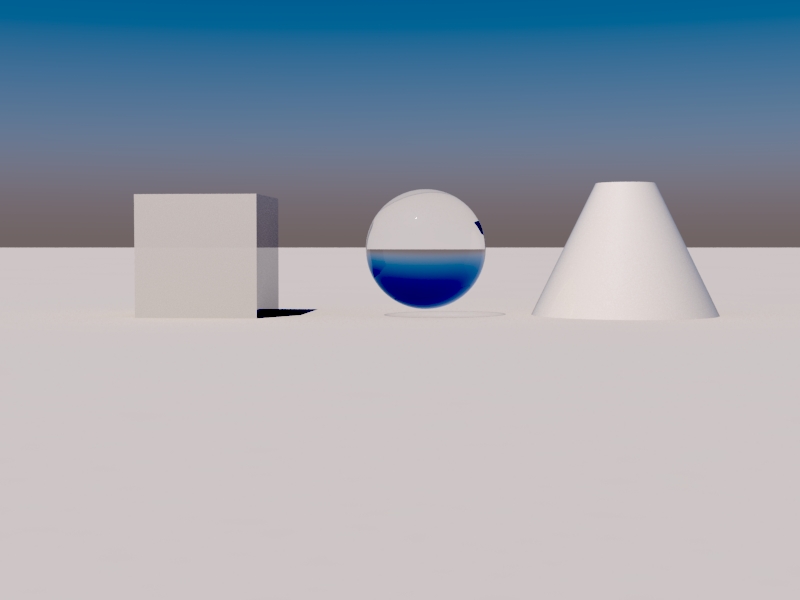
3. Within the “Environment” tab, change the colors of the “Background”, “GI (skylight)” and “Reflection” to dark gray at intensity 2.
Return to the properties of the”GI (skylight)” sky and modify the following properties:
Water Vaper = 4.0
Turbidity = 4.0.
Ozone = 0.55
This automatically adjusts the properties for “Background” and “Reflection” tp the same values.
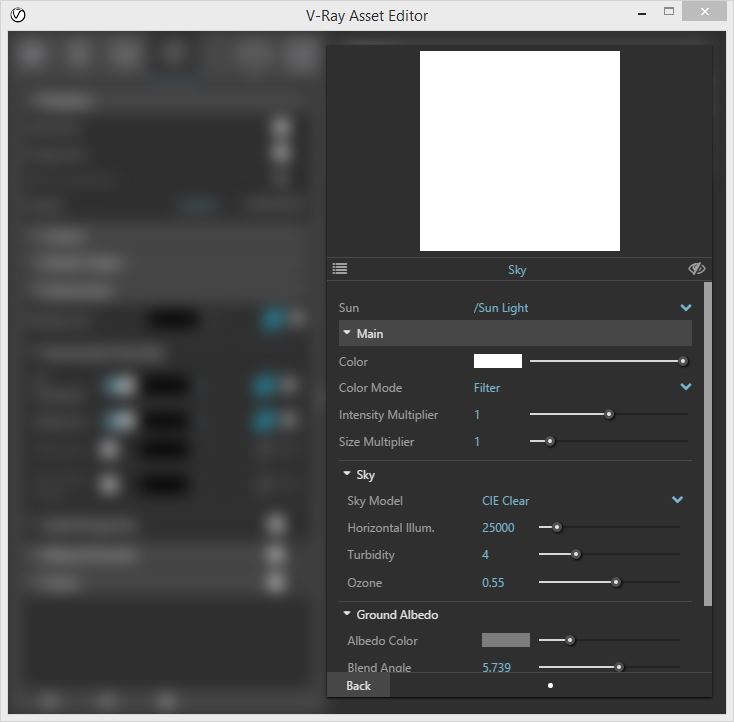
4. Re-render the model and the result is diffuse but a flatter we obtained with the Preetham sky at the end of part 1.
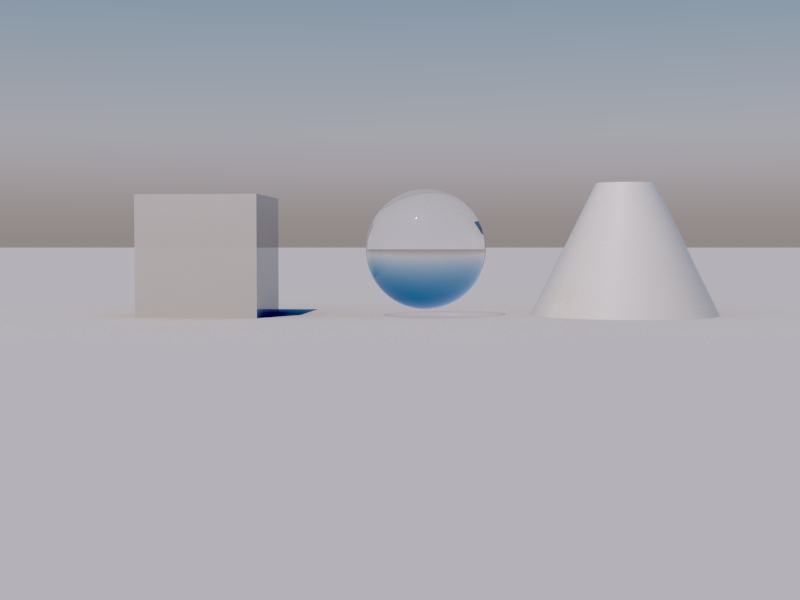
5. Restore the GI (skylight) color back to black at intensity 1 for slighlty higher contrast.
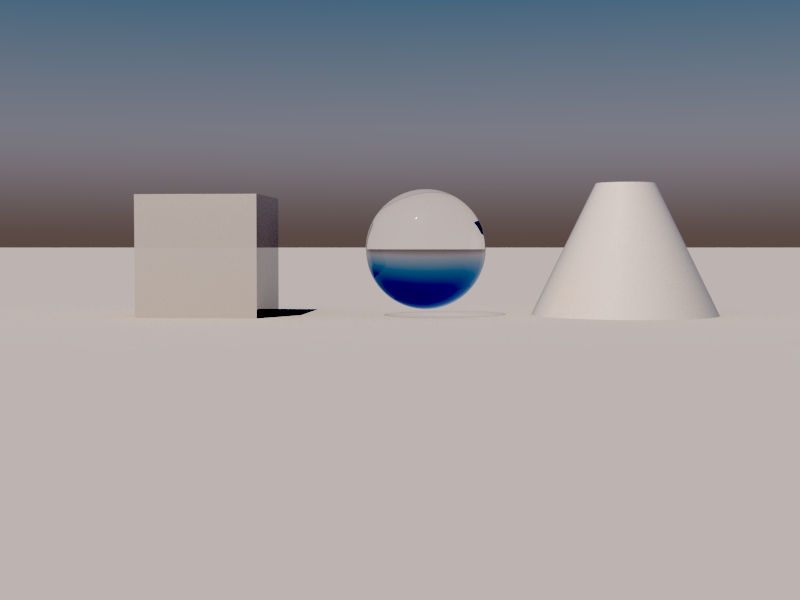
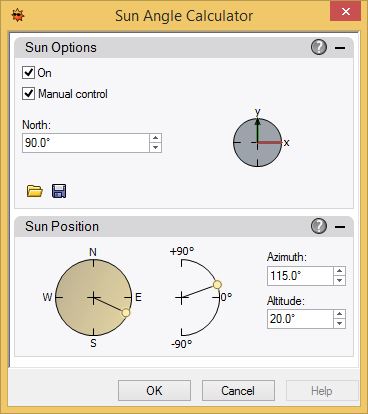
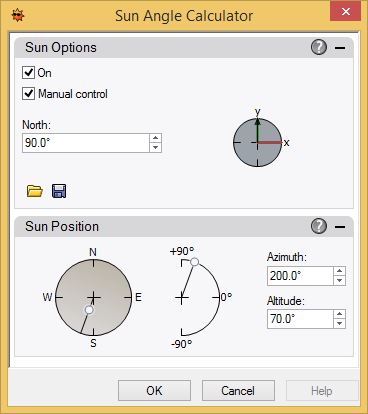
6. Modify the sun position manually by selecting the sun directly from the model space and then going to the properties tab on the right hand side select the “Change Sun Angle” option .
That is, set the sunlight for morning, mid-day and late afternoon, and re-render accordingly:
 |
 |
 |
| morning | mid-day | late afternoon |
Morning rendering with color adjusted via the “Color corrections” dialog box:
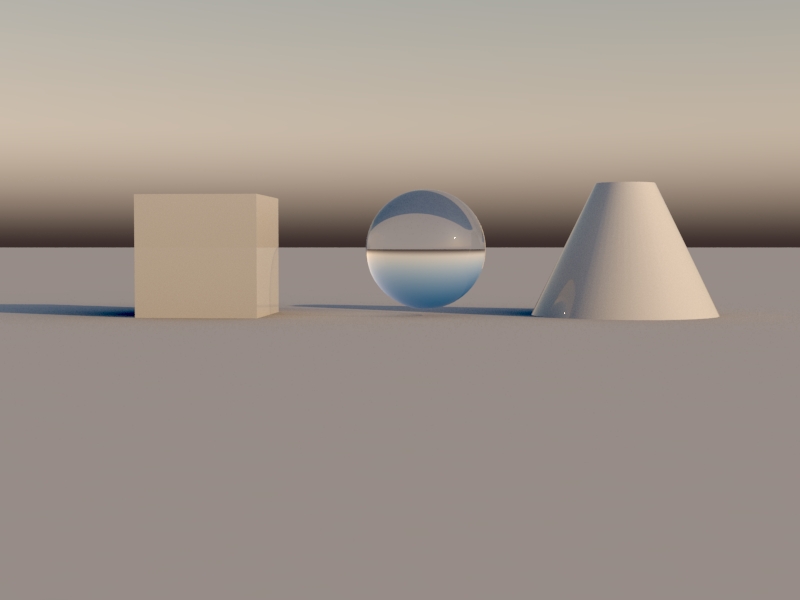
Mid-day rendeing with color adjusted via the “Color corrections” dialog box:
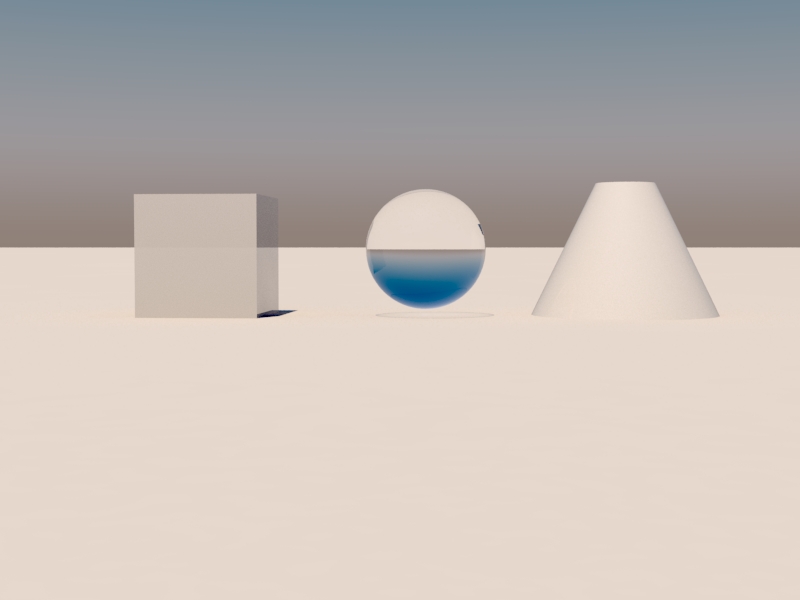
Late afternoon rendering with color adjusted via the “Color corrections” dialog box:
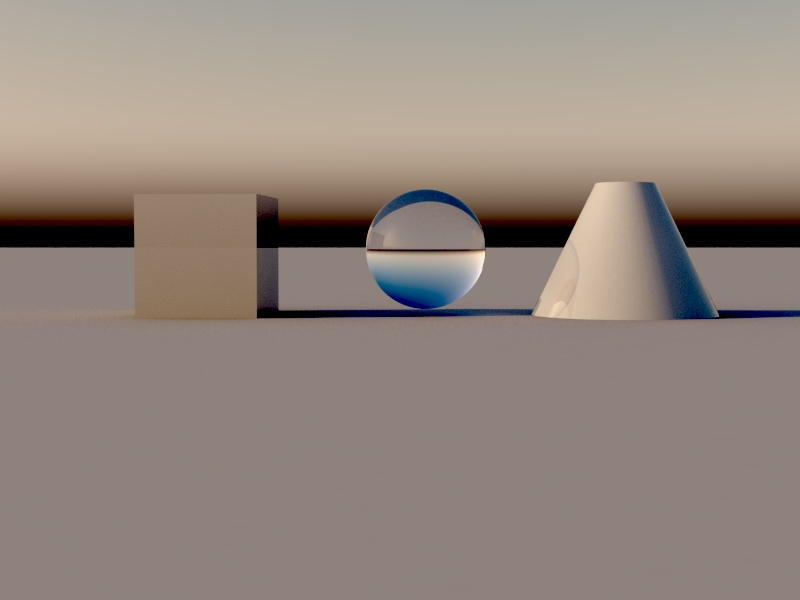
7. Adjust the sunlight to approximate early afternoon.
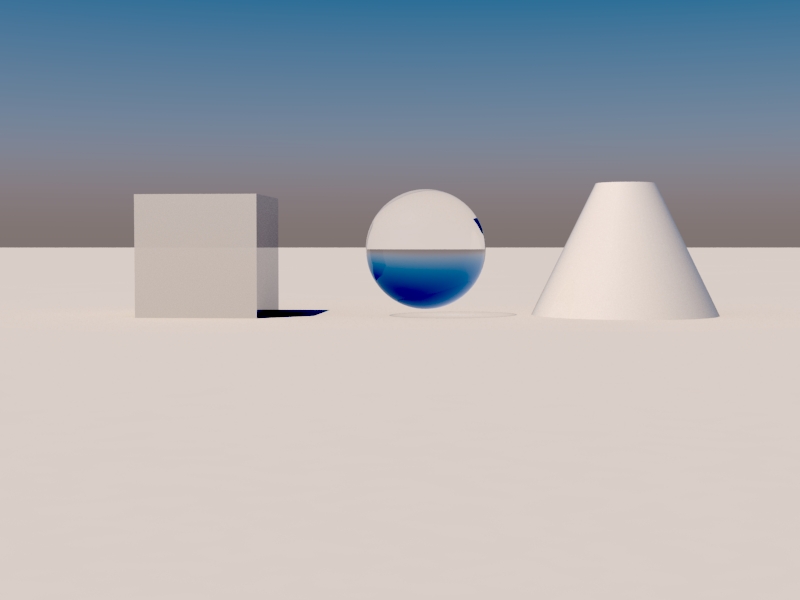
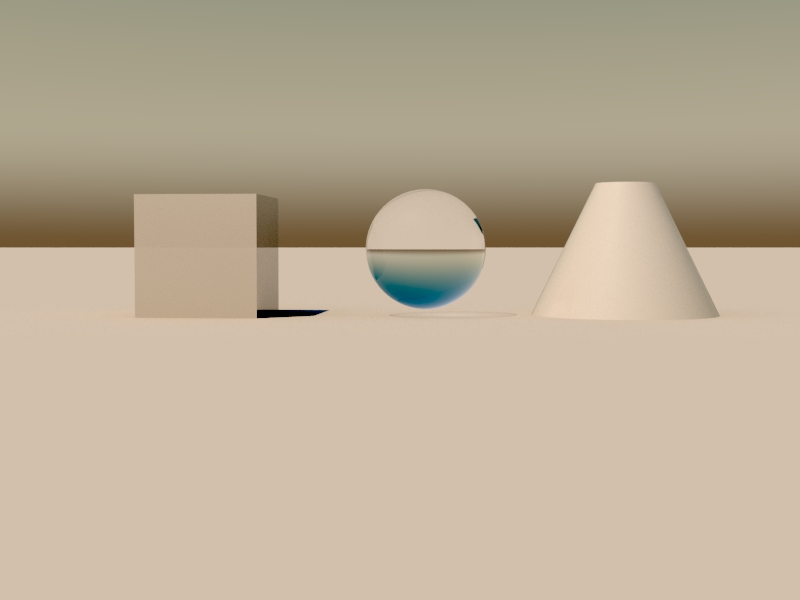
8. Return to the CIE Sky, and change the turbidity to values of 2, 5 and 8 and also rendering in turn for each value respectively:
Turbidity = 2.0:
Turbidity = 4.0:
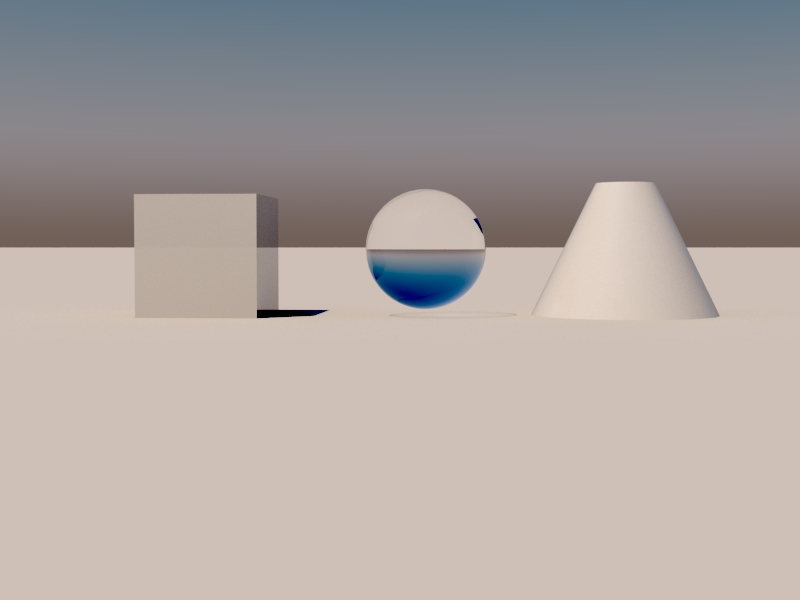
Turbidity = 8.0:
Part III: Viewing the Sun.
1. Return to the V-Ray Asset Editor,, Select the Light Iconr, and reset the “Sun Light ” size to 7.0. Note that this more direclty accesses the same properties for “Background”, “GI(Skylight)” and “Reflection” skies
2. Change the Sun Azimuth to 220 and the Altitude to 20, and rotate the view so as to look in the approximate direction of the Sun, and render. This may take a number of trial renderings to pinpoint the location of the sunin the perspective view. Right-click on the view name “Perspective” in the upper-half hand corner fo the view, hold down the right-mouse button continuously and select the “Set Camera/Adjust Lens Length and Dolly” tool to adjust the view. Use this tool in combination with with the “Pan” tool to help find the appropriate adjustment of the view so the the sun will be visible within it.
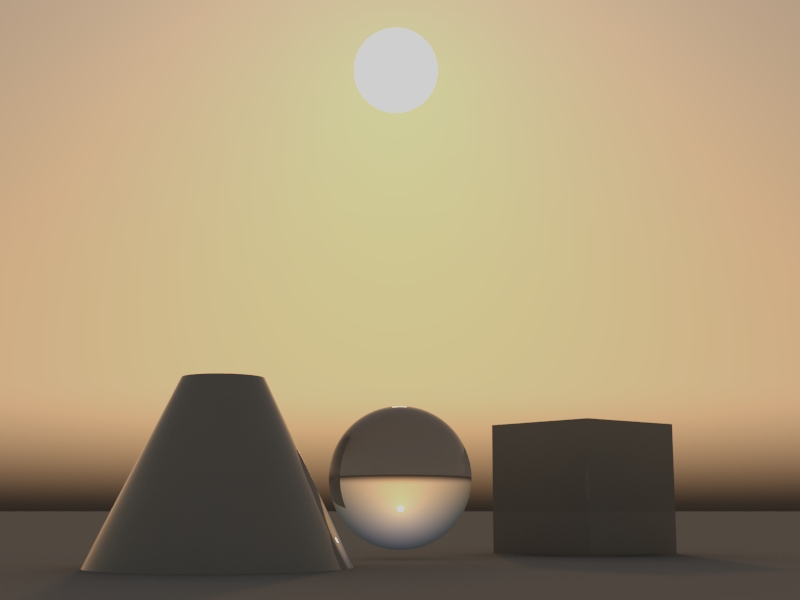
3. Restore the Turbidity to 2.0 and re-render the same view.

