- By Jean Cohn
- Subject: Art
- Grade Level: Pre-K through 6th grade
- Length of Unit: 16 Lessons, 30-minutes each, once a week
- Download the Curriculum: Honoring Tribal Legacies through Hands-On Visual Art
INTRODUCTION
When teaching art to my students, I like to learn new things for myself, and I enjoy watching them learn more than just how to make a physical piece of art. By integrating academic concepts into my teaching of art, it is my hope that my students will develop a deeper understanding about society and cultures. Being able to participate in the honoring of tribal legacies will allow my students to understand some aspects of Native American (or American Indian) cultures through real-world experiences. By making artwork that is modeled after real-world objects, students will take away more than just an artistic how-to lesson. By analyzing and discussing artwork, students develop critical literacy and the gift to discover multiple perspectives, and it is my hope that they will remember both the making of art and its meaning for people of various cultures. My focus is to explore a variety of art techniques with my elementary students using examples from American Indian cultures that I studied on the Lewis and Clark Trail, in the states of Montana and North Dakota, especially the Crow (or Apsáalooke), Northern Cheyenne,Mandan-Hidatsa-Arikara (Three Affiliated Tribes), and Lakota tribal nations.
Each learning experience focuses on the Big Ideas of connecting to expressions of Native American Identity and of gaining a greater understanding of the importance of relationships between people and connections to the land. Art-making activities will be combined with vocabulary lessons meant to open up discussions around meaning, importance, and significance that contextualize the objects they will create. Learning about cultures will be fun and have a lasting impact on the children. Teachers will have an opportunity to develop strong relationships with their students as they create pathways for the children to become lifelong learners. These lessons should be appropriate for use by other art teachers and by general elementary-school classroom teachers.
CURRICULUM DESIGN APPROACH
Using the Honoring Tribal Legacies model, my plan is to tap into the natural environment as well as the spirituality of some of the cultures along the Lewis and Clark Trail in order to bring to light the Indigenous nations that have long been ignored or misrepresented by general U.S. historical narratives. This unit aims to raise multiple perspectives relating to places and events, asking students to open their hearts and minds and try to build a connection to what it might be to live life as a person with Native heritage. Adding to this arts and humanities approach, part of the unit has a language-acquisition component, building vocabulary and strengthening young learner’s ability to express themselves through participation in discussions.
MY STORY
I was raised on Long Island, NY and developed a love for art at a young age. I graduated from the School of Visual Arts and started working as a Graphic Designer. After being on staff designing books for children for ten years, I left to freelance from home while taking care of my children. When it was time for my oldest son to start reading, I taught him how to read with the books I designed. Teaching my children to read sparked my interest in becoming a teacher.
In 2010, I started a Masters in the Art of Teaching at Queens College. After graduating in 2011 with certification to teach elementary grades 1-6, I was offered a job to teach art in an elementary school in the Bronx. After teaching art for one year, I became dually certified to teach art in grades K-12. In 2013–2014, I was accepted to the Brooklyn Museum Art Exchange Program where we worked with artists and museum staff in order to bring new experiences to my students. The following year I taught art in Queens where one of my students won the prestigious PS Art Competition.
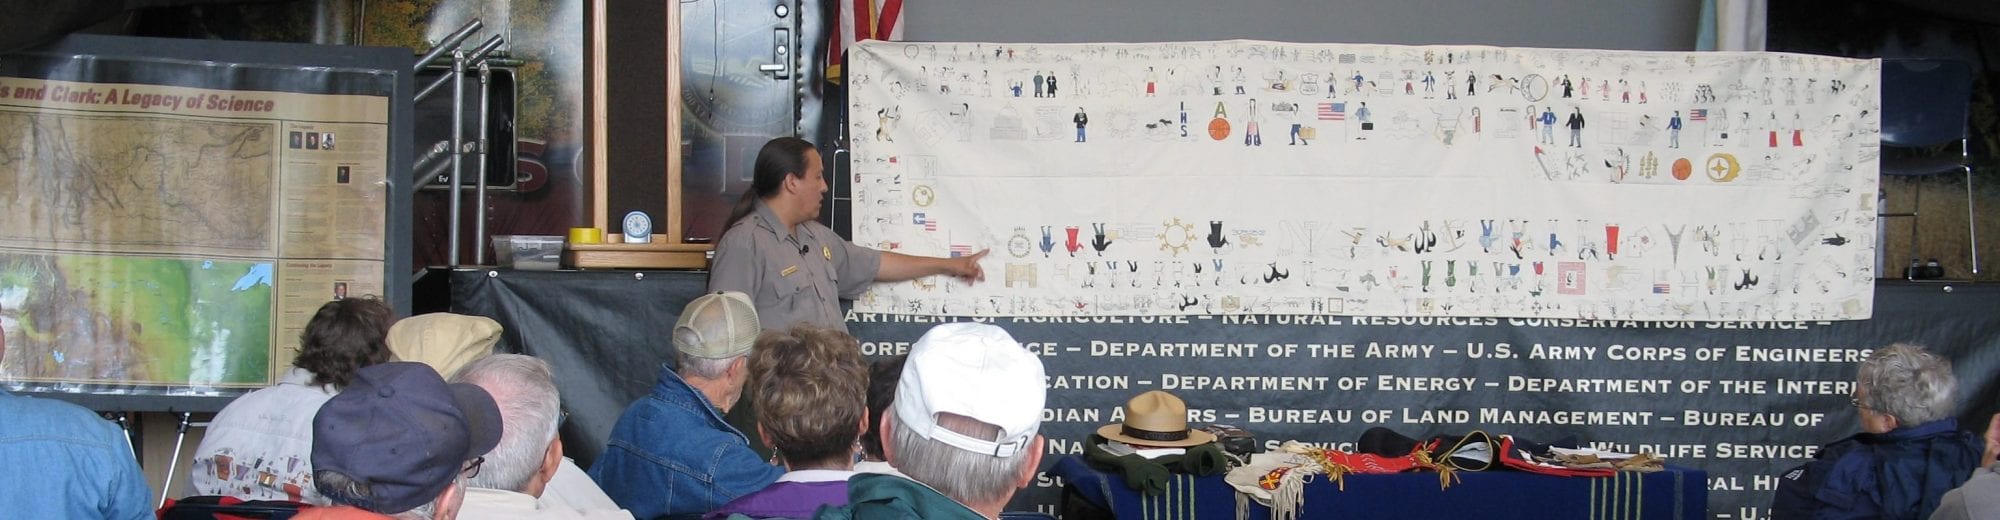
It is also worth mentioning that I was a Summer Scholar in a summer institute funded by the National Endowment for the Humanities, “Discovering Native Histories along the Lewis and Clark Trail,” in July 2019. This institute consisted of an educational journey between Billings, MT, and Bismarck, ND. On this journey, I was exposed to a large number of Native educators and elders who generously shared aspects of their cultures. I also got to visit historical sights and observe a huge array of cultural objects in museums. This experience motivated me to create this curriculum.
CONTEXTUALIZING VIDEOS
Here are some introductory materials for contextualizing this art unit, bringing to light the cultures in focus. Teachers might wish to view them prior to teaching this unit, and they might choose to share some of these videos with their students (if the Internet is accessible in the classroom).
- Crow (or Apsáalooke)
- Northern Cheyenne
- The Three Affiliated Tribes from the Fort Berthold Reservation
- Mandan-Hidatsa-Arikara
- Lakota
CURRICULUM EXPRESSIONS
Big Ideas Honoring Tribal Legacies along the Lewis and Clark National Historical Trail:
-
- IDENTIFICATION
- COMMUNICATION
- ANIMAL LIFE
- LANDSCAPE
LESSON 1: PICTOGRAPHS AND PETROGLYPHS
Learning Objectives
Students will learn how letters and symbols can be used as a form of identity, while also learning about Native American PICTOGRAPHS and PETROGLYPHS and cultural identifiers.
STANDARDS
- NYS Arts Standard 1 Creating Performing and participating in the ARTS. Students actively engage in the processes that constitute creation and performance in the ARTS and participate in various roles in the ARTS.
- NYS Arts Standard 2: Knowing and using art materials and resources. Students will be knowledgeable about and make use of the materials and resources available for participation in the ARTS and in various roles.
- NYS Arts Standard 3: Responding to and analyzing works of ART. Students will respond critically to a variety of works in the ARTS connecting the individual work to other works and to other aspects of human endeavor and thought.
- NYS Arts Standard 4: Understanding the cultural dimensions and contributions of the ARTS. Students will develop an understanding of the personal and cultural forces that shape artistic communication and how the arts in turn shape the diverse cultures of past and present society.
Materials
- Examples of PICTOGRAPHS and PETROGLYPHS
- Pencils
- Scrap paper
- Wax paper, freezer paper or acetate
- Puffy paint
- Glue gun
- Blocks of wood or cardboard
Links to Information about Sites with Pictographs and Petroglyphs
- Winter Counts, Accounts of Winter Events on Buffalo Hides (by Dakota Goodhouse,
Lakota, speaking to fourth graders) - Pictograph Cave State Park
-
- <http://stateparks.mt.gov/pictograph-cave/> This is a very important sacred and prehistoric site for Native people.
-
- Deer Medicine Rock (on private property
-
- <https://www.flickr.com/photos/63339942@N00/52902555> This is a very important sacred and historical site for Native people.
-
- Medicine Rocks State Park
-
- <https://en.wikipedia.org/wiki/Medicine_Rocks_State_Park> This is a pre-contact sacred site, although most of the petroglyphs we can readily see there are from the late 19th century forward. It is now illegal to create petroglyphs on these rocks.
-
Vocabulary
- Pictograph – An image that is painted onto stone or other material (e.g. hide, cloth, ceramics).
- Petroglyph – An image that is carved into stone.
Motivation
Students will be excited to create their own PICTOGRAPHS.
Session 1
- Delivery of Instruction
Teacher will show students some PICTOGRAPHS and PETROGLYPHS.
Students will use their critical literacy skills to interpret the images. What do you notice? What do you think the symbols might mean?


After looking at several images, students will discuss what is meaningful to them. Ask your students, “What identifies you? Can you think of one or more symbols and/or letters? Examples would be maybe you like the sun or soccer? You might also think about your initials.”
Teachers will demonstrate how to help students start their pictographs. Using scrap paper and sketching designs, teachers will create an artist’s palate as an example or their identity as an art teacher. Other examples might be a heart or a star. After the teachers finalize an idea by sketching, that symbol would be created on tracing paper or something see-through, then the teachers would turn the sketch over and trace it with puffy paint or a glue gun. Please note: make sure that, if you are using letters, you write them in reverse, so that when you later print from the puffy paint, it will print correctly. After the paper with the puffy paint symbol or letters has had time to dry, teachers will mount the paper on a piece of wood or cardboard. Paint or ink should be rolled over the dried puffy paint, and the piece of wood or cardboard should be inverted and pressed to paper, to make a print, like a stamp!
Closure
- Ask students, leading a group discussion:
- How can you use this stamp (PICTOGRAPH)?
- Students will use this stamp to identify their work and never forget to sign (or identify) their work again.
Session 2
- Students will start sketches for their own identification mark or PICTOGRAPH.
- Sketch, trace onto tracing paper, turn over (especially if there are letters in it), and outline with puffy paint.
- Remind students of ideas. Teachers will circulate in order to give feedback to improve work.
- When artwork is finished, students will place it on a drying rack.
Session 3
- Students will mount the PICTOGRAPH onto cardboard or wood to use as identification.
- This fun activity is the beginning of a precedent for students to always identify their work in order to get proper credit.
Closure
Why might we wish to have our identity represented by our written names or by other symbols? Why is it important to identify your work?
LESSON 2: BARTERING
Learning objectives
Students will understand BARTERING as a form of trade in order to acquire items essential to live and grow economically.
STANDARDS
- NYS Arts Standard 3: Responding to and analyzing works of ART. Students will respond critically to a variety of works in the ARTS connecting the individual work to other works and to other aspects of human endeavor and though.
- NYS Arts Standard 4: Understanding the cultural dimensions and contributions of the ARTS. Students will develop an understanding of the personal and cultural forces that shape artistic communication and how the arts in turn shape the diverse cultures of past and present society
Vocabulary
- BARTER: exchange (goods or services) for other goods or services without using money.
- PICASSO often bartered, trading his drawings for meals.
- Synonyms: trade, swap, trade off, exchange, give in exchange, change, switch, traffic, sell
Teachers will share examples of material that Native Americans (or American Indians) bartered.
Motivation
Students will be excited to share a story with an example of bartering that has personal meaning to them.
ACTIVITY: Barter an object that has meaning to the students.
Session 1
Delivery of Instruction
- What do you need to survive? Food, water, a place to sleep.
- What do you need to feel safe?
- What was available to American Indian tribes, such as the Crow/Apsáalooke, Northern, Cheyenne, Arikara-Mandan-Hidatsa, or the Lakota on the Lewis and Clark Trail?
- The Native people needed animals to survive.
- They ate the meat, and they used the fur for clothes, shoes, and lodging.
- They used the bones to make tools, weapons, and utensils. Nothing went to waste.
- What did the settlers need? When the settlers arrived, Indian tribes started to BARTER with the outsiders.
- What does the word BARTER mean? It means to trade goods or services.
- Show a picture of Fort Union and all the items stocked for trading.
- https://www.nps.gov/fous/index.htm Video on Bartering


Engage Students
- Explain: “You want to BARTER something that someone else needs in order to get something of value to you.”
- Example: The white buffalo hide was sacred. The Arikara found out someone had a White Buffalo hide.
- They negotiated to BARTER that hide for 15 horses.
- What do you think others would want or need?
- Find something that is meaningful to you.
- Maybe it’s a toy or something you found.
- What do you think others would want?
- Be prepared to talk about why it is meaningful to you during the next class.
- You will be BARTERING this item so be prepared to give it away.
Here’s an example. The teacher will share a story about something special. Here is a piece of a shell, notice the purple color. When I was on the beach with my nephew, who was 13 at the time, I picked up this shell. (Hold up the shell.) My nephew told me how this kind of shell was used as Wampum which was traded with settlers. It was a monetary system, the more purple, the more valuable. In some cultures, purple means royalty. I went home and looked up what my nephew told me. He was right! This shell is symbolic of learning as well as the relationship I have with my nephew. This shell (of the type used for WAMPUM) was wanted by settlers and used to BARTER with Native American s in the early 1700’s.
Homework
“Based on our discussion today, for the next class bring an item from home to BARTER. Keep in mind it should be an item you think would be in demand and you will NOT GET IT BACK; it is to give away.” Idea: “Maybe make something appealing that you would not mind giving away.”
Session 2
- Students will show their objects to the class and share a story about why they are meaningful.
- If the class is seen frequently, individual students can present to the entire class (Circle Time Presentation?).
- If class meets less frequently, students can present in small groups.
- Once everyone has shared their meaningful story the BARTER can begin.
- Spread the objects on the table. What do you want?
- Do you have any questions for the owners?
- Barter for something you would want.
- Students will share what they bartered for and explain why they needed or wanted it.
- Encourage them not to leave anything unwanted, but if things are left unwanted, ask students why the bartering did not work with regard to those items.
Closure and Assessment
Kindergarten students can write words, first grade can write a sentence or two, second through sixth grade can write a paragraph about their experience BARTERING. Students are able to complete this activity based on the level of their ability. Maybe students will be sad about giving up something that was valuable to them, and they can express their feelings. Maybe someone needed that item more than they did. Or maybe they are excited about what they got through bartering, and they will want to write about why they are pleased.
Teachers can revisit this writing sample in June and ask the students to reflect back on the experience of BARTERING after year-long participation in understanding American Indian culture.
ESSENTIAL QUESTION for older grades: What would be the advantages or disadvantages of using the BARTERING system today?
LESSON 3: TEXTURES
Learning Objective
- Students will understand the art element of TEXTURE by studying the fur from a variety of animals.
- Students will also continue to understand Bartering.
STANDARDS
- NYS Arts Standard 1 Creating Performing and participating in the ARTS. Students actively engage in the processes that constitute creation and performance in the ARTS and participate in various roles in the ARTS.
- NYS Arts Standard 2: Knowing and using art materials and resources. Students will be knowledgeable about and make use of the materials and resources available for participation in the ARTS and in various roles.
- NYS Arts Standard 3: Responding to and analyzing works of ART. Students will respond critically to a variety of works in the ARTS connecting the individual work to other works and to other aspects of human endeavor and though.
- NYS Arts Standard 4: Understanding the cultural dimensions and contributions of the ARTS. Students will develop an understanding of the personal and cultural forces that shape artistic communication and how the arts in turn shape the diverse cultures of past and present society
Vocabulary
- Hide – the skin of an animal.
- Texture – the visual or tactile surface characteristics and appearance of something.
- Space – refers to the area within, around, above or below an object.
Materials
- Pastels
- Crayons
- Watercolors
- Sponges
- Paper towels
- Q-Tips
- Paintbrushes
- Brown paper, paper bags or butcher paper
- Photographs of fur (and stone, see below) to use as reference.
- Find animal furs and hides to share and touch.


Session 1
- Show students animal skins and lead discussions.
- Discuss the animals on the Plains available for the Indian tribes of Montana and North Dakota.
- How did these animals help these Native American tribes?
- Students will see and touch a variety of skins and furs.
- Students will identify the animals based on the fur color, texture, and size.
Session 2
- Students will start to create their own animal fur using the art elements of TEXTURE and SPACE.
- Refer to samples and photographs for reference. Students can create their texture on crumpled brown paper.
Session 3
- Class will look at a variety of stones and other minerals.
- Teachers will share a variety of pictures from Medicine Rock and Theodore Roosevelt National Park.


- Students will use texture in order to create stone.
- Sponges and paper towels will help you achieve a stone look.
Closure
- Gallery Walk and discussion of projects.
- Ask visitors: “Can you tell which animal hides or stones the students have created here??
LESSON 4: COMBINING PICTOGRAPHS WITH TEXTURED BACKGROUNDS (HIDE AND STONE)
Learning Objective
Students will understand that PICTOGRAPHS were usually painted or drawn on stones or hides.
STANDARDS
- NYS Arts Standard 1 Creating Performing and participating in the ARTS. Students actively engage in the processes that constitute creation and performance in the ARTS and participate in various roles in the ARTS.
- NYS Arts Standard 2: Knowing and using art materials and resources. Students will be knowledgeable about and make use of the materials and resources available for participation in the ARTS and in various roles.
- NYS Arts Standard 3: Responding to and analyzing works of ART. Students will respond critically to a variety of works in the ARTS connecting the individual work to other works and to other aspects of human endeavor and thought.
- NYS Arts Standard 4: Understanding the cultural dimensions and contributions of the ARTS. Students will develop an understanding of the personal and cultural forces that shape artistic communication and how the arts in turn shape the diverse cultures of past and present society.
Material
- Ink
- Pastels
- Crayons
- Paints
- Sharpies
- Tracing paper
- Soft pencils
Session 1
Motivation
- The students will be very excited to create a graphic symbol that represents something without using words.
- Show students a sample of a texture much like they created in the previous session with a PICTOGRAPH you have drawn over it.
- Teachers will say: “Think about what you would like to create on your texture. You can copy an image or create a new pictograph of your own.”
Session 2
- Look at a variety of PICTOGRAPHS and PETROGLYPHS (again, see photos from LESSON 1).
- Analyze and interpret the meaning of the images.
- Show pictures from Pictograph Caves and Medicine Rocks again.
- Share images of cave art from prehistoric times.
- Teachers will demonstrate the activity by using the texture already created in class as a background.
- Images should be sketched first then transferred onto the textured background.
- Students will create pictographs from their sketches, putting them over the textured background.
- Students might reproduce what they see in the slide or handout, or they can invent their own.
- Prepare visual examples students will have to see and touch at each desk.
Session 3
- Transfering the new drawings/paintings of pictographs on top of the textures created in previous classes.
- Transfer Process:
- Turn over paper and cover with a soft pencil.
- Trace the front of the image, leaning on texture to transfer image.
- Color with black medium of choice.
Closure
Gallery Walk: Discuss and interpret the pictographs created by students and applied to the hide or stone textures they had made previously.
LESSON 5: LANDSCAPE CONTOURS
Learning objectives
- Students will understand components of a landscape (MONTANA) by creating a landscape using tissue paper.
- Students will understand Background, Foreground, and Horizon Line.
- Students will create a Landscape using torn up tissue paper.
STANDARDS
- NYS Arts Standard 1 Creating Performing and participating in the ARTS. Students actively engage in the processes that constitute creation and performance in the ARTS and participate in various roles in the ARTS.
- NYS Arts Standard 2: Knowing and using art materials and resources. Students will be knowledgeable about and make use of the materials and resources available for participation in the ARTS and in various roles.
- NYS Arts Standard 3: Responding to and analyzing works of ART. Students will respond critically to a variety of works in the ARTS connecting the individual work to other works and to other aspects of human endeavor and though.
- NYS Arts Standard 4: Understanding the cultural dimensions and contributions of the ARTS. Students will develop an understanding of the personal and cultural forces that shape artistic communication and how the arts in turn shape the diverse cultures of past and present society
Materials
- Tissue paper
- LOTS OF GLUE STICKS
- Visual examples of a completed model for the lesson’s project, to see and feel in front of them.
VOCABULARY
- Foreground
- Background
- Horizon Line
- Transformation
Motivation
Students will be excited to create their own landscape after looking at pictures of the big open skies of Montana.
Session 1
Delivery of Instruction
- We will create the Land of Sky and Wind.
- Look at a map of the United States and find MONTANA.
- Next, we will look at photographs of the big open skies, mountains, and hills.
- Show Medicine Rocks State Park. Analyze the forms. How would you explain what you see?
- How and why did this happen? Discuss transformation.
- Show the landscape of the Plains. What do you notice? Look at the colors? What is near vs what is further away?
- Notice the colors are darker as the landscape is closer to you.
- Teachers will demonstrate the process of the lesson’s project.


Sessions 2, 3, 4 and 5
- Students will work on their landscapes.
- Tear the paper and glue down carefully.
- Cover all the white space.
- Teacher will distribute supplies listed above and give feedback on the spot to students.
- Have samples on desks to inspire students.
Closure and Assessment
ESSENTIAL QUESTION: “How can you be successful creating your landscape?”
LESSON 6: EFFECTIVE LANDSCAPE REPRESENTATION
Learning objectives
- Students will continue to understand components of a landscape (using examples from Montana) by creating a BACKGROUND, FOREGROUND and HORIZON LINE.
- Students will create a blue sky, clouds, and spent dandelion puffs (the make-a-wish kind).
- Students will create clouds by creating a TEMPLATE.
STANDARDS
- NYS Arts Standard 1 Creating Performing and participating in the ARTS. Students actively engage in the processes that constitute creation and performance in the ARTS and participate in various roles in the ARTS.
- NYS Arts Standard 2: Knowing and using art materials and resources. Students will be knowledgeable about and make use of the materials and resources available for participation in the ARTS and in various roles.
- NYS Arts Standard 3: Responding to and analyzing works of ART. Students will respond critically to a variety of works in the ARTS connecting the individual work to other works and to other aspects of human endeavor and thought.
- NYS Arts Standard 4: Understanding the cultural dimensions and contributions of the ARTS. Students will develop an understanding of the personal and cultural forces that shape artistic communication and how the arts in turn shape the diverse cultures of past and present society.
Materials
- Tempera paint (White, Blue, and Black)
- Ink
- Oil Pastels
- Crayons
VOCABULARY
- Foreground
- Background
- Horizon Line
- Template
Motivation
Students will be excited to create their own landscapes after looking at the big open skies of Montana.
Session 1
Delivery of Instruction
- First, we will look at the giant Dandelions of MONTANA.
- Next, we will create a blue-sky background.
- While that dries we will cut a template to create the clouds.
- Teachers will demonstrate the project process.

Sessions 2, 3, 4 and 5
- Students will dab white paint using the template to create clouds.
- Next step is to add the dandelions.
- Look at the samples and decide how you would like to create your dandelions.
Closure and Assessment
Gallery walk, peer feedback and discussion of work.

-
Download the Curriculum: Honoring Tribal Legacies through Hands-On Visual Art