IMPORTING MOVIE FILES, EDITING AUDIO AND VIDEO CLIPS IN IMOVIE, PLUS
PHOTOSHOP EDITING, FILE FORMATS AND CODECS
PART I: EDITING ESSENTIALS WITH IMOVIE
Note the following screen shots are based upon the class tutorial.
For a more compete description of the process see the getting started documentation on iMovie which can be found on the following web site:
https://help.apple.com/imovie/mac/10.1/
1. Open iMovie from within the Applications folder on a Mac.

2. Select the “Create New” button above and choose the “Movie” (blue icon) option below.

3. The movie editor and project window now opens.
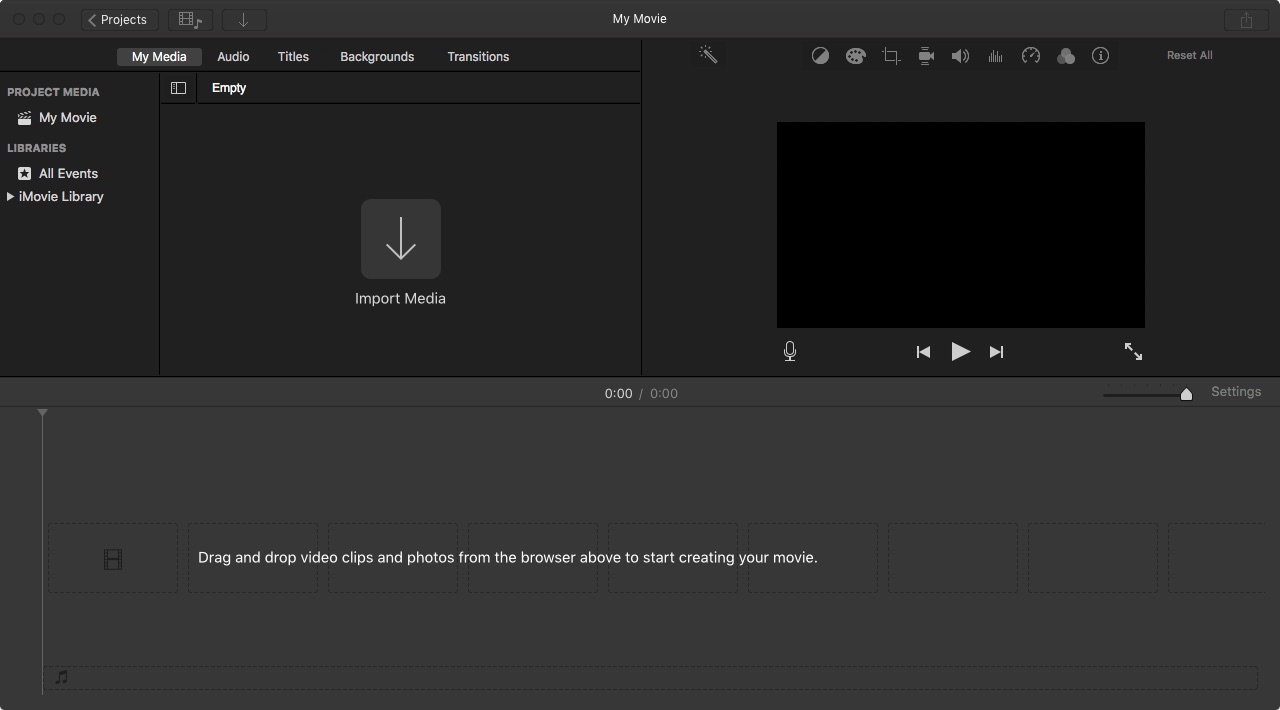
4. Import media to the browser browser window in the upper left-hand corner using the down arrow with the “import media” label in the image above and selecting the movie files in the dialog box that follows below.
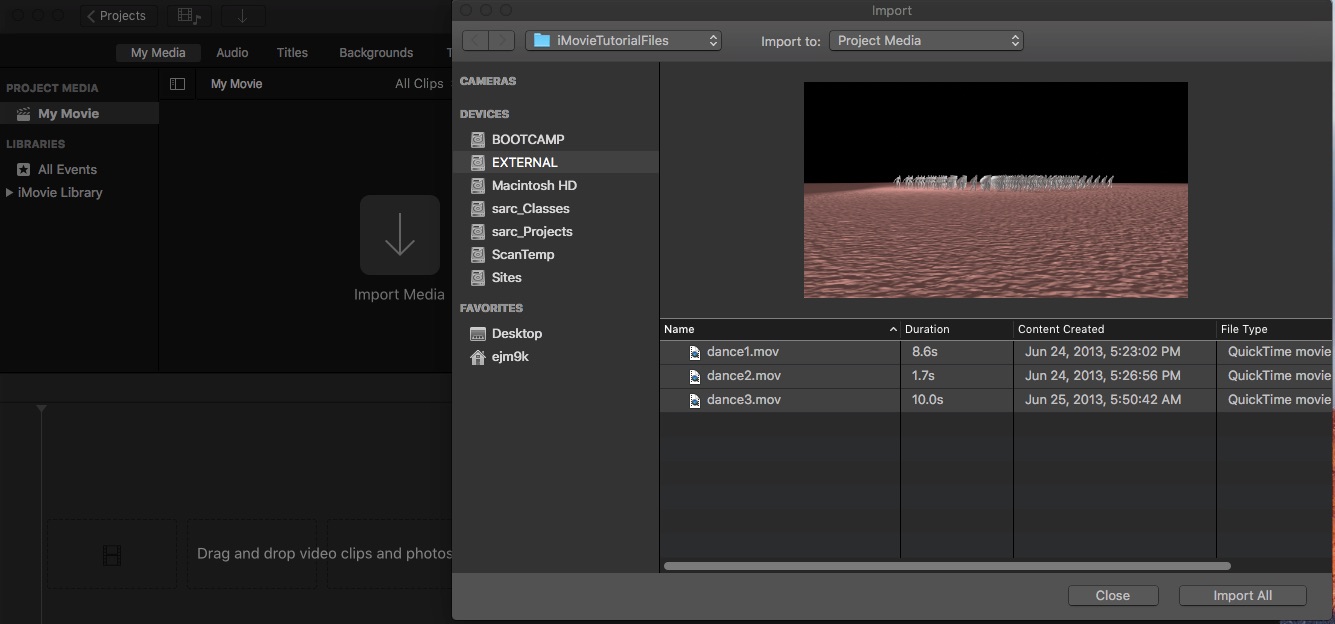
5. The media will then appear in the media browser window in the upper left corner of the iMovie Dialog box as shown in the following image.
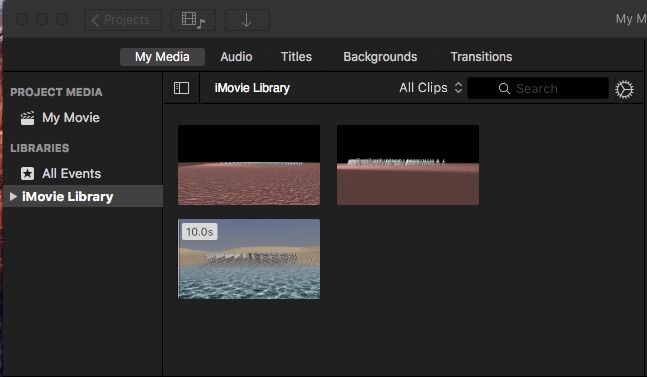
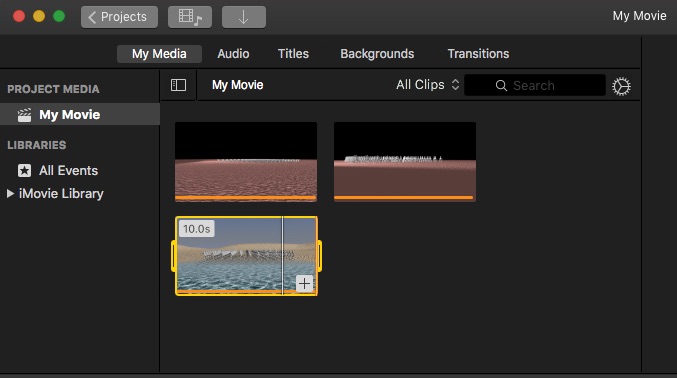
6. Note that when selecting a movie clip from the browser, drag the mouse through the portion of the movie clip desired so that it highlights in yellow as depicted below before dragging it to the timeline.
7. Drag and drop the media files into the timeline below and in the sequence desired. Next, use the right pointing arrow in the window in the upper right corner of the application window to play through the resulting rough assembly.
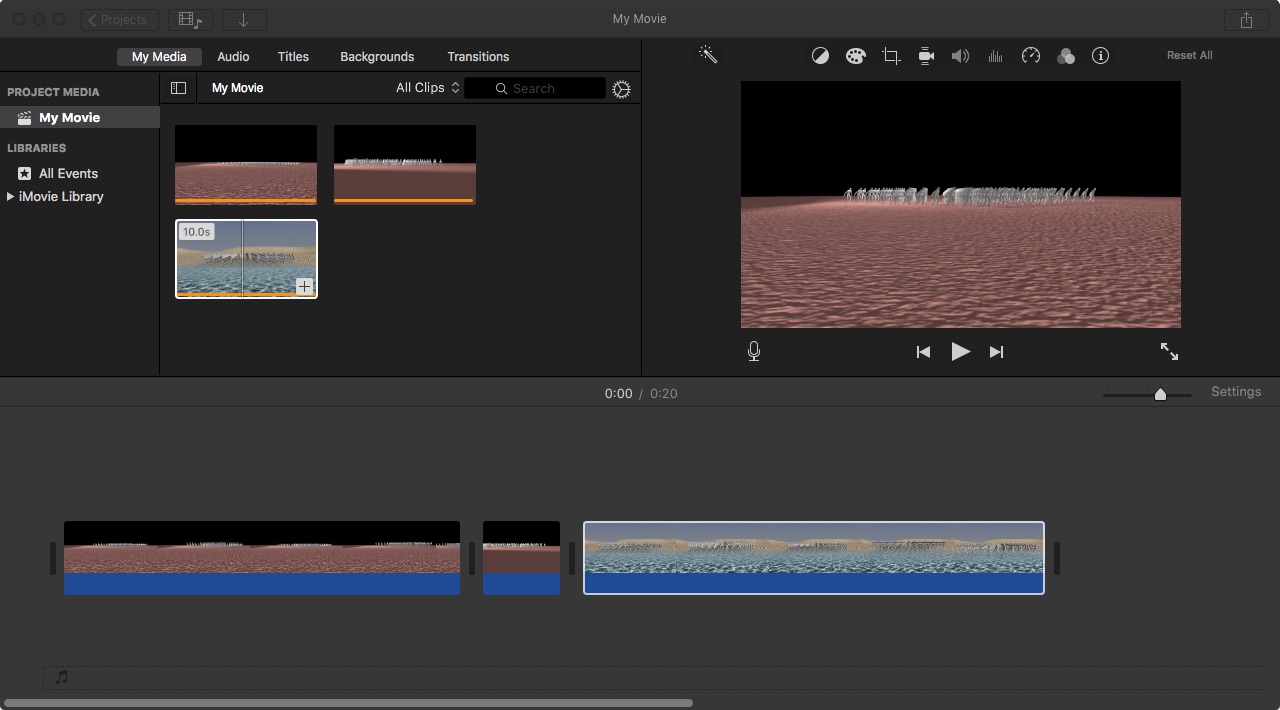
8. Note that it is also possible to mport and add additional movie files as needed through the “file /import media” menu item rather than via the “import media” symbol used in step 4 above.
9. Go to transitions tab on the upper left side of the view window, and then add transitions if and as needed between movie clips. For example, the “Cross Dissolve” transition is placed between the first two animation clips in the image below:
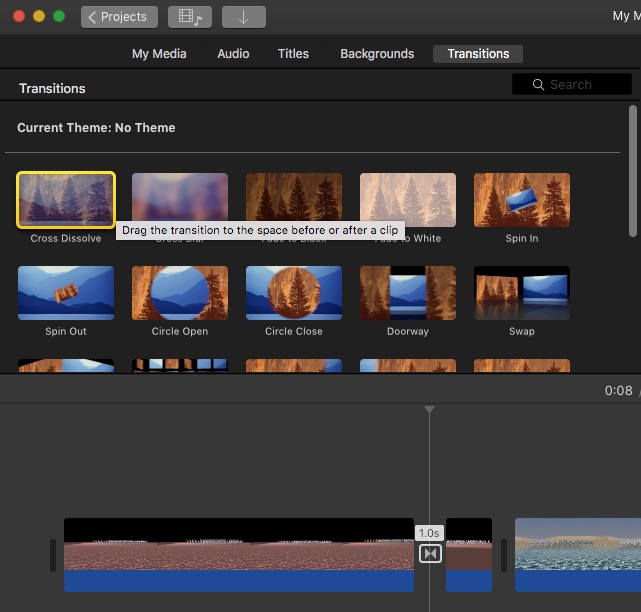
10. Double-click on the with the left mouse button on the cross-dissove icon to be able to adjust the time length of the transition.
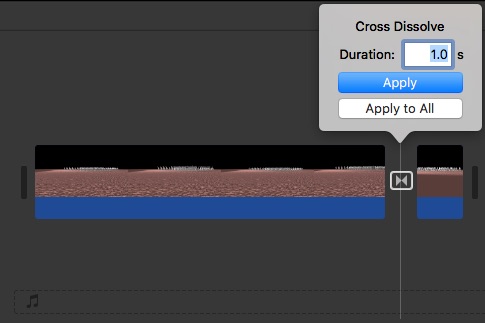
11. Similarly, go to the “TItles” tab from the same menu to overlay a title on the video or place it in its separate slot on the timeline (this technique is not shown here).
12. To add sound, drag a sound mp3 file from an external folder into the editor and place it in the timeline below the video track. The length of the sound track can be adjusted by clicking on the right hand edge with the left mouse button and sliding to the desired length.
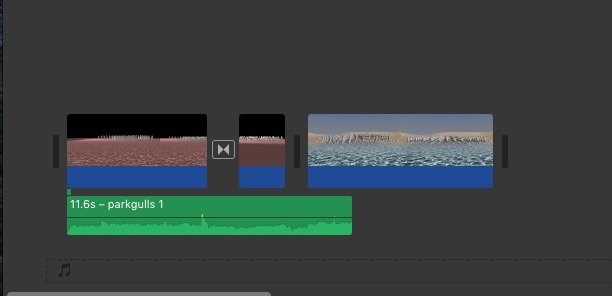
13. Add an additional mp3 file sound track below or to the right of the first sound track.
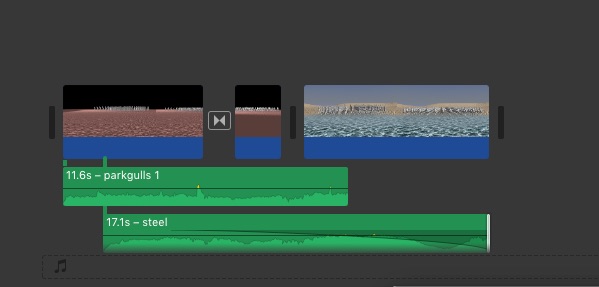
14. Select the inspector “i” symbol in the upper right hand corner of the iMovie window to make additional time length adjustments.

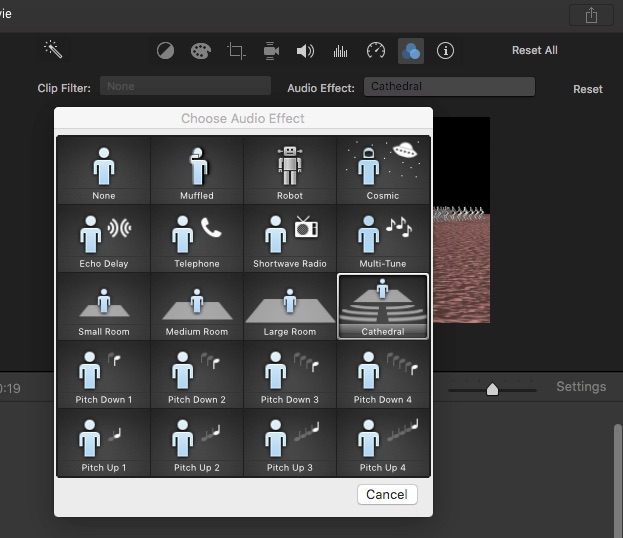
15. Select the three dot icon in the upper right hand corner and just to the left of the “i” symbol to add an audio effect.
 1
1
16. Select the vertical bars icon in the upper right hand corner to apply a preset equalizer effect (adjusts the apparent audibility of different sound frequencies). The “Flat” equalizer effect is chosen in the case depicted below.

Note that each of the sound tracks is separately editable via techniques 9, 10, and 11. above.
17. When editing is completed, go to the “File/Share / File ” to compile the movie to the mp4 file format, select resolution and quality(high).
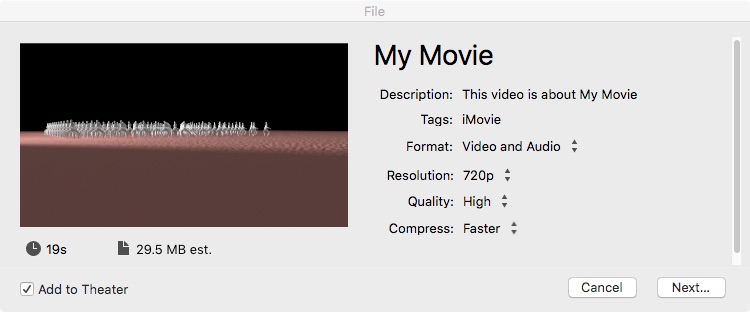
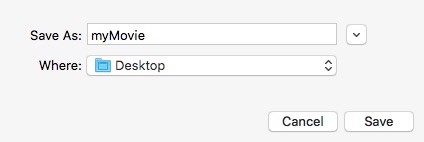
18. Select the “Next” button, name the file, and select the folder where to place it. Note that the mp4 format is automatically created as a result and the suffix “mp4” is added to the file name (e.g. “myMovie.mp4”).
19. Use the Quicktime player to playback the mp4 file to confirm quality.
20. Moving an iMovie from One Computer to Another.
iMovie edit files is portable from one apple Computer to another; hoever, the process is slighlty more complex than saving a single file. The details here are excerpted from Apple’s web site . https://support.apple.com/en-us/HT203049.
iMovie libraries should not be placed in a folder that syncs with online storage services such as iCloud Drive, Dropbox, or Google Drive, as this can damage some libraries. Before you move iMovie library, it’s a good idea to back it up. Learn how in Mac Basics: Time Machine backs up your Mac.
To vove your library, the steps are as follows:
- Quit iMovie.
- In the Finder, choose Go > Home.
- Open the Movies folder. Locate the iMovie Library file.
- Drag the iMovie Library file to your external drive or a new location on your computer.
- Double-click the library file to open it.
PART II: PHOTOSHOP EDITING, COMPILING STILL IMAGES INTO SINGLE MOVIE FILE FORMAT AND CODECS
1. Launch the Photoshop software. Use the Photoshop menu to Open the first image of the image frame sequence and with the open file diagog box selected the check-box for “Image Sequence”.

2. Set the frame rate, such as 30 frames per second in the dialog box that follows.

3. Open the timeline tab at the bottom of Photobhop and the video track will appear just below with standard play icons.
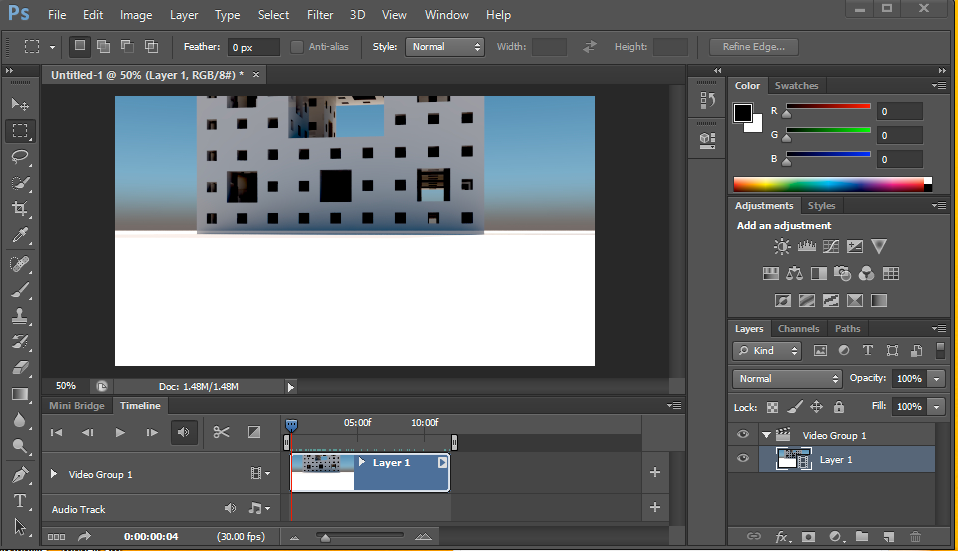
4. Optionally, continue to import frame sequences in Photoshop as separate image files
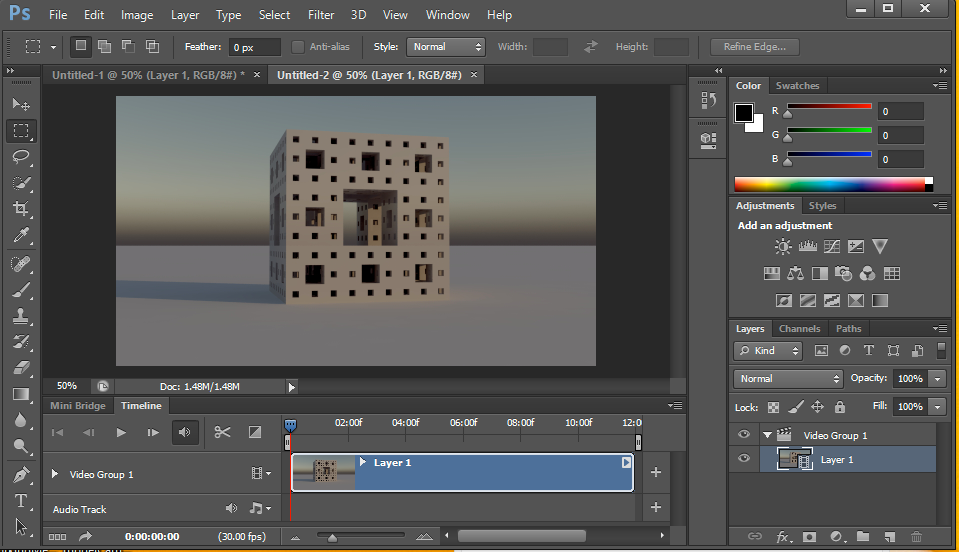
5. Chose “Video Group 1” on the left of the video track, and then the Photoshop the menu item sequence “Select/Select All”, to copy the track.
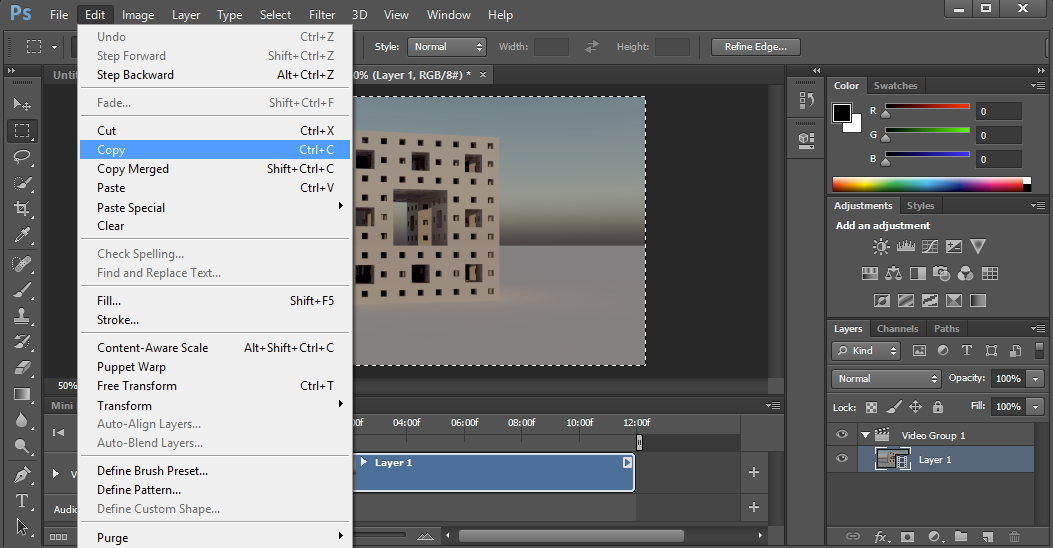
6. Use the Photoshop menu “Edit/Paste” the second video track onto the right side of the first video track used for the first import sequence in order to created the two videos in sequence. Repeat this process for any additional sequences you wish to add to the video track.
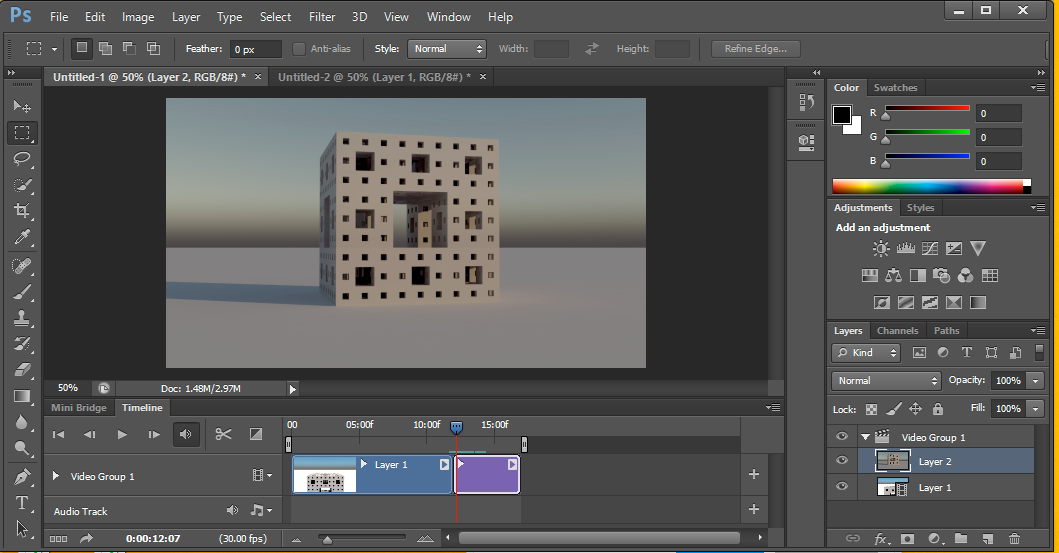
7. Use the menu item :File/Export/Rendered” to render video to a single file “mp4” video movie format (or alternative format).
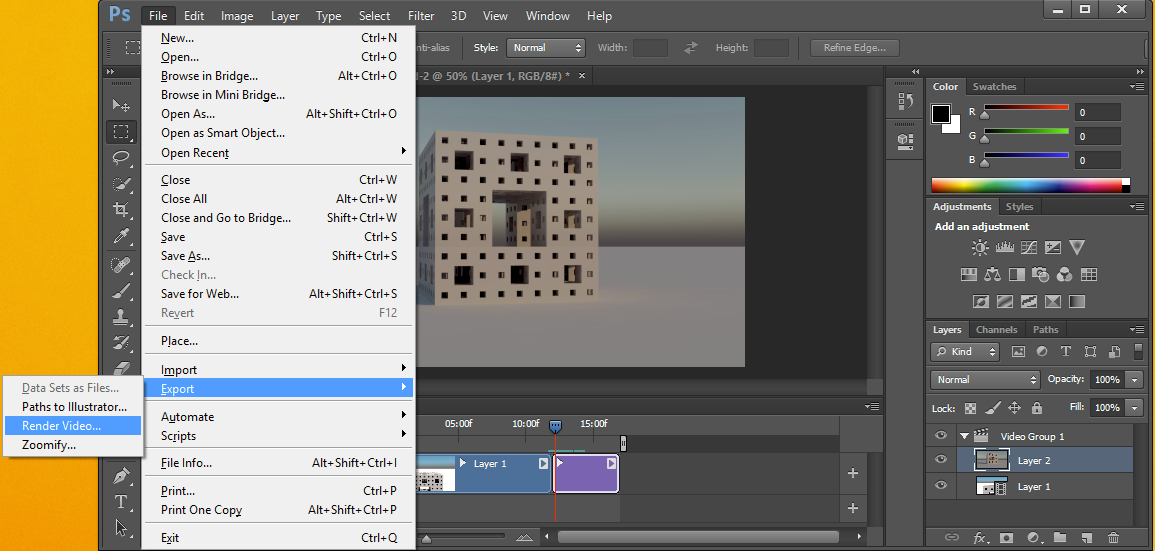
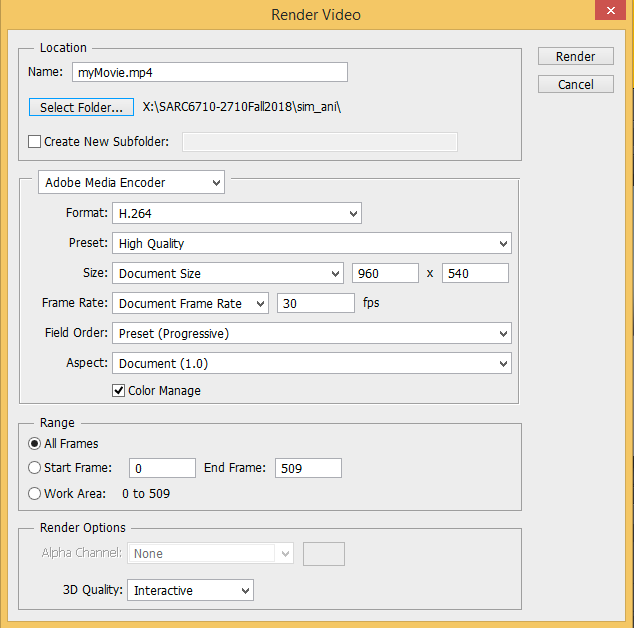
8. With the file formatting dialog box that appears, select the export location folder and choose a filename with the “mp4” format extension. The other presets in the “Render Video” below are recommended, including Format “H.264” and the Present “High Quality”. The Document Size of “960 x 540” should be the same resolution as the original renderings. Select the “Render” button in the right hand corner to compile the “mp4” video. A “Progress” window will graphically display the progress towards completing the compilation.
9. The video can now be viewed within any number of standard video players on Windows or Mac OS, such as the Windows VLC Player.

Note that other video editing options are available. Adobe Premiere is availalble on Windows OS in Campbell 105 and Campbell 107. Quicktime Pro is also available in these rooms on Mac OS. These tools are beyond the scope of this tutorial, but may be easier to work with for those already familiar with them.
PART III: QUICKTIME EDITING, FILE FORMATS AND CODECS
Note: These techniques are depreciated on the Windows OS. They require the use of QuickTime Pro which is not available on Mac OS computers within Lawrence Hall at the University of Oregon.
Quicktime Editing and Compiling. Workshop is based upon the following password protected quicktime docs:
1. Import Image Sequence (p. 28)
2. Exporting Movie (p. 43 – 45)
3. Exporting to Mpeg 4 (p. 48)