Working with the Timeline
To begin editing, you must create a Sequence (which will open in the Timeline window). You can have multiple Sequences (e.g., for backups, individual scenes, etc.), so give each a descriptive name. When you create a new Sequence, remember to change the presets to match the video format. If you are not sure what your video settings are, open your media in QuickTime Player. Use the Inspector to check the frame rate, as well as the format and resolution. If these settings do not match, it can cause problems during editing.
After you create a new Sequence, you can rename it, or create a folder to organize all your Sequences if you are working with multiple.
After you import and organize the files, you can then bring them down to your Timeline. One method is to simply click on the file and drag it into the Timeline area. This will bring down the entire contents of the media clip that you selected (e.g. video and audio together if the media includes those).
Another method of laying your media on the Timeline is to double-click on the clip in the Project tab. It will then open in the Source window, just to the left of the Program window. In this window you can preview the clips and “pre-edit” them by using In and Out Points. In (I) and Out (O) points allow you to designate a certain starting point for the clip, and specify a stopping point. After selecting the portion of the clip you will be working with, you can then click and drag the frame onto the Timeline and begin editing. Both methods of placing media onto the Timeline work and are efficient, but one just has an additional step, and the other would require more use of the Razor or Trim tools to edit out unwanted parts of the clip.
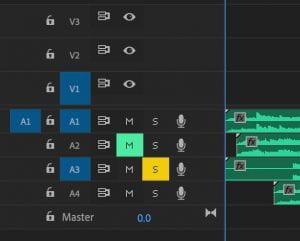
In the Timeline, you have different tracks for both video and audio, and can have multiple tracks of each type. If you only want to hear certain audio tracks while editing, you can Mute audio tracks by clicking the M icon on the left-hand side of the Timeline. You can see in the image below that Audio Track #2 has been muted. You can also Solo audio tracks (by clicking the S icon) when you want to mute all tracks but one. In the image below, Audio Track #3 will be the only audible track during playback.
While all the audio tracks will play simultaneously if not muted, only the V1 video track will be visible (though you can use effects such as split screen or transparencies to display more than one video track at a time).
After you place the files onto your Timeline, the next step is to begin the real editing process.
Basic Editing tools
The tools you will be using can be accessed from the toolbar menu on the side of the Timeline window.
Selection Tool (V). Allows you to select clips, shorten/extend clips, adjust volume within the clip, and more.
Track Select Forward Tool (A). Allows you to select all clips to the right of your cursor. This helps if you need to make room early in the timeline for a new piece of media and need to move the rest of the media.
Ripple Edit Tool (B). When this tool is activated, trimming the beginning or end of clips will affects all clips downstream of the edit.
Razor Tool (C). Allows you to carve up clips. You can use it to remove unnecessary parts at the beginning, middle, or end, or to separate parts of the clip from each other.
Slip Tool (Y). Allows you to “scroll” through the contents of a clip without changing its duration on the timeline. Essentially, you changing the In and Out marks of the clip (but not its length).
Pen Tool (P). Mainly used to create Keyframes, which allow you to manipulate variables that can change over time within a clip, such as Opacity or Audio Level. To add a Keyframe, click on the horizontal line in the middle of an audio clip. After you have created 2+ Keyframes at different points, you can manipulate their positions on the track to create video transitions or to smoothly fade audio in and out.
Hand Tool (H). Allows you to select a clip, and move it around the Timeline without making edits to it.
Type Tool (T). Allows you to quickly add text to your sequence. Simply draw a text box over the frame in the Playback Window. Edits can be made to the text in the Effect Control panel which is explained below.
Basic editing effects
Effects can used to make videos flow better, look better, or be more interesting in general. To navigate to the Effects Workspace, click Effects in the top center of the window. These workspaces change the type and layout of panels on the screen. Edits are made in the Editing Workspace which is the default workspace when opening Premiere Pro.
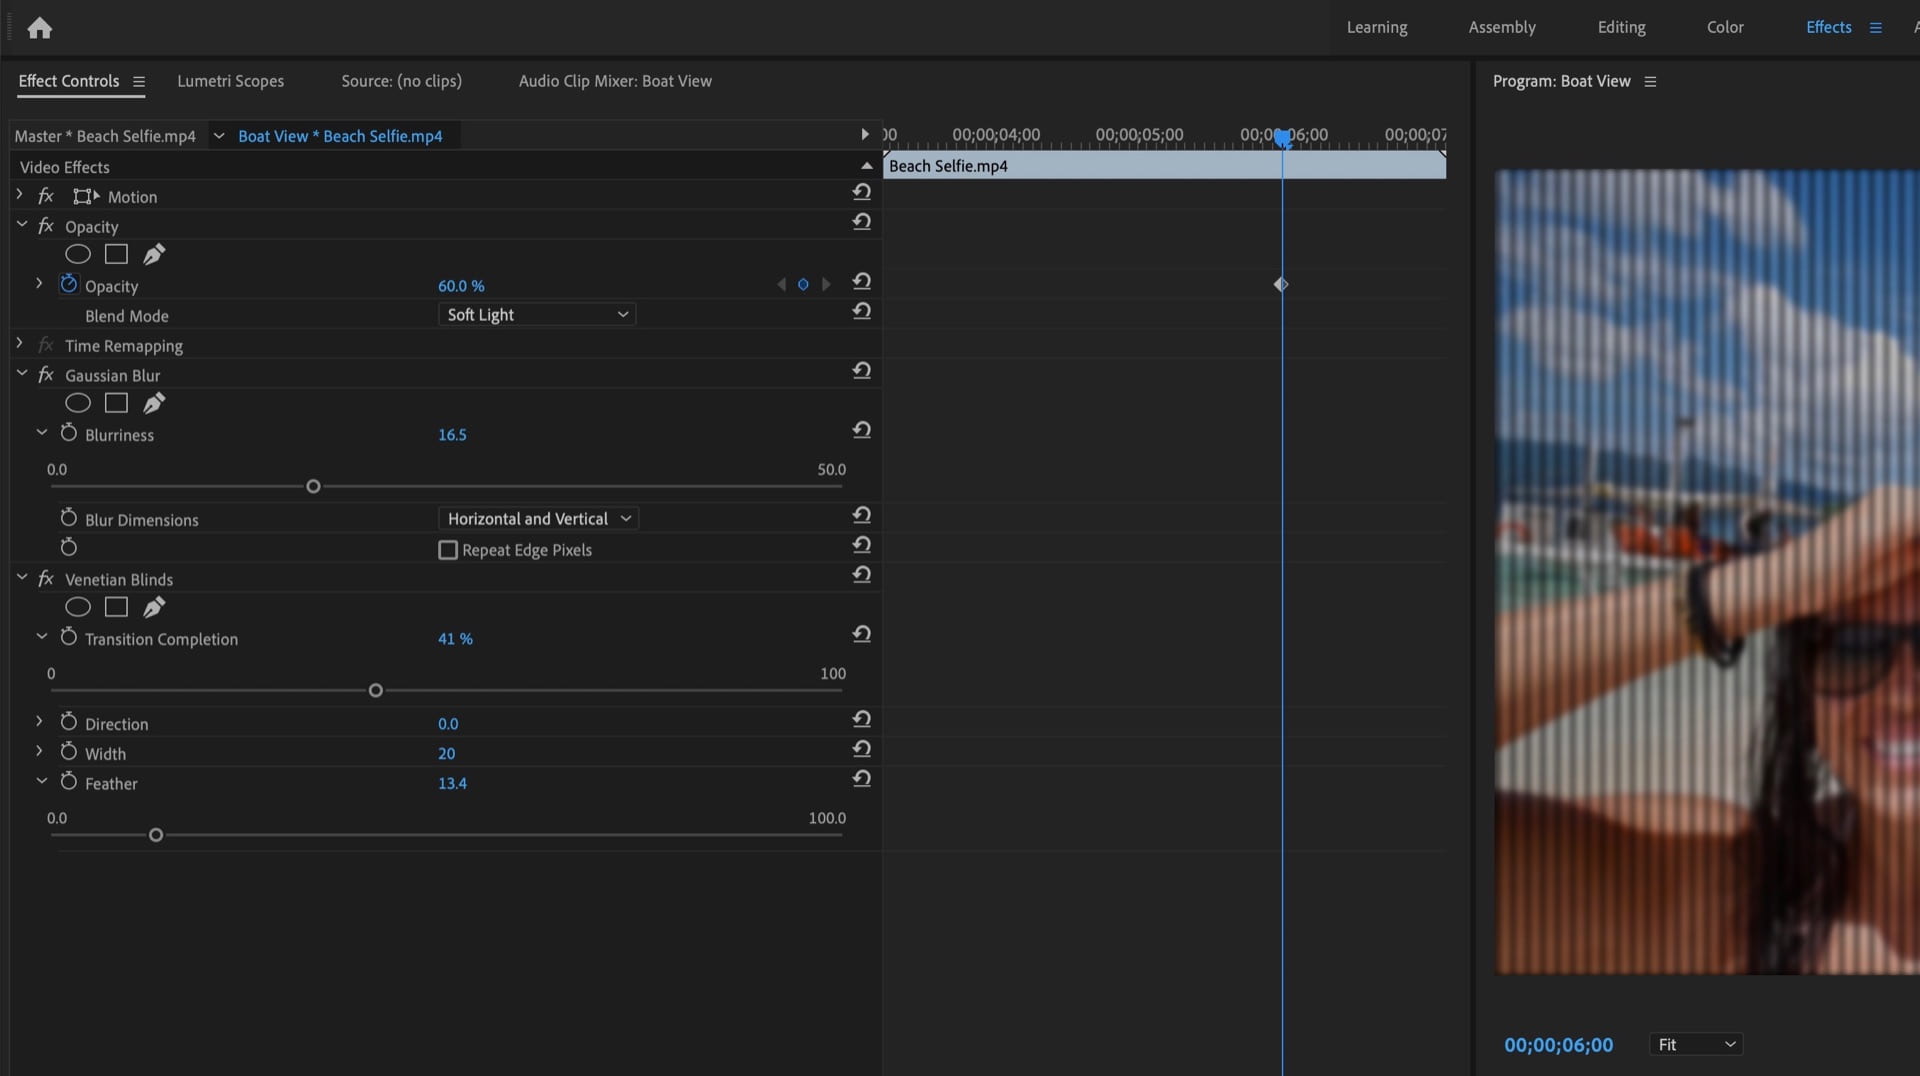
Three basic yet useful effects are Opacity, Blur/Sharpen, and Transitions. These Effects and others can be applied by dragging an Effect from the Effects panel onto the target clip, or by adjusting the clips properties via the Effects Controls panel.
Decreasing the Opacity makes your video more transparent. To use this effect, select your target clip, then go to the Effects Controls panel (located in the upper left corner by default). You can adjust the percentage of the effect by either dragging or typing the percentage next to the effect name.
Blur can be used to blur certain sections of your video for dramatic effect. There are many different blur types to choose from in the Effects panel (e.g, a Gaussian Blur). A variety of Sharpening effects are also located in the Effects panel (located in the upper right corner by default).
Transitions can be used to make cuts between scenes much smoother, such as when there are large jumps in time or space. A variety of audio and video transitions can be found in the Effects panel.
When working on the timeline it can be hard to see what you are working on. On the left side of the timeline, there are scroll bars to move up and down through tracks but the circles on either end work to enlarge or minimize the tracks to make them larger. Grab and drag a up or down to enlarge or minimize. This helps when using the pen tool for creating keyframes.
The same can be done for the length of the timeline when working with media. Using the same circles but on the scroll bar below the timeline, you can zoom in or out of the timeline to make small or large edits. Grab and drag to the left or right to zoom in or out.


