Getting Started
This is the first window you will see after opening Adobe Premiere Pro CC. You can either select a previous project, or start a new one.
Note: Click on any image to open it in a new tab at a higher resolution.
If you select New Project, a Project Settings window will appear. Make sure to save your project and the Captured Video/Audio, Video/Audio Previews, etc. to a permanent location (i.e., an external hard drive). The quickest way to do this is to change the Project Save Location at the top left of the below image by clicking Project Location, then Choose Location, and then choosing your external hard drive. Then make sure to set the locations for all scratch desks to “Same as Project.” Never save your project to the internal drive of a lab computer or your user locations (i.e. desktop or documents folder) as all the information will be wiped when you log out. Finally, make sure to give your project a descriptive name before selecting OK.
After creating a new Project, you can create a new Sequence (⌘N). You can change your Sequence settings later, but at this stage it is best to select settings that most closely match the format of the video that you recorded. If you’re not sure what your settings were, you can check the camera you used, or open one of your videos in QuickTime Player and use the Movie Inspector window to see the format, resolution, and frame rate information.
Importing files
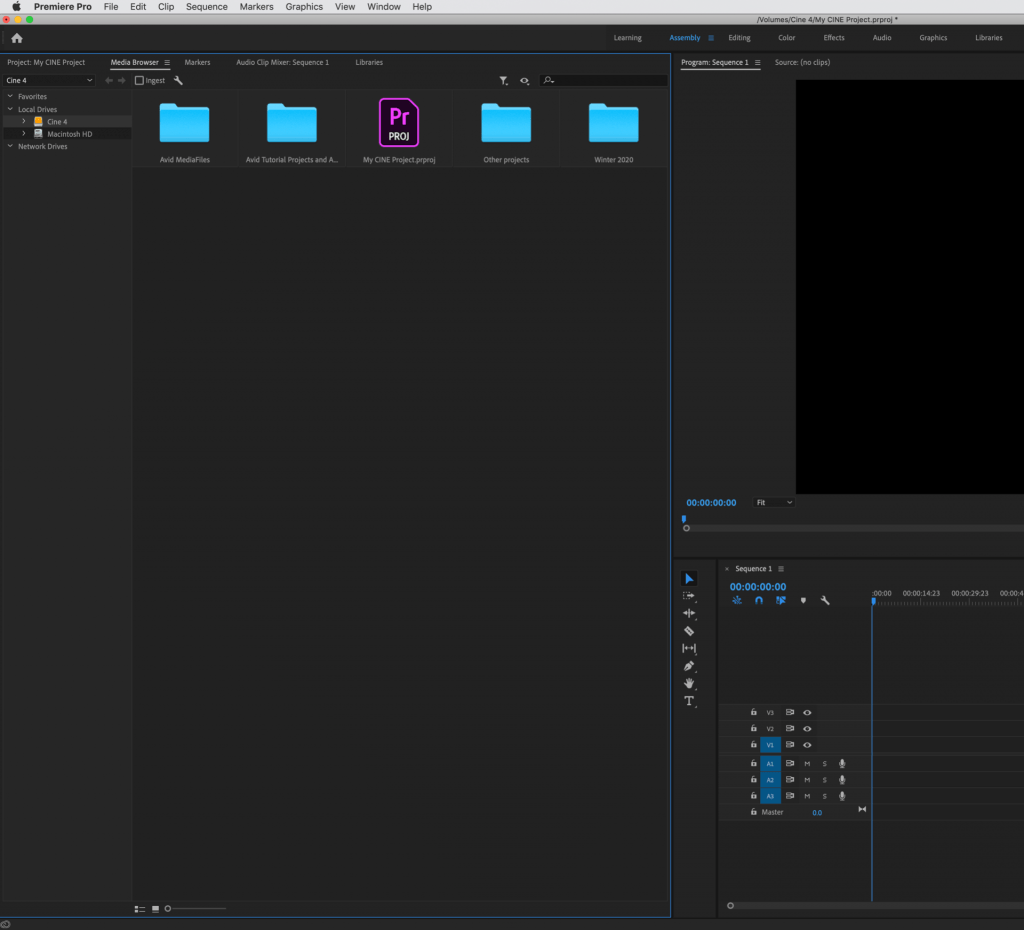
In Adobe Premiere, there are a few ways to import media files. You can select Import via the File menu (⌘I), or navigate to location of your media via the Media Browser.
If your media files are already on your external hard drive, then either of these options work and you can import them into Premiere. The files will remain in place on your hard drive, but they will now be accessible through the Project tab in Premiere.
If your media files are still on your camera or SD card, then you MUST copy them over to your external hard drive first. Depending on the type of camera, and the settings you used when recording, your files may be on the top level of the card as .mp4 or .mov files, or within a Private folder on the SD card. In either case, it is best to copy the entire contents of the SD card to an external hard drive before importing. We recommend copying it to a specific folder on your hard drive with a descriptive/unique name, so you don’t lose track of your media. For more information about working with media from SD cards, see this page on effective file management workflow.
Once your media is copied over, you can begin importing as usual.
Once imported, the file will show up in the Project tab (on the left-hand side by default). Make sure to rename the files you import with a specific name, so that they are easily recognizable. This will also help you stay organized. You can also create folders (called Bins in Premiere) that can help you further organize your media by shoot date, media type, quality, or any other parameters that are relevant for your project.
Advanced Selection and Review Tools
Here is a brief list of additional techniques and tools you can use to review and select your media.
Bins – All media and assets including your sequences should be stored and organized in bins in the Project window. Bins can be created for multiple purposes; some of the most important are by type of media and by scene or character.
In and Out Points – Within a clip in and out points allow you to select a section of the clip to bring down to your Sequence or to create a sub clip to further organize and sort your media in your bins.
Sub Clips – Sub Clips are small sections from larger clips that can be independently organized in the Project window or Bins. They can be created and stored in bins by selecting a range from a clip in the Source Viewer using in and out points and creating a Sub Clip from the Clip Menu. Sub Clips can then be sorted and organized separately from their Master Clips. They can be especially useful when taken from very long Master Clips like a long interview.
Markers – Markers can be added to clips in the Source Viewer or in the Timeline. They allow you to tag a specific frame or clip with a note. This can be useful both to add more information about a specific clip or part of a clip, and also to mark something that needs to be fixed or edited later.
Search Bins – These can be created in the Project Window by clicking on the folder icon with a magnifying glass. This will create a bin that will stay updated to match your criteria. This can be useful if you sorted your media by scene, but would like a bin that contains all of the close ups or all of the shots of a certain character. If you add a note about the type of shot or character on a clip in the log notes or description columns you can then search by that to populate the Search Bin.


