Now that you have organized your media, created a rough cut, and created a refined edit, it is time to export your work.
For more information on codecs and file types, you can see our pages on Recording/Exporting Standards.
1. Share Project Button. Allows you to choose how to share or export your current project. You can also use the Range Selector tool to choose a smaller part of your project to export. Your most frequently used option from this menu will be Master File, but DVD, Youtube, and Vimeo are also useful. By clicking Add Destination, you can also access many other options through the Compressor Engine.
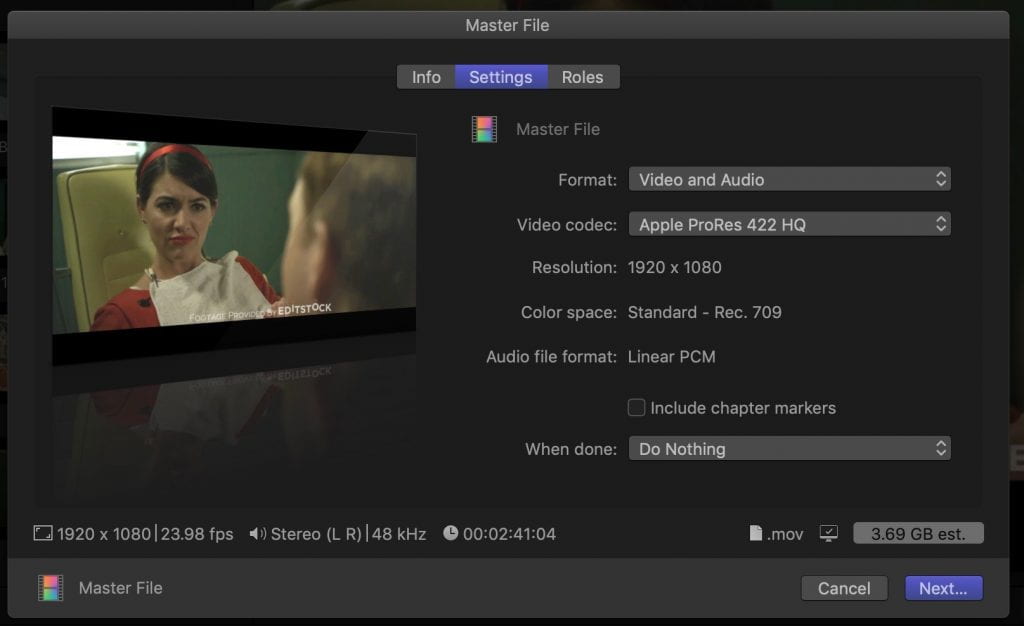
2. Master File: Info. Allows you to view the duration, file type, resolution, frame rate, and final file size of your export.
3. Master File: Settings. This tab allows you to choose to export video, audio, or both, and to adjust the codec. The primary choices are H.264 and Apple ProRes 422. Typically, H.264 has a smaller file size that is more compressed and ideal for uploading. Apple ProRes 422 has a larger file size and is more suited to a final archival version. Apple ProRes maintains the highest quality, and is the best option for potential editing in the future.
Note: It is not possible to adjust the frame rate or resolution of your video via the export settings. You must change the project format or create a new project if you would like a different frame rate or resolution.
Please make sure to check the exported file’s format, content, and name to confirm that they are all correct, and meet the standards of your class and the specific assignment before you turn it in.
This page was written by Kevin May for the University of Oregon Cinema Studies Department, and is published under Creative Commons license (CC BY NC SA 3.0).


