My creative process began as a chaotic brainstorm of ideas, ranging from creating a unique data visualization of Fibonacci numbers, to filming time-lapse videos of watering plants, to using graphic design tools and 3D printing technology.

After a few weeks of consideration and many sketches later, I settled on the idea of creating a 3D sculpture that incorporates light, mirrors, and (of course) the Fibonacci sequence. I was particularly inspired by Ned Kahn’s “Prism Tunnel” display, which is based on light refraction, and chose to utilize light as a “medium” in my display. Light is symbolic of awareness, and I thought incorporating light into my sculpture would by an interesting way to convey the concept of environmental awareness.
To further integrate the theme of environmental awareness into my display, I decided that I would used recycled/reclaimed materials. By using materials that had been previously used for other purposes, I hope to emphasize the importance of minimizing resource use, and preventing the creation of waste to begin with. Through using recycled materials in my creative display, I minimized my impact on the environment, and was able to create a statement about our materialistic culture that relies heavily on non-renewable resources. I chose to use glass mirror as another medium in my sculpture, because of its highly symbolic nature – mirrors (literally and intellectually) symbolize reflection and personal perception. A mirror reflects whatever it is surrounded by, and it is thus a perfect metaphor for perception and awareness.

Once I had created initial sketches and a blueprint of my sculpture, I gathered the raw materials for my sculpture (most from the local Bring Recycling!): a giant piece of recycled glass mirror, metal nuts, a square piece of marble (for a base), a corded light bulb base, and a mirrored light bulb.
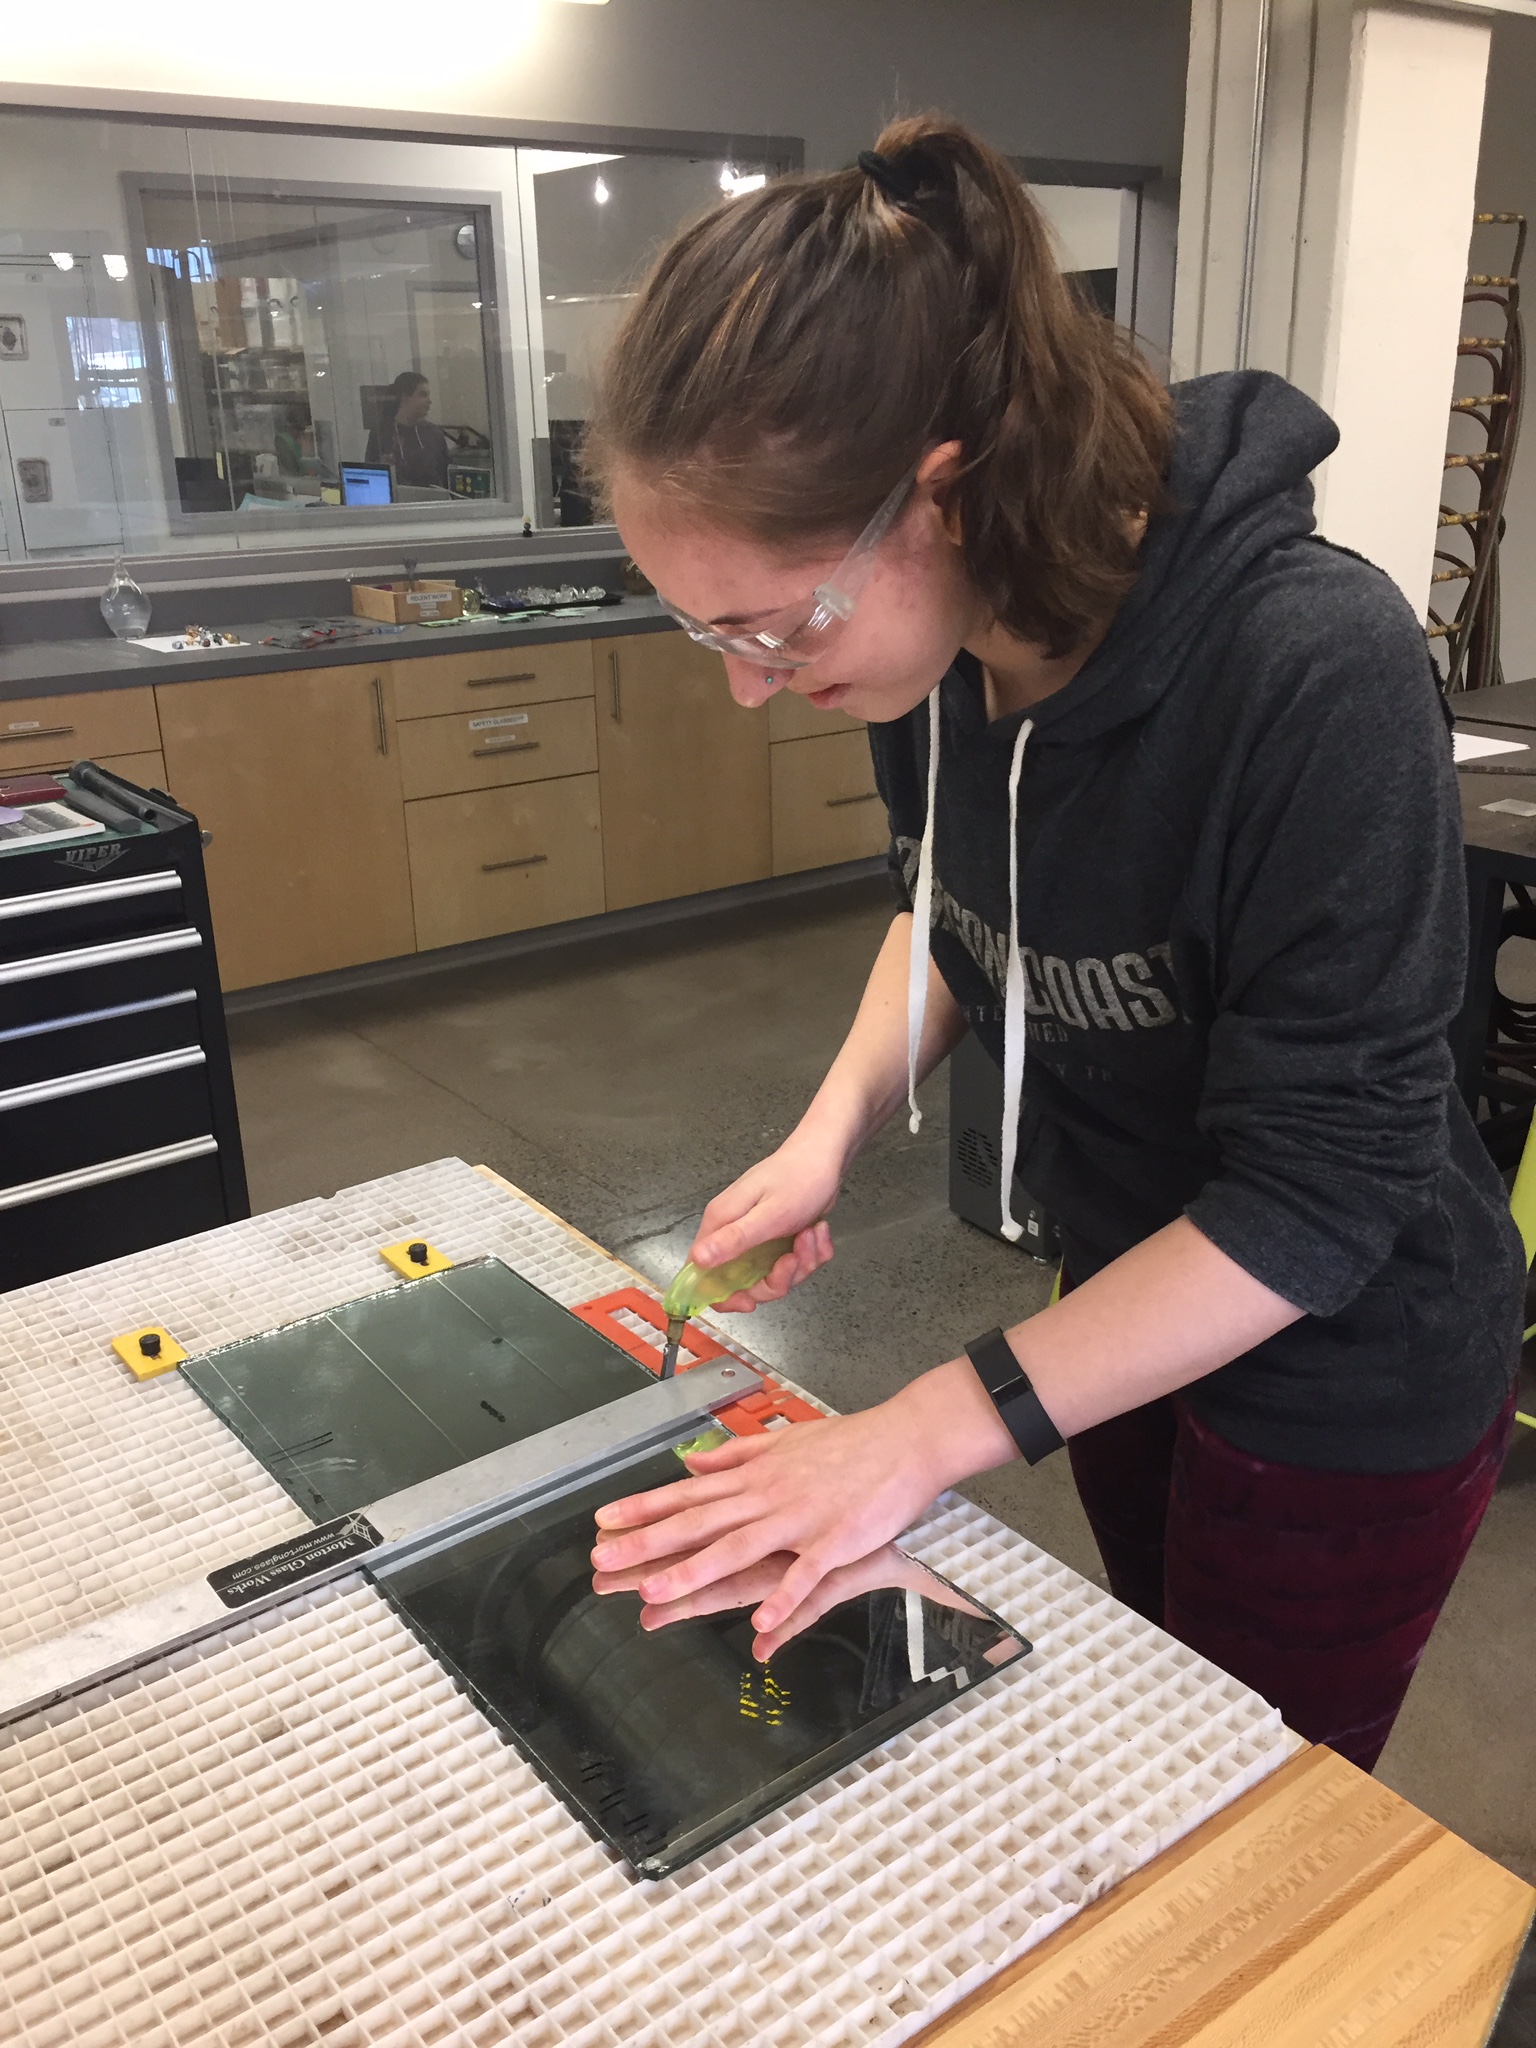
Gathering materials was, by far, the easy part! Next, I brought the mirror to the Craft Center in University of Oregon’s EMU. With the generous help of glass tech Tim Jarvis, and assistant Sarah, I cut the mirror into several pieces, which I later arranged and assembled in my sculpture. I learned so much during this part of the creative process! Tim and Sarah taught me many glass-working skills that were not only important to my project, but also very interesting and useful for future applications. Below are some photos documenting my experience in the glass shop: the process of cutting glass and the skills required to do so.


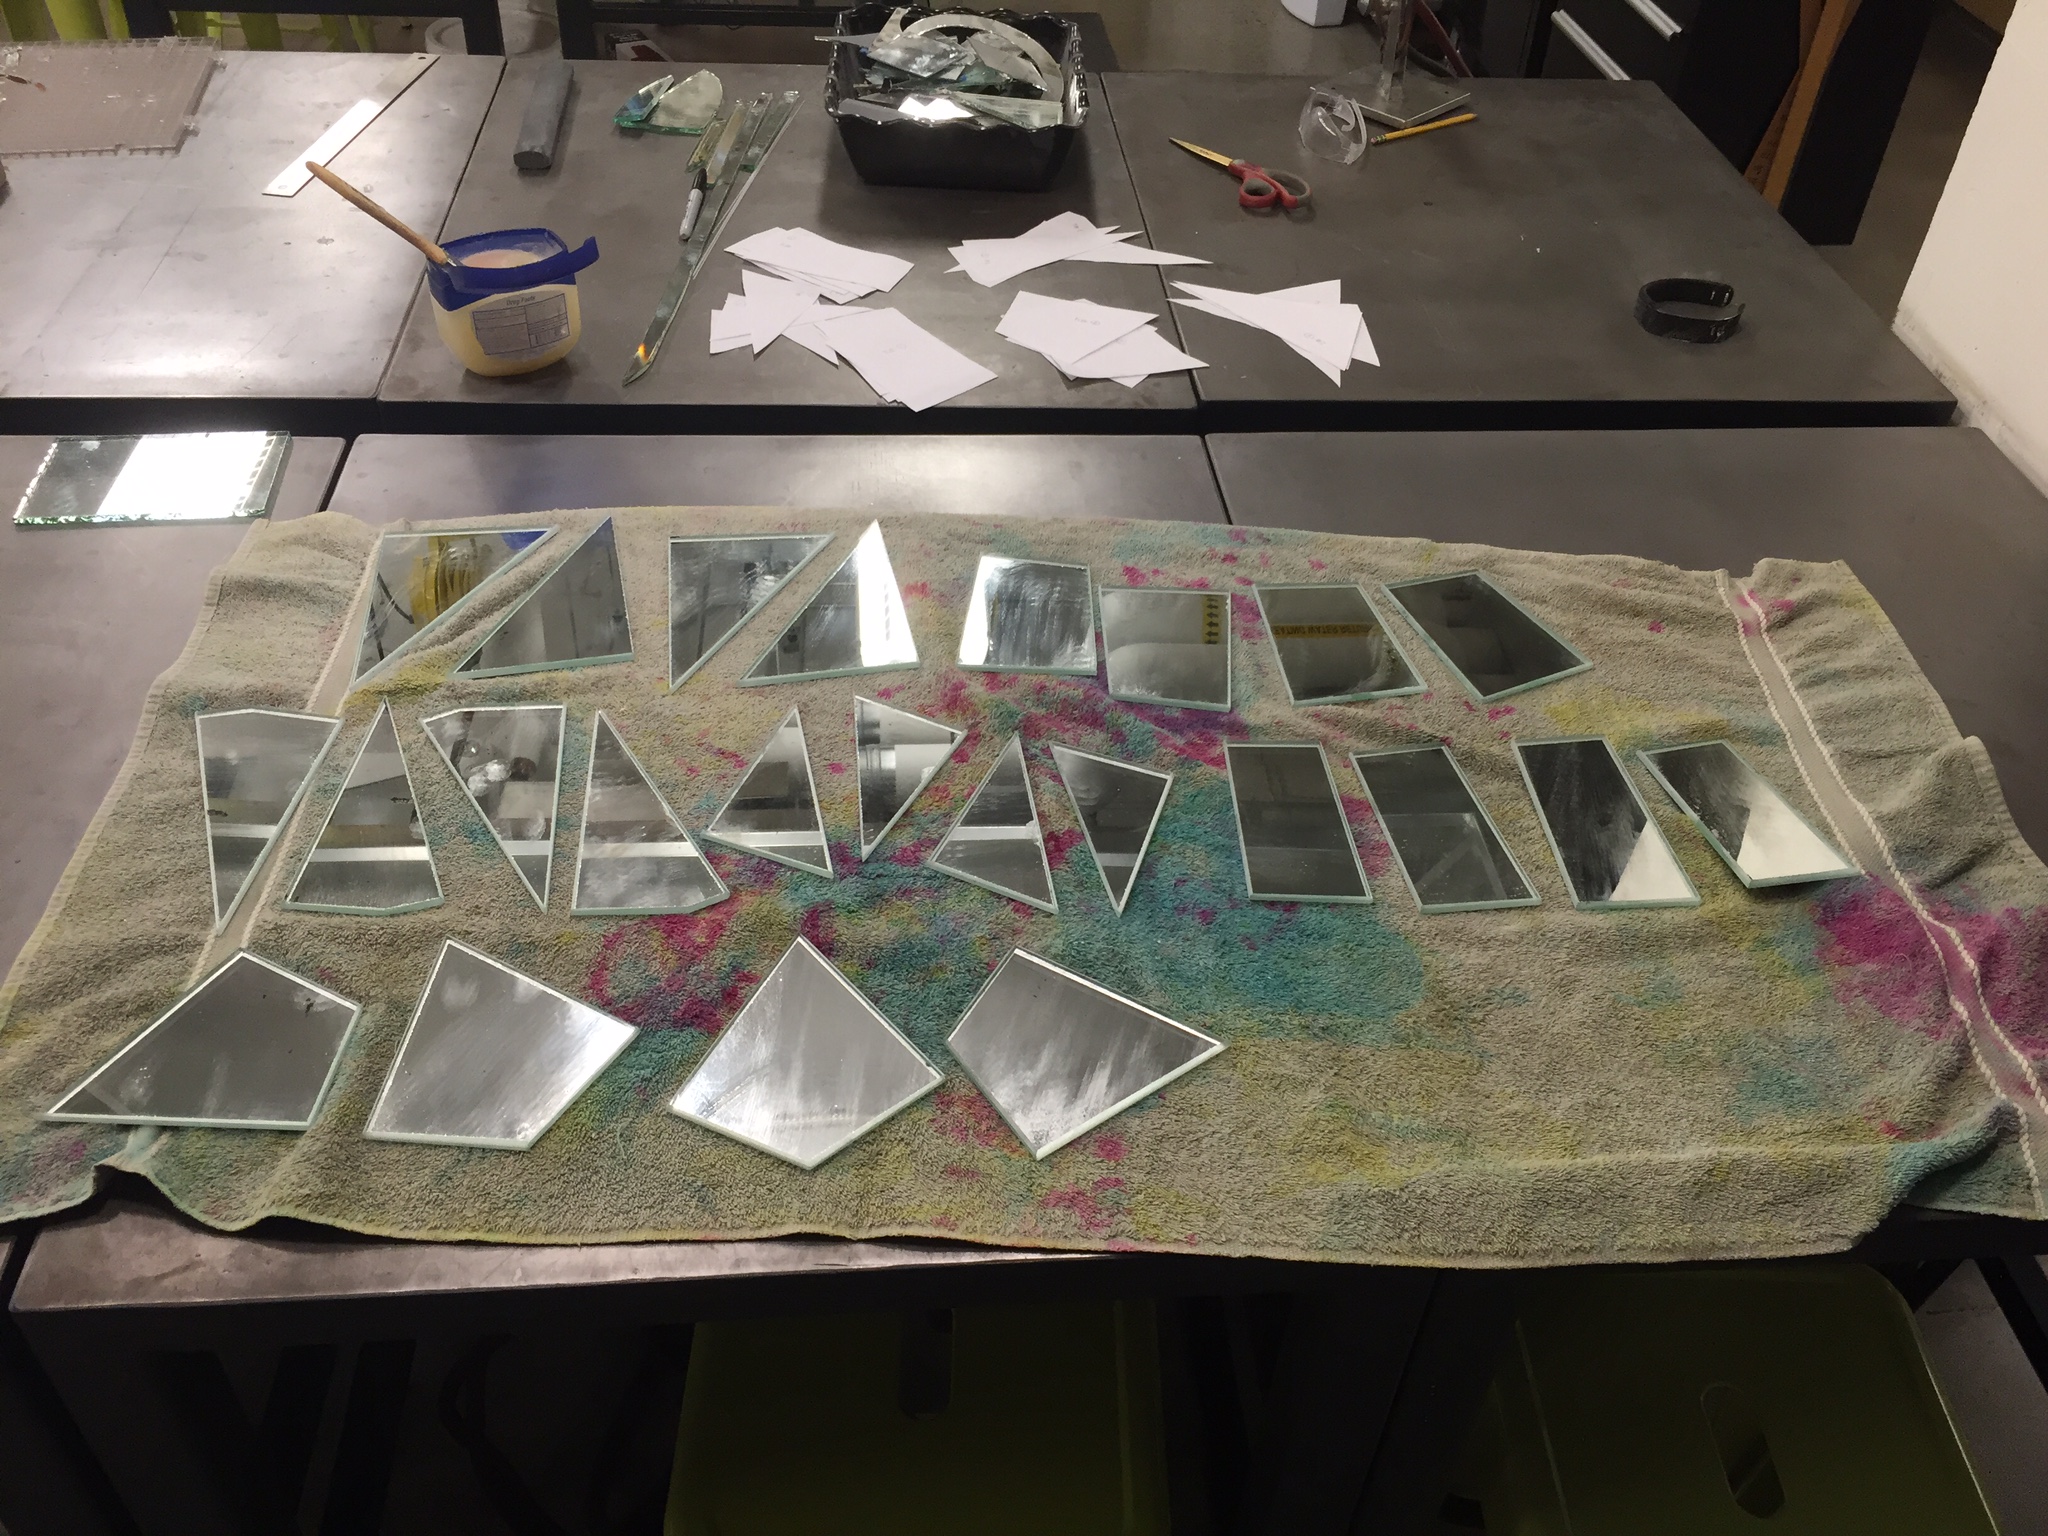

After preparing the pieces of glass mirror, I prepared the base of the sculpture by attaching the light bulb base to the square marble base. To accomplish this, I attached the light bulb base to the inside of a bridge-shaped piece of brass, which effectively holds the light bulb base in an upright position. Then, I adhered this entire mechanism to the center of the marble. After securing the electrical component, I began layering the pieces of mirror, each layer separated by metal nuts for structural support and multi-dimensional aesthetic.


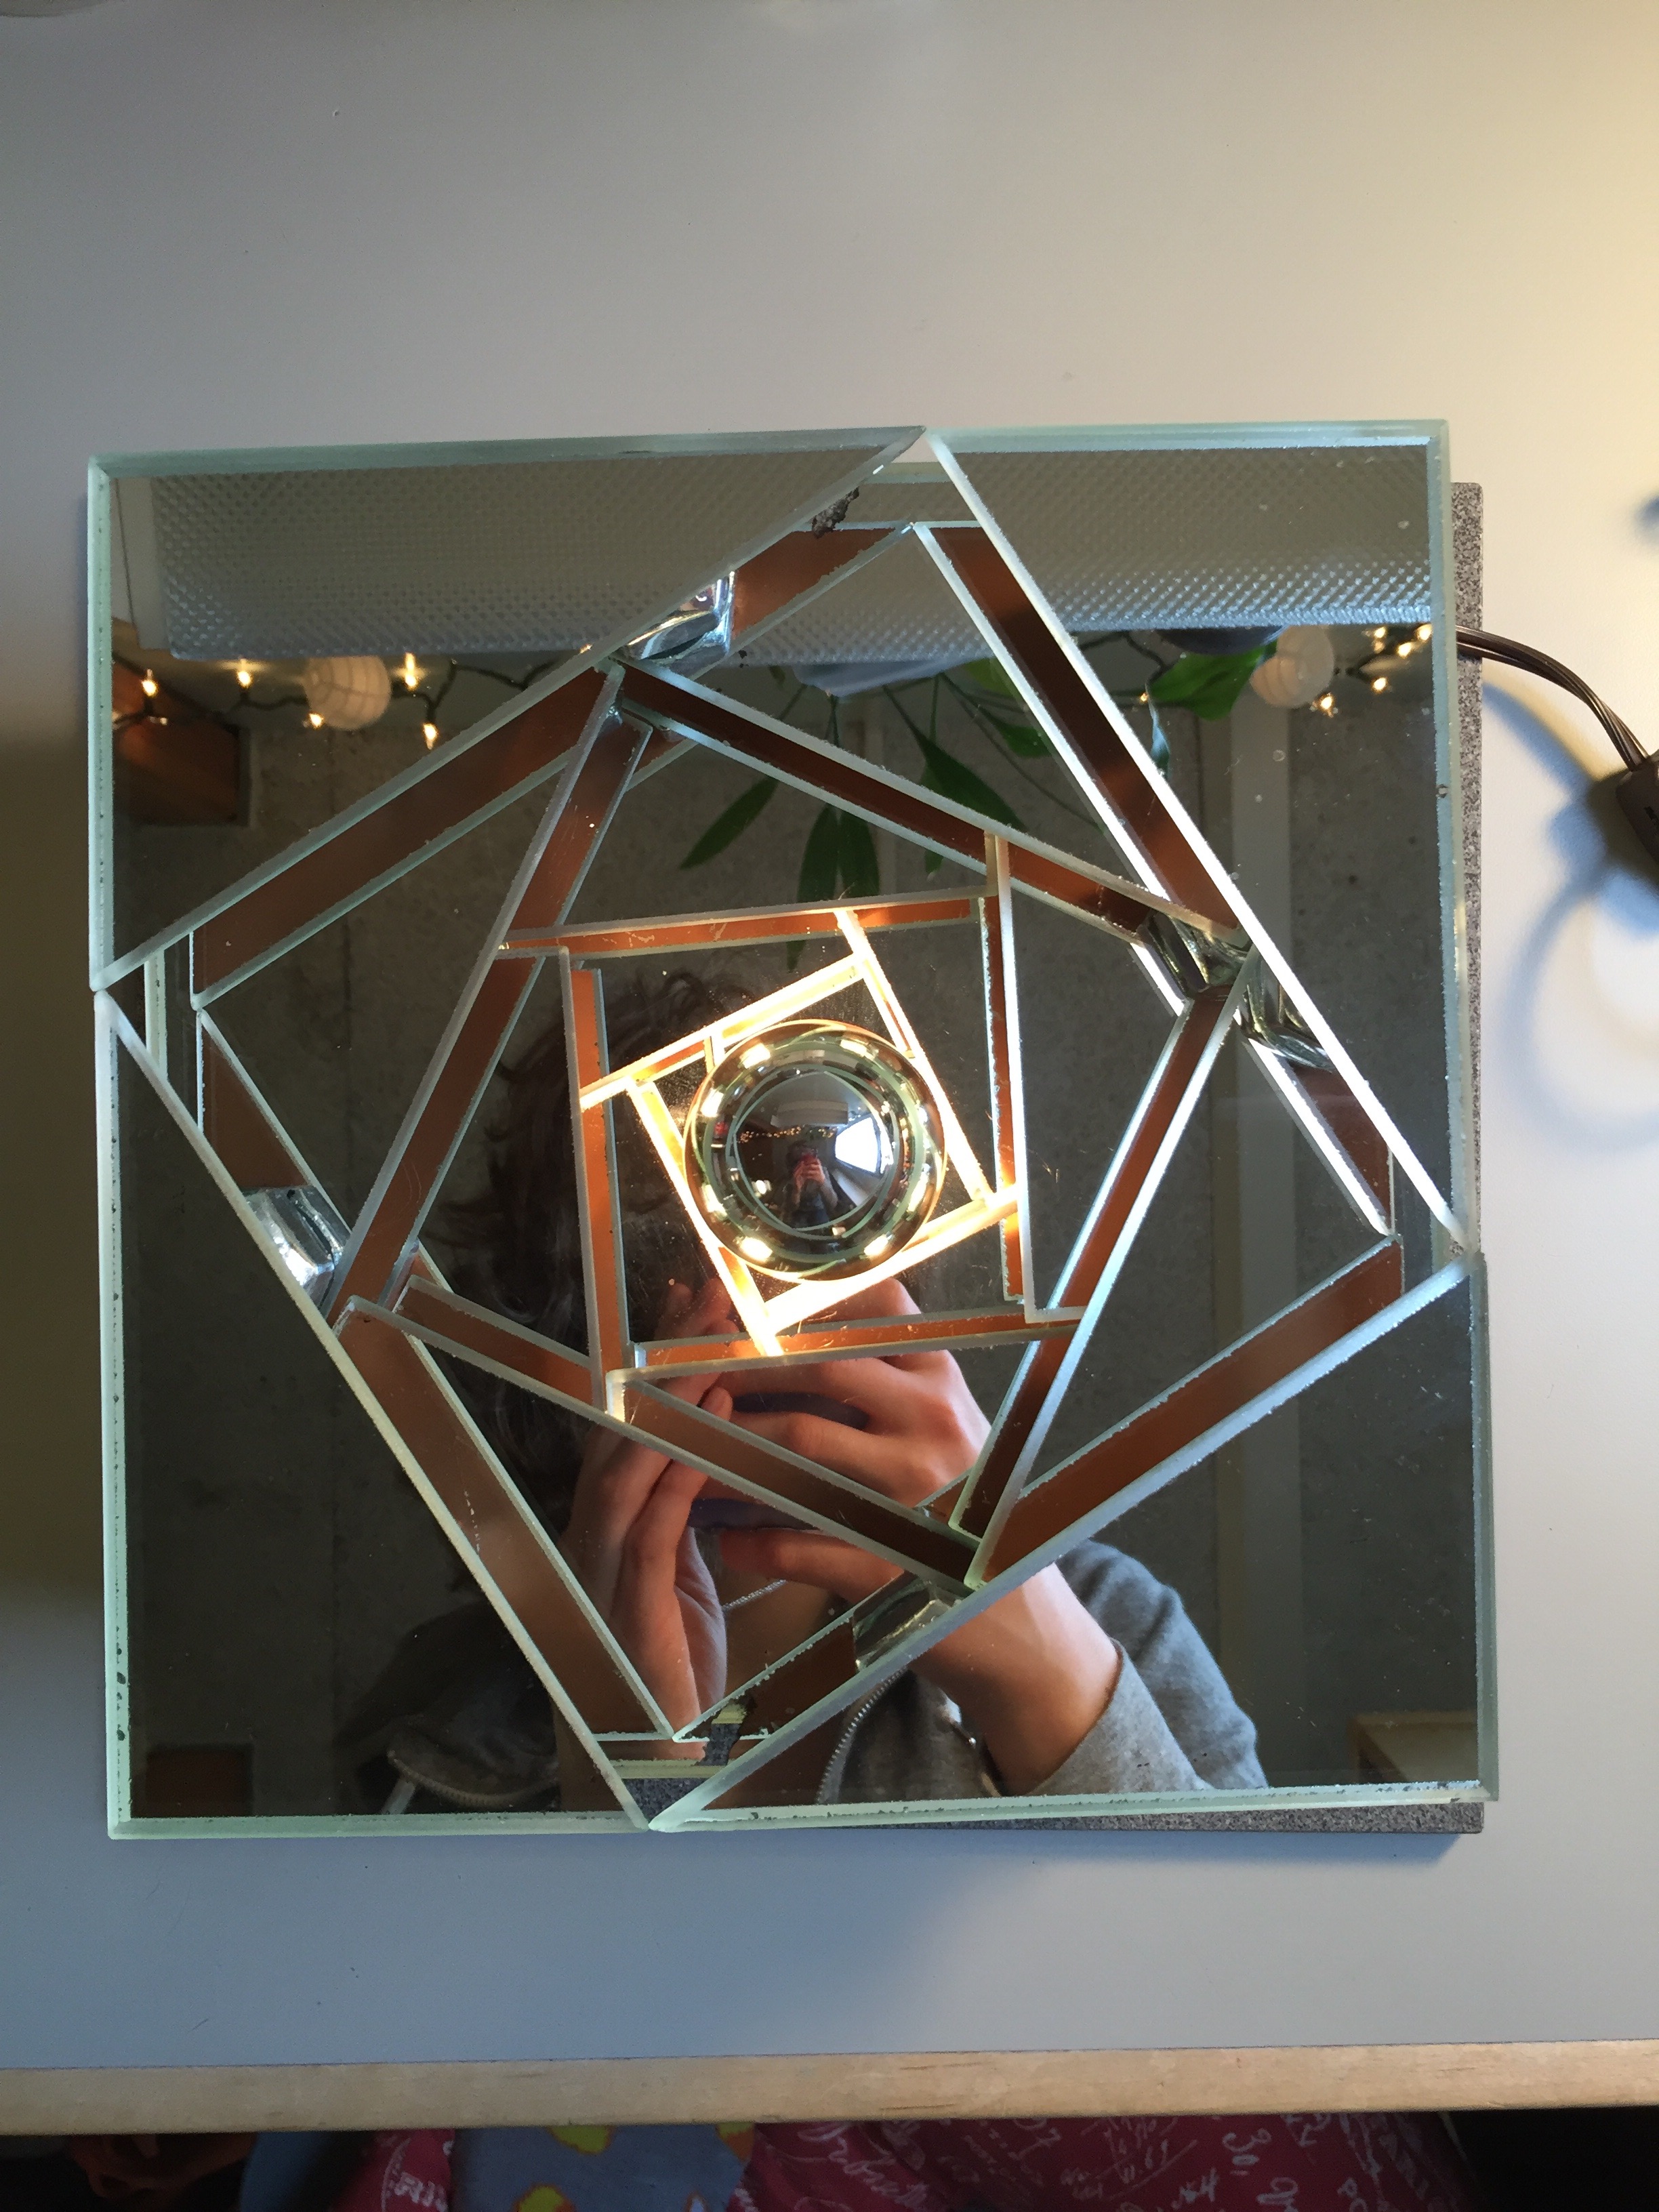
I purposefully designed this sculpture so that it would display a perfect Fibonacci spiral when viewed from the top. In order to do this, I planned out 6 different layers of glass mirror, each layer with a concentric square of space inside the layer. To determine the size and position of the squares, I used the phi (Φ) ratio. Beginning with an initial side length of 21.2 cm, I multiplied this length by the phi ratio (0.618) to obtain a new, smaller length (note: the phi ratio is 1.618, not 0.618. However, because I designed sculpture beginning with the largest measurement, each consecutive measurement had to be smaller than the last, 0.618 times the previous measurement to be exact). Marking this second measurement along each side of the initial square, I then connected the markings, forming a new square inside the original one. Then, by multiplying the new length of the inside square by the phi ratio, I obtained yet another concentric square. Repeating this process 6 times, I ended up with a blueprint that included 6 layers of glass, where each concentric square represented the empty space in a given layer (see the photo of my blueprint near the top of this page).
After more careful measuring and marking, I adhered all of the layers of mirror together, alternating layers of glass with layers of metal bolts. Once all of the layers were properly stacked and adhered, I had to let the industrial adhesive dry for 72 hours! Finally, I put a mirrored light bulb into the centered base, and plugged the cord into an electrical outlet to illuminate the sculpture.
~~~
Below are some photos of the finished creative display.