Liz Charpentier, Arch 5420 Computer Animation & Storytelling , Exercise 2, University of Virginia, 2014.
PART I. POLYGONS WITH EXTRUSION
I.A EXTRUDE A FACE
1. Create/Polygon Primitives/Plane (use the menu “box”)
2. Set subdivisions to 10 along width and 10 along height/Apply
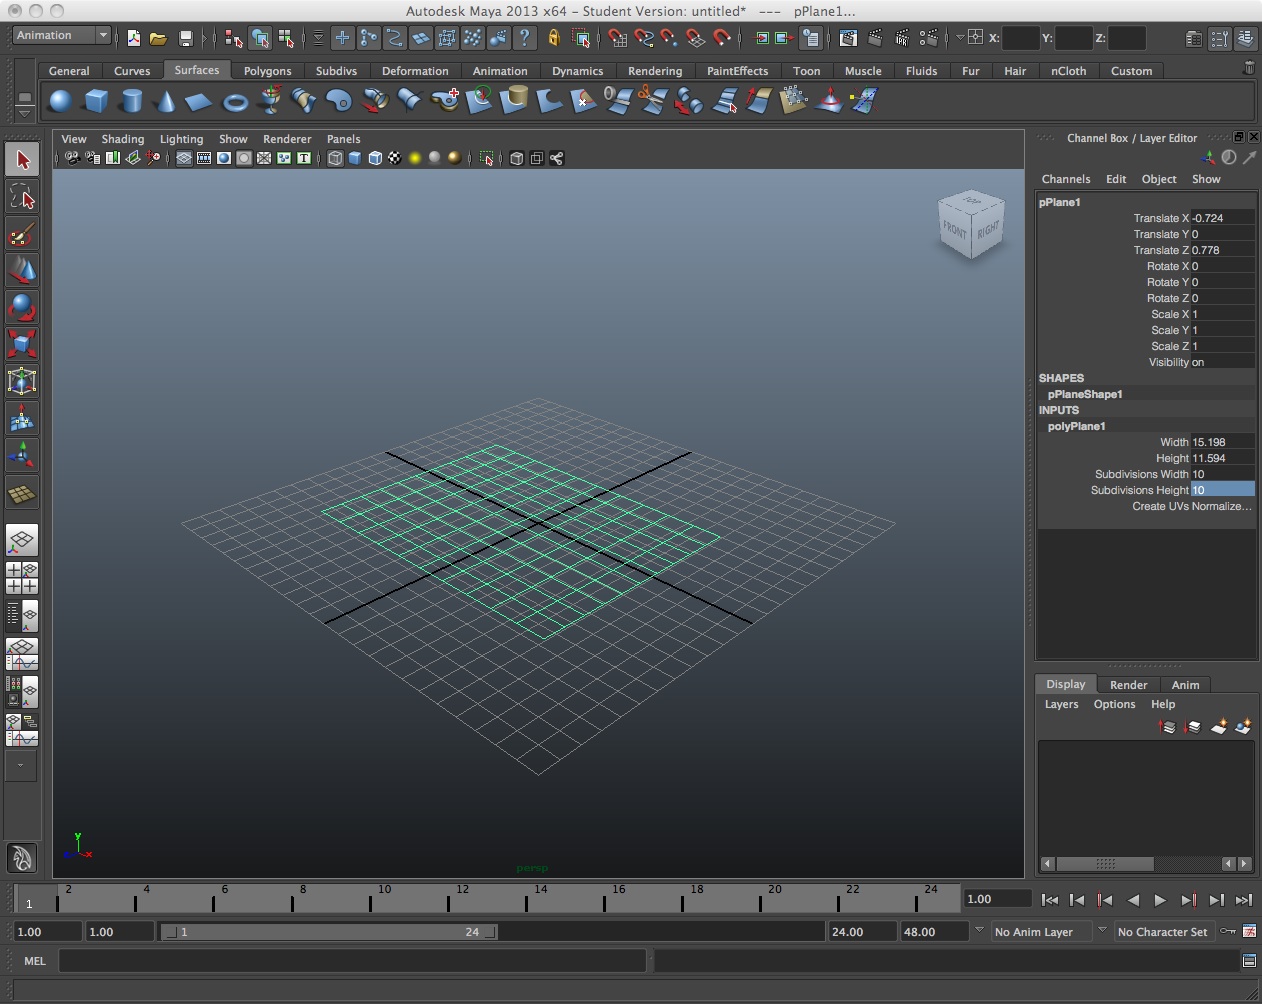
3. Scale the surface
4. Right-click on the surface and select “face”.
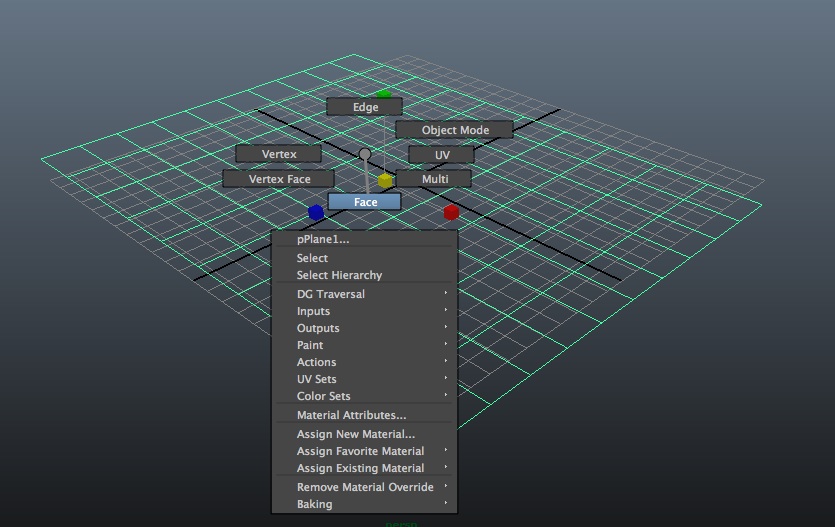
5. Use the select arrow to grab a face.
6. With the surface face still selected/pull out the Edit Mesh Menu
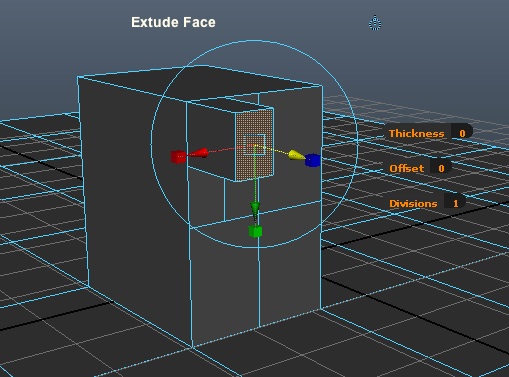
7. Select Edit Mesh/Extrude (use the menu “box”)
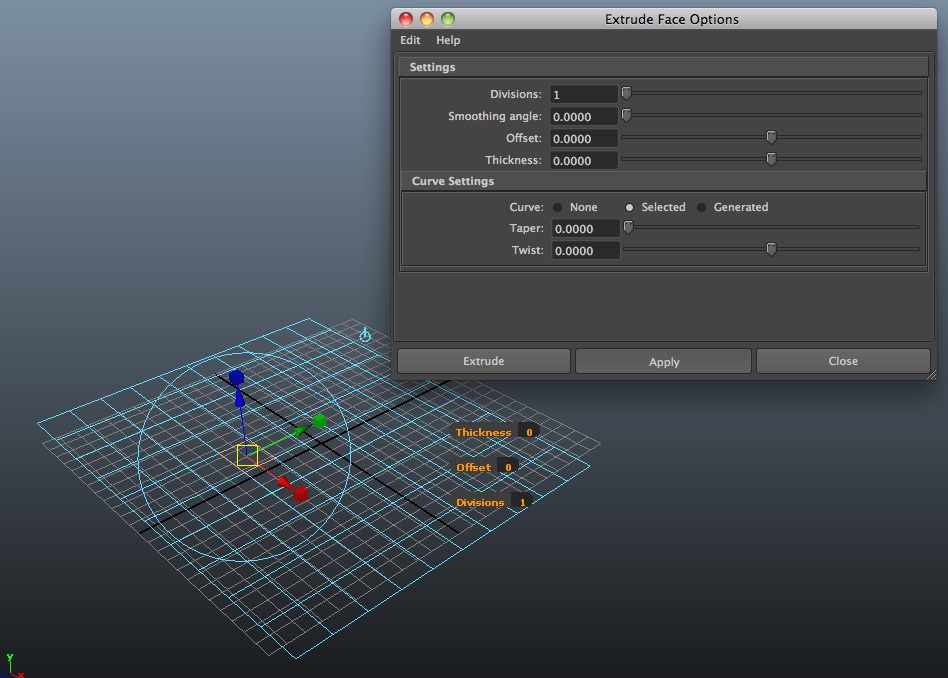
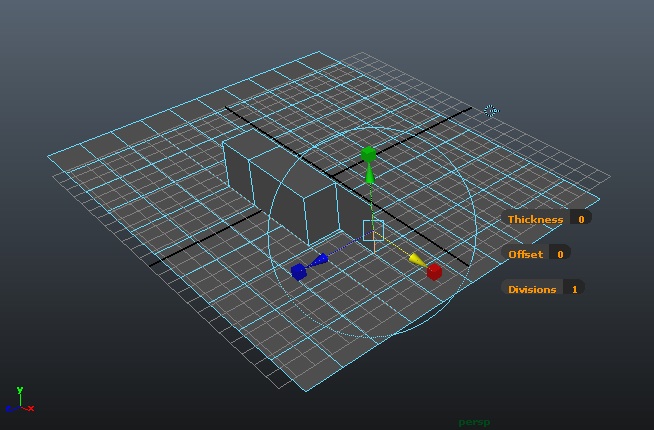
8. Put all settings to “0” except divisions which should be set to 1.
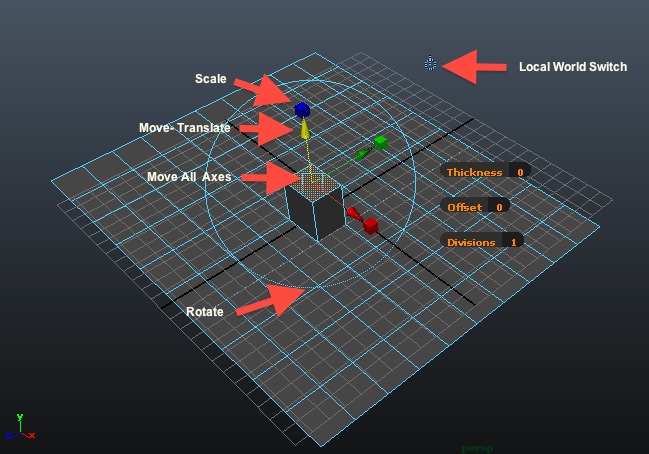
9. Note: World coordinate space option is alternative to local object coordinate space (see Local/World switch toggle icon, round target, that appears when selecting face).
( See also online help documentation for tool)
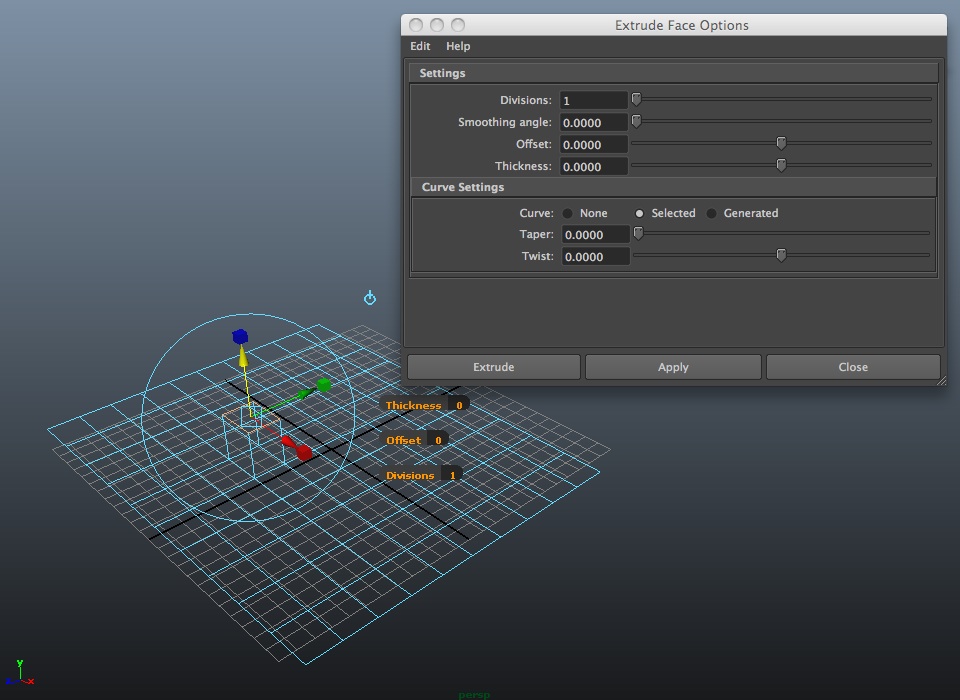
10. On Object select faces.
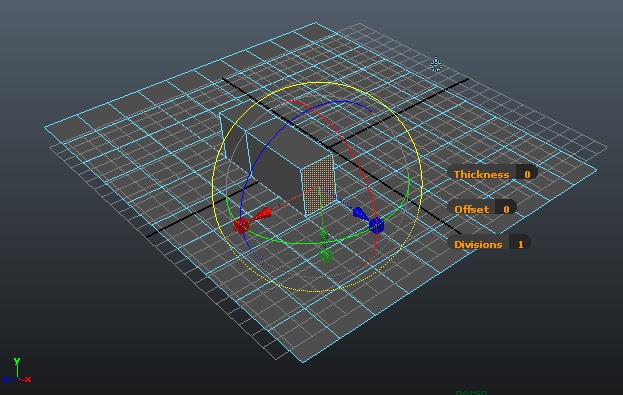
11. Apply individual extrude tool: extrude with arrow, scale face with box
I.B EXTRUDE A FACE ALONG A PATH CURVE
1. Select the edges/or faces you want to extrude and the curve you want to extrude along.
- Select a Face & Choose Edit Mesh > Extrude (to extrude a face)
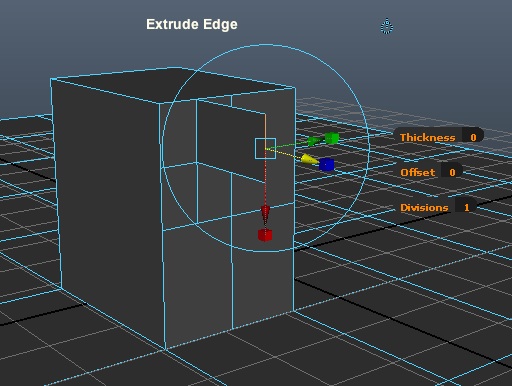
- Select an Edge & Choose Edit Mesh > Extrude (to extrude an edge)
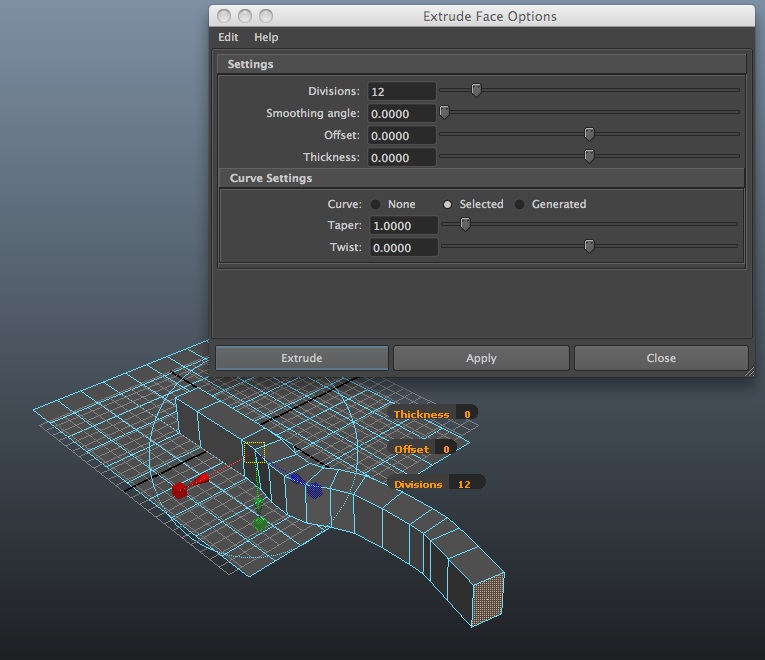
2. To extrude along a curve:
- Choose Edit Mesh > Extrude along with its option toolbox.
- Turn on the Use selected curve for extrusion option.
- Control the # of subdivisions that you want to smooth the extrusion along the curve
- Set the Taper to 1 and othe values to 0
- Select the face and then a curve perpendicular to and at the center of the face.
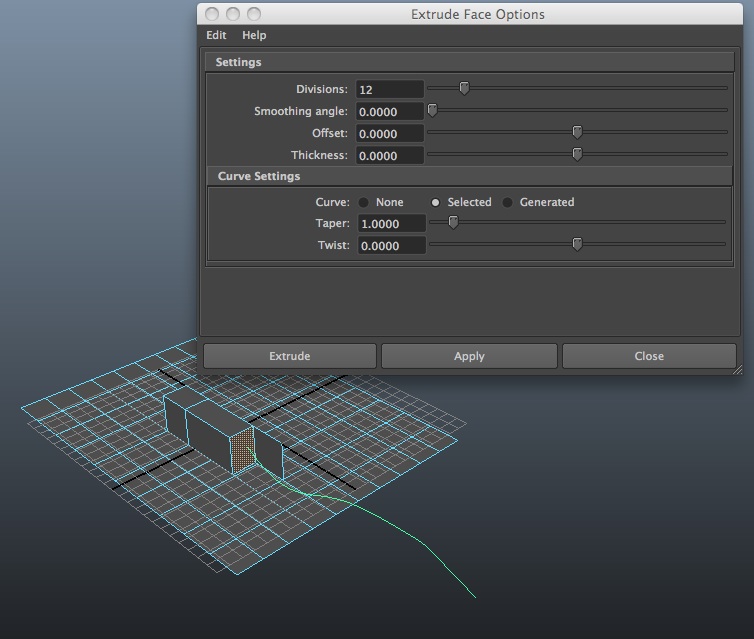
- Click Extrude (to close dialog box) or Apply (to leave dialog box open.
PART II. SUBDIVIDE FACE
-
-
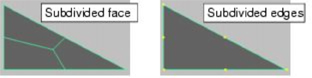
- Select the edges or faces you want to subdivide and choose Edit Mesh > Add Divisions
- Set Mode to triangles or quadrangles.
- Subdivision Level lets you subdivide multiple times. A value of 1 subdivides once. A value of 2 subdivides once and then subdivides each of the new faces again, thus yielding an exponential number of faces. Thus, a face converted to quadrangles subdivided 2 times yields 8 faces, and subdivided 3 times yields 16 faces and so on.
- Click Subdivide.
- Exponential option subdivides in u and v direction for each face selected
- linear option allows you specify subdivisions in u and v direction
-
[Also, You can also select the polySubd node and change the subdivision values and modes in the channel box or attribute editor.]
PART III: CREATE SIMPLE ANIMATION
- Add simple rgb color and transparency to objects.
- Introduce shaders/applying Phong shader to object with primary colors.
- Setup spheres with dynamics falling on deformed surface with gravity – dynamics module/Soft/Rigid Bodies/Create Active Rigid Body
- Use animation module/create deformers/non-linear/bend on base surface for bending in xy plane and zy plane. Add pyramid object from shelf. Apply resistence to both – dynamics module/Soft/Rigid Bodies/Create Passive Rigid Body
- Rendering a Key Frame Animation.
-
- Go Window/Rendering Editors/Render Settings or Select render globals icon.
- Go to Common TAB
- Set Filename prefix to name#.ext
- Set image format to jpg
- Set start frame to 1 and end frame to end of sequence (i.e., 48)
- Set image size to 640 x 480
- Go to Maya Software TAB
- Set quality to intermediate quality
- Go to raytracing tab to turn on check-box for raytracing.
- Go to File/Project/Edit Current menu & review or Edit the project folder to establish the “images” directory for individual rendered frames.
- Select Render/Render Current Frame tool.
- Make adjustments to lighting or any other adjustments needed.
- Render again/if satisfy choose the Render/ Batch Rendering or select the Batch render icon.
PART IV: COMPILE FRAMES FROM ANIMATION IN OPEN SHOT
- Open the OpenShot Program and import
-
- Use the methods of workshop 2 to import the image squence and save it to an MP4 movie file..
2. Add a second sequence
-
- Edit the Maya project folder to establish a second “images” directory for individual rendered frames.
- Batch render.
- Use the methods of workshop 2 to import the second image squence into OpenShot .
- Select, drag and place the image sequence into track 1 of the OpenShot video editor.
- Use the Export method within open shot from workshop 2 to save the two sequences to single MP4 movie file.