Using the i1 Display Pro Display Profiler
Using the i1 Display Pro Display Profiler

Step 1
Watch the video on Display Profiling:
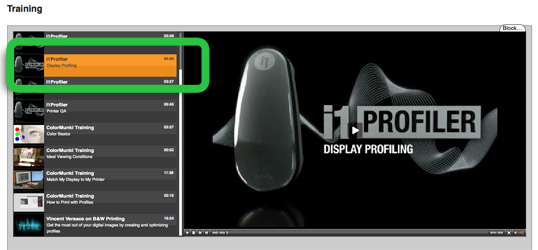
http://www.xritephoto.com/ph_learning.aspx?action=videos&litid=1570
Step 2
Download i1 Profiler software from xRite support. Choose the latest version supported by your operating system.
http://www.xrite.com/product_overview.aspx?Action=support&ID=1454
Step 3
Step-by-Step Guide
1. Install Software
As with all USB devices it’s important to install the software BEFORE plugging the i1 Display Pro into your computer. When installer is complete, plugin the i1 Display Pro. On Windows systems when you do plug it in, the New Hardware Wizard will launch and it’s important that you let this install the drivers for the device before doing anything else. Once the driver is installed you can launch the i1 Profiler software. The i1 Profiler software will display options for printer profiling but since you are using the i1 Display Pro you can’t use these functions.
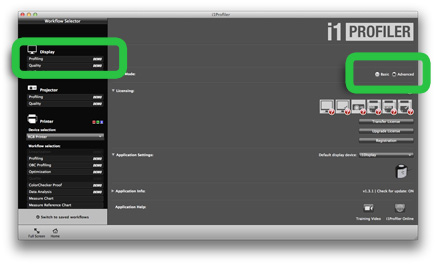
Click on Advanced. Then click on Display Profiling to begin. This article covers profiling a computer monitor, not a projector, although the workflow is very similar.
2. Default Display Settings
Technology Type: The i1 Display Pro can compensate for different LCD backlight technologies such as CCFL, Wide Gamut CCFL, White LED, RGB LED, and Projectors. Check specifications of your hardware to determine what type of backlight your display uses then select it accordingly. If you don’t know start with CCFL and make your first profile. If you are not happy with the result then try the other technology types.

White Point should be left at D65 (default).
Luminance should be left at 120 (default).
Contrast Ratio should be left at Native (default).
Flare Correct un-check this option.
Ambient Light Smart Control un-check this option.
Click Next to continue.
3. Profile Settings
Use default settings.
Click Next to continue.
4. Patch Set
Use default settings.
Click Next to continue.
5. Measurement
Automatic Display Control (ADC): This should be checked (default).
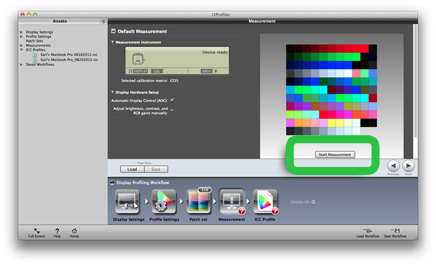
Get your ambient lighting as typical as you can. When making the ambient measurement make sure the ambient light diffuser arm is over the i1 Display Pro’s lens and carefully position the device where you would place a print if you were comparing it to an image on screen. Don’t place it under a desk lamp, in shadow or too close to the glow of the monitor.
Click Start Measurement when you are ready.
Follow the on screen directions.
Click next when measurement is completed.
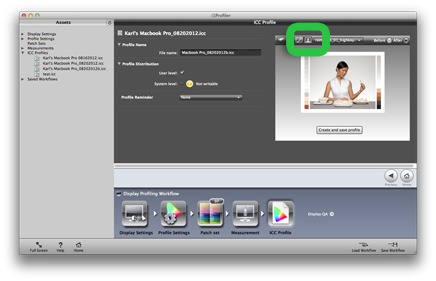
6. ICC Profile
Give the profile an appropriate descriptive name, (username_device_date).
You can choose to get the software to remind you to recalibrate after a certain amount of time Disable Ambient Light Monitoring.
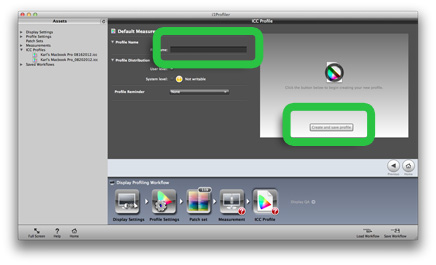
Click Create and save profile.
7. Before and After Comparison
Clicking the image symbol to allow a visual before and after comparison that shows the effect of your calibration. As some changes may have been made to the monitor hardware the before/after switch will not show all the changes but will give you an idea of the level of improvement and accuracy of the new profile. A range of default images can be used or you can load your own custom image from the menu. If you see little change then it may just mean that your display hasn’t changed much since the last time you profiled it.
8. Exit i1 Profiler Software