
OUTLINE
00. Install & Download [students do this before their lab]
- Adding to Rhino & adding toolbar
1.1 Basic Menus & Interface
- Rhino Toolbar
- Enscape App Interface
1.2 Enscape Visual Settings
- Sun, Location & Time
- Environment
2.0 Rhino lights
- Global Illumination Explanation
- Show light settings during day vs. night
3.1 Materials and Material Mapping
- Selecting/adding materials
- Mapping Using Enscape
- Mapping Using Rhino
- Display Modes
3.2 Exporting: Output settings
S1.0 Assets, Landscape Architecture
S2.0 Potential Bonus: Video Editor
00. Install & Download
Downloading Enscape Software
Student site (free with UO email): https://enscape3d.com/educational-license/

- You will receive an email with a download link/button and a license key (above).
- Download software installer to your computer and follow installation instructions.
- Finish installation and open Rhino (current Enscape version supported on both Rhino 6 & 7)
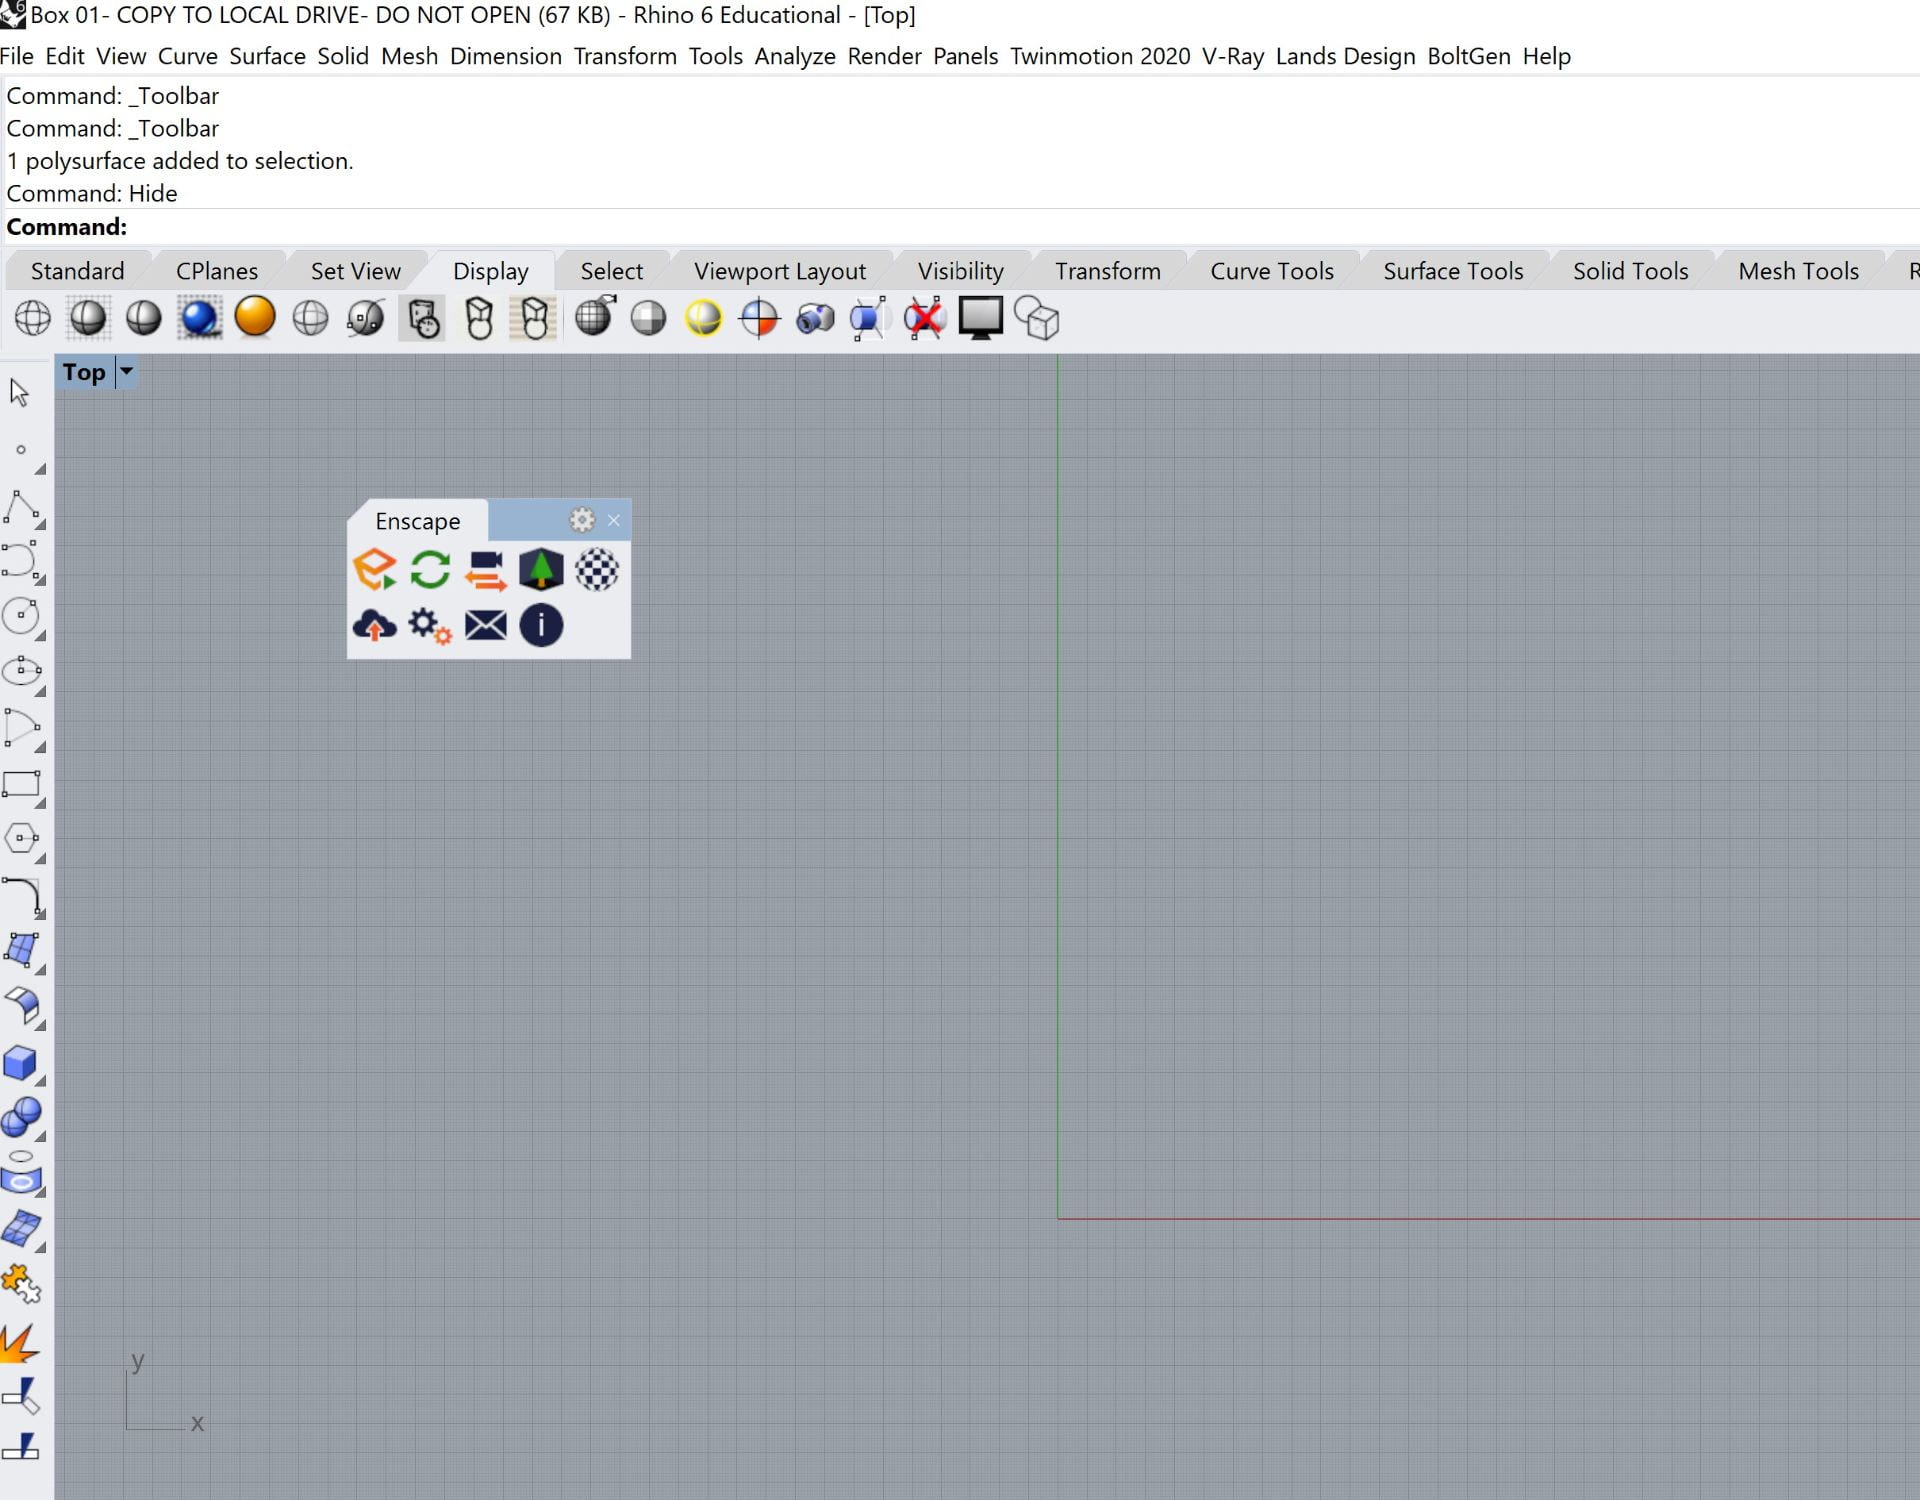
Adding Enscape Toolbar to Rhino
- In Rhino dropdowns at the top: Tools > Toolbar Layout > Check box to enable Enscape (should be available by default)

- A floating Enscape toolbar will appear in Rhino. Click and drag it to place it into the Rhino interface menus.


Official Rhino McNeel Support: https://wiki.mcneel.com/rhino/toolbarimports#:~:text=The%20easiest%20place%20is%20probably,you%20want%20and%20click%20Open.
1.1 Basic Menus and Interface
Enscape Toolbar in Rhino
Note: Hovering over the toolbar icons will also show what they do. You will basically only use icons A-E.

- Starts Enscape – Probably the most important toolbar icon.
- Enables live updating in Enscape based on changes made in Rhino.
- Synchronizes Enscape camera movement with the camera navigation in Rhino.
- Can be helpful if you lose sight of your model in Enscape and need to bring it back.
- Opens the Enscape Asset Library (object library of trees, people, props, street elements, furniture, etc.)
- Explained in Supplemental Part 1 (S1.0)
- Enscape Material Tuning
- Explained in Part 3.1
- Creates a Catalog of the Panoramas or Web Standalones you create.
- Explained in Part 3.2
To continue, please open the “Box Template” that is required for your assignment.
Enscape App Interface
Click the Start Enscape button in the Rhino toolbar, it will open a separate window for the Enscape app with a basic view of your model.
Some initial navigation tips: Pressing the “H” key in Enscape will open the help window, which shows tips for Enscape navigation (shown below). Again, hovering over each icon will show you what it does.

- Enscape itself also has its own toolbar at the top of the application window. Hovering your mouse over each icon will show you its function. The left side of the toolbar includes:
- Home Mode
- Collaborative Annotation
- BIM Mode (Not usable in Rhino)
- View Management
- Create and manage saved views between Rhino and Enscape
- Video Editor
- Screenshot (Render/Export Button)
- Render Based on Output Settings customized in Enscape Visual Settings.
- Panorama
- Standalone
- The right side includes:
- Mini Map Toggle
- Safe Frame
- Projection Mode
- Navigation Mode
- VR Headset Toggle
- Visual Settings
- Crucial for customizing the appearance of your scene.
- Render Window Settings (App Settings)

1.2 Enscape Visual Settings
Sun, Location & Time
- Most of the contextual and lighting settings for your rendering are done in Rhino, but fine-tuned in Enscape.
- To daylight your scene, enter the “Sun” command in Rhino. It will open another toolbar similar to Enscape with settings for the sun, location, date and time.
- Rhino will automatically consider North as “up” in the top view of your model.
- Check the box at the top of the toolbar to turn the sun options ON.

- Scroll down to find the menus for Date, Time & Location of your choosing. For our purposes, choose Salem, Oregon as your location. The date & time will vary based on the daylighting conditions you are testing in your assignment.
- Some common dates to test include: Vernal Equinox (3/21), Summer Solstice (6/21), Autumnal Equinox (9/23) and the Winter Solstice (12/21)

- Some common dates to test include: Vernal Equinox (3/21), Summer Solstice (6/21), Autumnal Equinox (9/23) and the Winter Solstice (12/21)
- Once you finish these steps, return to Enscape where you can further customize your scene.


Environment & Scene Customization
- Navigate to a front view of the opening in the box. You will be creating multiple renders with the same camera position, so it is good practice to save the view in case you accidentally move the camera. Views can be created and managed under View Management on the top-left side of the Enscape app toolbar. The base preview should look something like this:

- From here, you can begin customizing the sun position, environment and scene settings by opening the Visual Settings on the top-right of the Enscape app toolbar. The Visual Settings window consists of several different tabs:
- Main
- Image
- Atmosphere
- Sky
- Output
- The Atmosphere and Sky tabs relate the most to setting up the environment, while the others relate to customizing how the picture looks.Let’s begin with the Sky tab.
- The Sky tab allows you to customize the background and horizon of your scene, as well as the density, variety and amount of contrails and clouds in the sky. Although we selected Salem, Oregon as our location, Rhino only uses that data for positioning the Sun rather than simulating the entire climate.
- For this exercise it could be helpful to check the White Background box at the top of the Sky tab to have a clean, abstract image.

- For this exercise it could be helpful to check the White Background box at the top of the Sky tab to have a clean, abstract image.
- The Atmosphere tab gives you the option to customize fog and wind conditions as well as the illumination. The illumination settings can be used to customize your the appearance of your image in a specific way, but the default settings are generally solid.
- Sun Brightness – Controls the brightness of the sun.
- Night Sky Brightness – Illuminates the night sky and stars when the date and time are set to nocturnal conditions.
- Shadow Sharpness – Defines how crisp or smooth the edges of shadows are.
- Artificial Light Brightness – Boosts artificial lighting intensity if artificial lighting exists in the scene (discussed in Part 2.0)
- Ambient Brightness – The brightness of the environment – evenly lightens or dims the scene, changing the contrast between light and dark.

- The Sky tab allows you to customize the background and horizon of your scene, as well as the density, variety and amount of contrails and clouds in the sky. Although we selected Salem, Oregon as our location, Rhino only uses that data for positioning the Sun rather than simulating the entire climate.
- You can experiment with these settings and different lighting conditions. To change the time of day, you can either use the “U” and “I” keys or hold “shift+right click” while dragging your mouse to go back and forth. To be more precise or change the date, return to the Sun settings in Rhino and input them manually. The changes you make in Rhino will change automatically in Enscape, unless you have turned off Live-Update in the Enscape toolbar in Rhino.
- The skills from this tutorial and what you know in Rhino should be enough to get set up your scenes for the lighting exercise in class.


2.0 Artificial Lighting
Rhino Lights
- Lights are added as model elements in Rhino. Type in the “Lights” command into the Rhino command bar. This will bring up a similar toolbar to the Sun settings. Alternatively, you can find lights in the Render Tools tab below the command bar.
- Note: It is a good idea to create a separate layer for your lights, so you can hide them from view if necessary.
- The toolbar is helpful because it shows how many lights you have in the scene and their types and properties (color, intensity, etc.). Clicking the light bulb, similarly to hiding/unhiding layers, will turn the light on and off.

- Let’s start by clicking the plus icon on the Lights toolbar. It will give you the options to add several different types of lights:
- Point Light
- Spot Light
- Directional Light
- Linear Light
- Rectangular Light
- Choose the Rectangular Light to create it and follow the instructions. You can try placing it on the ceiling of your box to simulate artificial lights from above. Afterwards, to start testing artificial lighting you can either turn off the “Sun” light or return to the Sun Settings toolbar and set the scene to nighttime.
- After you create the light, it may not seem like it functions because its default intensity is too low. You can change this in the Lights toolbar by manually entering values for the specific light, or by selecting the light in Rhino and going to the Properties tab and using the light properties settings and sliders. You can also change the color, among other properties which are more advanced. Both methods are pictured below:
 (Pictured) Initial Rectangular light setup with default settings
 (Pictured) Intensity raised to 1.5 and color changed to pink.
 - You can continue using the same methods and experimenting with different types of lights. The Atmosphere tab in the visual settings of the Enscape app also has an Artificial Light Brightness setting, which is useful for fine-tuning lighting intensity. The Sun Brightness slider in the same Enscape settings tab also overrides Rhino’s Sun intensity settings.
- There are other settings within Enscape that influence the appearance of lighting and can change the character of your render. Corrections and Effects are located under the Image tab in Enscape’s visual settings window.
- Corrections include:
- Adjustments similar to Photoshop: Contrast control, saturation and color temperature.
- A daylight color temperature sits around 4,500K, while warmer colors start around 3,000K and colder at around 6,000K.
- Effects include:
- Motion Blur
- Lens Flare (similar to glare)
- Bloom – The outshining/surrounding glow of bright objects and lights.
- Vignette – Darkens the image around the corners.
- Chromatic Aberration – A camera-like effect, where the lens cannot focus on multiple colors in a single area, causing blurring and color distortion.
- Corrections include:
- You can also control the Exposure of the entire scene in the Main tab of the Enscape visual settings.
- Note: Having Auto Exposure turned ON will compensate for incorrect lighting settings. This is good for quick process renders, but gets in the way of accurately representing the lighting conditions of a scene otherwise.


Some helpful tips:
- Bigger lights will diffuse more softly than small lights, since they originate from a larger surface than a point. This also applies for light types such as a rectangular light vs. a point light.
- When lighting an object or simulating studio lighting, placing lights farther away from your subject will also make the light softer and more diffused rather than sharp and intense.
- The quality of your render and the reflectivity of the materials will also affect how lights appear, so make sure to test the conditions before exporting (covered in later steps).
Other lighting resources:
McNeel Rhino Support: https://docs.mcneel.com/rhino/6/help/en-us/commands/lights.htm
140 Tips for Architectural Rendering (PDF Booklet): https://gumroad.com/l/DDHrr
Blender Guru Lighting Course – Good for learning about the theory/setting up lights and renders, but not actually about using Rhino.
3.1 Materials and Material Mapping
Selecting Materials
- Make sure you have Enscape and Rhino open at the same time (side-by-side or on separate screens) to follow along. Set the scene back to Daytime and a white background and turn off the rectanglular light.
- Materials are selected in Rhino, not Enscape, and are saved as part of the Properties information in the model. Therefore, materials can be applied to individual objects or entire layers depending on how you choose to select them. Let’s start with individual objects first by selecting the box we have been using in the template. Similarly to lights, you need to have the object selected to edit its properties.
- Once you have the box selected, look through the Properties tabs until you find the Material tab. It looks like a paint tube with a red stripe around it. Navigate to it and follow these steps:
- Open Materials Tab
- Click the dropdown at the top of the toolbar (automatically set to “Use Layer Material”)
- This dropdown contains all the materials already present in the model, so there is no need to import materials multiple times.
- Select Use a New Material
- Choose Import from Material Library

- Once you have the Material Library open, it will show you multiple folders with different material types. For our purposes, select:
- Architectural > Wall > Concrete > “Concrete Light”.
It can be helpful to change the icon size in the Material Library explorer to preview what the materials look like before choosing them (shown below).
- Architectural > Wall > Concrete > “Concrete Light”.
- Alternatively, you can change the materials in the Layers tab. There, you can edit the Material Properties of the Layer by clicking the white circle in the materials column. Afterwards, a material selection window will appear and you can follow the same steps as in steps #3 and #4 above. Make sure that the Box is in the layer you are editing. It should be in the”Default” layer.
All new objects you create in that layer will automatically render in that material. You can override this by changing the material of the individual object, changing its material from “Use Layer Material” to a material of your choice as shown in steps #3 and #4. Also – some versions of Rhino and Enscape have a bug where they are able to live-update materials as you apply them to objects, but require you to close and restart Enscape to view material changes to layers.

- The Box with the Concrete applied should look something like this in Enscape:


Material Mapping
You may notice that the concrete looks blurry or low resolution. This is because of the tiling of the material and the U/V mapping of the surfaces of the Rhino object. Perfecting the U/V Material Mapping will allow you to change the scale of your material so it looks more realistic and less blurry.
U/V Mapping is the process of projecting a 2D image onto a 3D model’s surface for texture and material mapping. Each Rhino material is basically a square, 2D texture, repeatedly projected onto different parts of the model object it is applied to. Therefore, Rhino basically unwraps the object’s surfaces and lays them flat to tile the texture squares multiple times (shown in the cube image below).
The process is called U/V mapping because the software assigns a point grid to the faces of each object, which then correspond to specific points on the texture image so it knows where to place it. The U/V refers to the point system for tiling surfaces similarly to the way X/Y coordinates work to describe 2D placement in Rhino. The higher the U/V count, the more points there will be on the surface, which means the surface will be tiled more times at a smaller scale.
Mapping is somewhat straightforward in a cube since you can use multiple, equally-sized squares to form each surface, but can cause problems on curved, round or organic shapes. In a sphere, for example, the top is narrower and flatter than its middle diameter, so the material tiling becomes distorted at the top and bottom. A good example of this is how maps on globes distort the actual distances and sizes of continents and oceans in order to deal with making a round version of a map. Some example images of U/V mapping are shown below:


U/V unwrapping of a cube, a U/V map of a face texture and the distortion of a globe/sphere in square U/V tiling.
Enscape Method
Let’s start with customizing our own Material Mapping for the concrete texture on our box. There are two ways to apply Material Mapping in Enscape and Rhino. Currently the texture is too big and out of scale. We want something like this:

- Let’s first try the Enscape version. Select the box and navigate back to its Material Properties. It will display its material as “Concrete Light” as we previously selected. Right-click its preview dropdown and choose Duplicate to have an unedited version of the material saved in your model.
- The new material will be displayed as “Concrete Light (01).” Feel free to rename it as you choose, still in the Material Properties. Then, click the Type dropdown and change the type from Custom to Enscape, otherwise the material will not appear in the Enscape Material Editor. Select the Tune Materials in the Project icon in Rhino’s Enscape toolbar. The concrete material we edited will appear on the left-hand side.
- Once you select the material, a series of options will appear to the right. At the top of this window, you will see tabs called Albedo and Height. Both these tabs reference the image textures that go into making these materials.
- Albedo: Essentially controls the surface appearance of the texture and its colors. Albedo itself is the measure of the reflectivity of a surface – how much light is reflected vs. absorbed.
- Height: Controls texture/roughness of the material, adding depth by simulating bumps, dents, wrinkles and other imperfections on the surface.
- Navigate to the Albedo tab first. It contains a texture transformation portion, where you can change the Width and Height of the texture to properly scale it. For concrete, make sure the distances stay equal so the texture stays proportional. I tried to set the W/H to 0.03, and it looked convincing, but still abstract and not photorealistic.
- You can also play around with the Rotation feature below the W/H inputs to change the texture orientation. Then, input the same values into the texture transformation of the Height image tab, so the texturing matches up with the Albedo image. The steps and the results are shown below.


- The Enscape method of material mapping is simple and easy, but directly edits the material preview in Enscape instead of the object. This can be helpful if you are using the same material multiple times and want it to look the same in each instance. However, editing the material after applying it to an object will affect all the objects it is applied to, so you must duplicate it again and treat it as a new material if you want it to be scaled, textured or colored differently.


Rhino Method
The Rhino Texture Mapping alters the U/V count of the surface or object rather than the size of the material like Enscape. Both methods are set to fill the surface, but this method edits how many times the texture should repeat on the object’s surface. This method is therefore more dependent and customizable to an object’s shape and size, but has to be repeated on each object individually.
- Start by changing the Box material back to the original “Concrete Light” we used before duplicating it in the Enscape method. Then, go to the Texture Mapping tab in the Properties toolbar to the right of the Material Properties tab.
- At the top of the Material Mapping toolbar, you will see multiple small icons with checkered surfaces and objects.
- Select the Apply Box Mapping (Cube) icon
- Outline the volume of the Box by following the directions
- Hit “Enter”/select “Yes,” when choosing if the mapping is Capped or not.
- Your Box is now mapped and editable using the “XYZ Size” or “UVW Repeat” parameters. To avoid distorting the texture, check the “Lock” box by these inputs. For this case, use the XYZ Size input and ignore the UVW repeat. Inputting “0.3” made the scale appropriate and similar to the previous Enscape Method. The process and results are shown below:
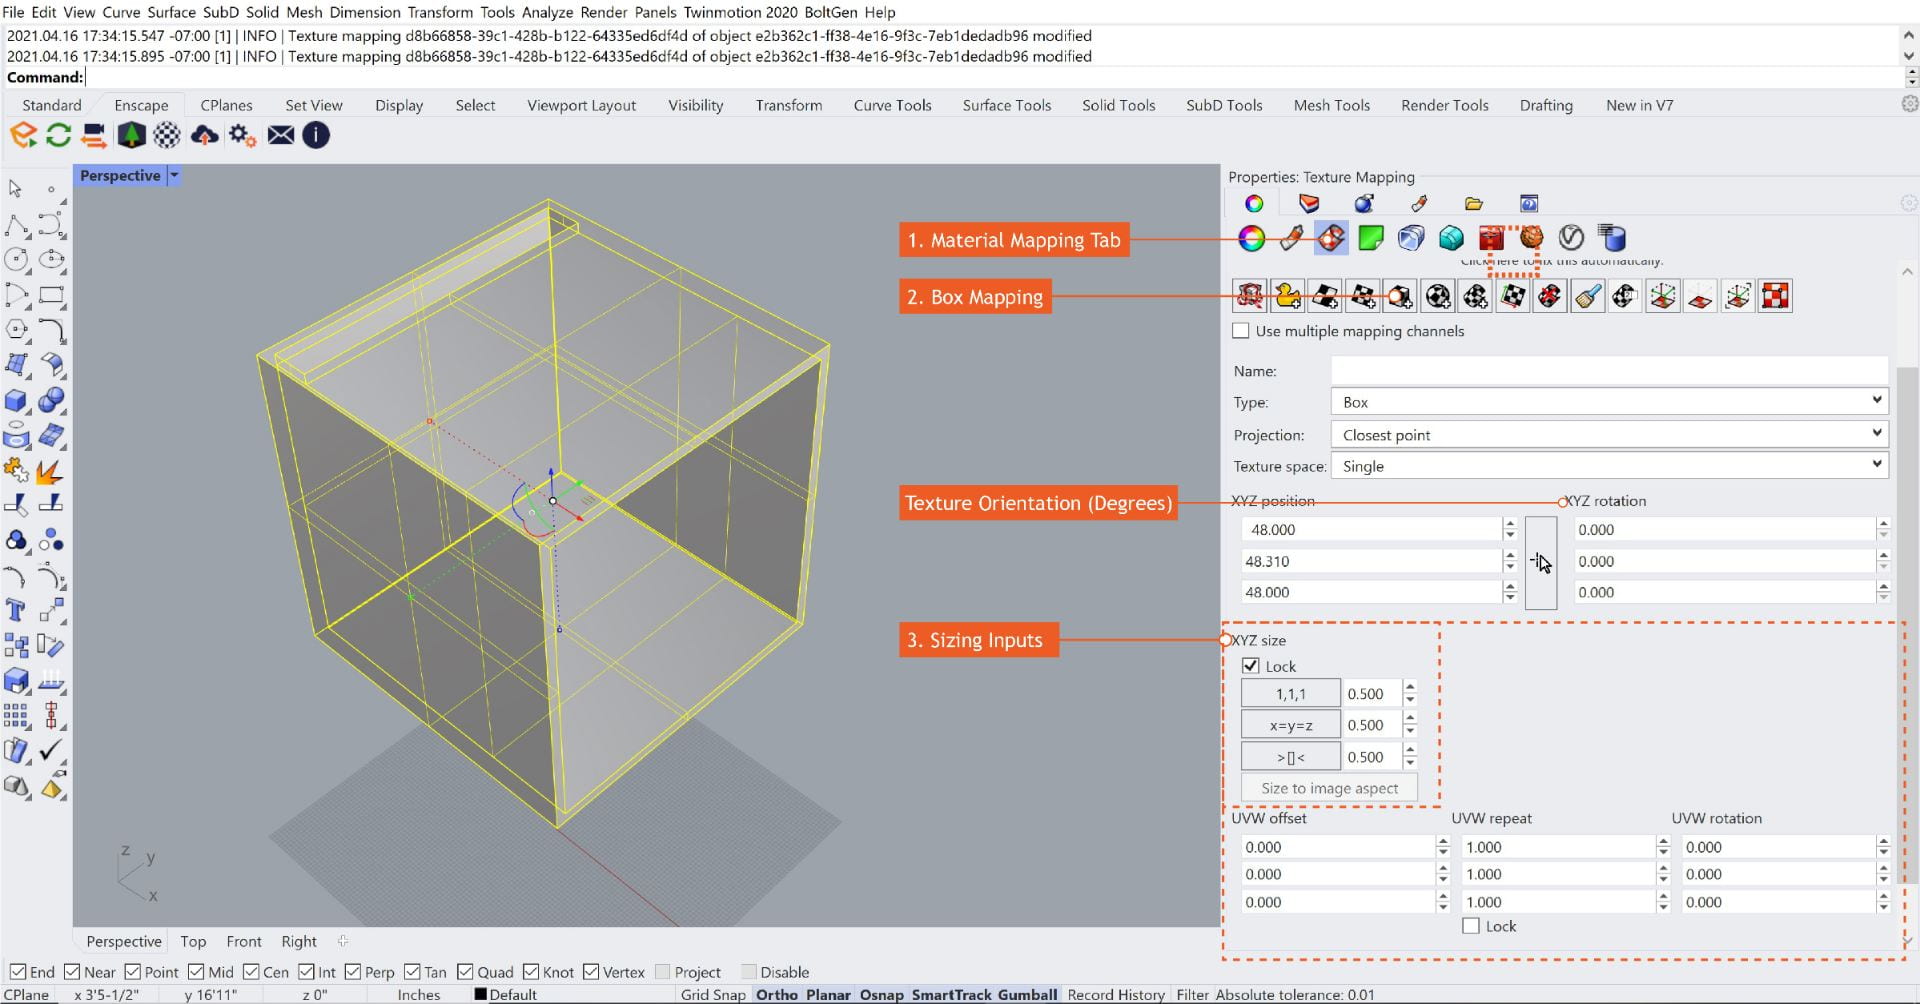

While this method is applied only to specific objects, the mapping is easy to duplicate to objects of similar shapes and sizes by using the “Match Mapping” function at the top of the toolbar. The icon looks like a large paintbrush and is among the other mapping icons.
It is important to remember when making your first renders:
- They do not have to look photorealistic, just abstractly correct. It is easier to use materials like steel, plywood and concrete since they essentially do not have a scale. Mapping materials like roof shingles, cobblestones, bricks or high-resolution wooden planks requires matching the scale, proportions, grain and also where they end/match up with the ends and intersections of each object. This can take lots of time, fine-tuning and advanced techniques that are at this point not worth your time. Even getting the shade and color of the material right can be enough – it’s just about getting your general point across about the spaces you are trying to create.
- You can abstract your own style to communicate your ideas without using the basic colors of readily-available materials. In the Rhino Material Library, you can use materials outside the Architectural materials folder. Some good, abstract, material folders to choose are Paint, Plasters, Plastic, or Ceramics.
- White/Clay renders can be beneficial when looking purely at spatial relationships or lighting and shadow conditions, so removing materials can also have some benefits in abstraction.
Some stylistic examples:


Top to Bottom: Render style comparison by Dezign Ark, Stylized Illustration by Matthew Davis and Arianna Deane of MOS, Architectural Illustration by Tishk Barzanji.
Display Modes
Similar to Rhino previews, you can change the Display Modes in Enscape. This can be beneficial in comparing lighting, spatial relationships or making diagrams.
- To change the Enscape display mode, open the Enscape Visual Settings in the Enscape App. Follow these steps:
- Make sure you are in the Main tab.
- In the Style section, you can use the dropdown to change the Mode. The modes include:
- White – Renders all materials in white, except for transparent materials and water.
- Polystyrol – Renders all surfaces like a real polystyrol (styrofoam-like) material, whereby the sunlight is scattered through the thinned geometry.
- Light View – This mode informs you as to how much light is hitting a surface and this is displayed as a heatmap. It also displays a customizable scale with Lux (Illuminance) values.
More information: https://enscape3d.com/community/blog/knowledgebase/rendering_styles/
- In the same Style section, you can also customize the Outline strength of your rendering for more definition or a sketch-like look.
- The Projection Mode is also customizable directly below, which can be useful to create different types of deliverables. The settings enable transitioning between:
- Perspective
- Two-Point Perspective
- Orthographic (Axon-like) Projection
3.2 Exporting
Pre-Export
Before exporting the rendering, it is possible to fine-tune the character and appearance of your image by using the Main and Image tabs of the Enscape Visual Settings.
The settings that have not been mentioned previously in the Main Tab include:
- Field of View – The radius/cone of vision which is visible from at the given time. In Enscape, the realistic FOV is about 67 degrees.
- Depth of Field & Auto Focus – Defined as the distance between the closest and farthest objects in your scene. Allows you to focus in on a specific point of yourscene, while blurring out the foreground/background around them (like the aperture of a camera). Turning on Auto Focus (enabled by default) will basically make everything equally focused, but will start blurring farther away from the camera because of atmospheric dispersion.
- Rendering Quality – Basically means what it is called. Increasing the quality will simulate more accurate shadow, lighting and material conditions including reflectivity, texture and transparency or translucency. Therefore, your rendering may look different when you change the quality. Going all the way to Ultra is rarely necessary, but most computers should be able to handle basic files in even High Rendering Quality.
The Image tab includes:
- Contrast settings similar to Photoshop
- Saturation – The purity, vibrancy or intensity of a color. Lower saturation makes the colors appear more gray and muted.
- Color Temperature – Makes the image seem “warmer” (lower number = orange hue) or “colder” (higher number = blue hue) – daylight is around 4,500K.
- The Effects mentioned in Part 2.0 – Artificial Lighting
Once you use the Atmosphere and Sky tabs to customize the render environment conditions and the Main and Image tabs to customize the appearance and character of your rendering, head to the Output tab, the last tab of Enscape’s Visual settings.
Output Settings
Before beginning, make sure you have selected the render quality you desire in the Main tab of the Enscape Visual Settings.
The Output Settings determine final parameters of your deliverable including:
- Image size & resloution
- Aspect ratio & orientation
- File type and save location
Verify these settings prior to exporting, so Enscape can process, compress and produce the kind of deliverable you would like to use in your presentation.
Most of these settings are found in the Output tab of the Enscape Visual Settings within the Enscape App. Navigate to this tab to begin.
- Make sure the camera is oriented in the view you would like to export. Click the Safe Frame icon on the upper-right of the Enscape App toolbar. The Safe Frame shows you the bounds of your image and what will be included in your exported image.
- In the Output tab of the visual settings, the General section will allow you to customize Resolution of your image in the dropdown.
Each setting differs in its amount of pixels, meaning the actual size of the image is different, even though it may appear the same on your screen. Higher resolution images are sharper when printed in large formats, or when zooming in to details on your screen. You can choose from several options including:- Window – Renders the everything visible in the Enscape App preview window based on the basic resolution of your display screen (will change if you use Enscape on a monitor/external screen).
- 1024 – A setting with a 1.33 aspect ratio, which is nearly square – can be good for vignettes/small, diagrammatic snapshots.
- Various HD options – A landscape-oriented render with a 1.78 aspect ratio, good for exterior renders. (HD, Full HD, Ultra HD)
- Custom – A customizable pixel count and aspect ratio, which enables you to customize the resolution and orientation of your image more freely.The use of each resolution depends on how you intend to use your image. However, the Full HD option renders at 1080p, a basic resolution common for current laptop screens and devices.
- The Image portion of the Output tab controls the file type, save folder location and naming conventions of your output image. The Export/Material ID will also export a series of accompanying images with your render, which can help with post-processing in other programs such as Photoshop.
More on this feature here: https://blog.enscape3d.com/export-options-in-enscape - You can also save the preset to re-use it later or export it as a file to use in a different project (process shown below). Enscape will automatically start a “Custom Preset” when you open it, but you must create a new one if you want to experiment with and save different styles.


Screenshotting/Exporting
After you set up your render, you are just a few clicks away from completing your render. The exporting buttons are on the left side of the Enscape App Toolbar, and include the following options:
- Screenshot (USE THIS) – Creates a still image with the rendering settings you have selected.
- Mono Panorama – Creates a 3D rendering similar to a virtual reality camera, which allows you to look around in 360 degrees. It also generates a QR code, which makes your rendering shareable through the cloud and viewable on your smartphone. You do not need a VR headset or Google cardboard to use this feature.
- Stereo Panorama – Creates a similar 360 panorama, but modifies it for VR accessories. Since it is called “Stereo,” it has two channels, one for each eye, for each side of the VR experience.
- Exe/Web Standalone – The Exe and Web Standalone features both create a separate file which opens the model in a different window without needing Rhino. The difference between the two is the Exe Standalone creates a file saved to your PC, while the Web Standalone creates a cloud-based file viewable online. It can be shared using just a link without the file itself and embedded on websites for an interactive appearance.

After I tuned my preferences and saved my preset, I used the Screenshot feature to create this Full HD resolution rendering, render in High quality:

S1.0 Assets & Landscape Architecture
Tips for adding entourage, vegetation, accessories and furniture…
Organic Materials/Groundcover
- Organic materials can be found in the Rhino Material Library and applied like any construction material. Good places to start are:
- Material Library > Organic > Folder of your choice
- Material Library > Architectural > Exterior > Folder of your choice
- You can apply organic materials to your toposurfaces and ground planes. To make the scale correct, you must either use the Enscape Material tuner as demonstrated in Part 3.1 or use Surface Mapping.
- Rhino Texture Mapping > Surface Mapping > Lock and use the UVW Repeat (not XYZ Size) and increase the number to scale.
Enscape Asset Library
More landscape features are found in the Enscape Asset Library. The asset library is a collection of pre-made objects that you can drop directly into your scene. When used correctly, they can boost the realism of both interior and exterior scenes. Upon opening, the left side of the Asset Editor window will show a series of categories you can choose from to narrow down your search. The most useful ones for landscape design are:
- Vegetation, subcategories:
- Trees
- Topiary/Hedge
- Shrubs
- Stones
- Groundcover – Randomly-spaced flowers, fallen leaves, lillypads, etc.
- Street Props – Sample buildings, street lamps & signs, bicycle parking, flowerbeds, outdoor furniture, drainage features, pergolas, etc.
- People & Animals
- Vehicles
- Other accessories/props
Once you select your desired object:
- Select the Rhino surface on which you would like to place it
- Select the specific location on that surface itself
- It will be visible as its own object in Rhino, and render in Enscape based on the preview it shows in the asset editor.
Rhino treats these assets as Rhino blocks, meaning they can be scaled, transformed and rotated using Rhino commands, but they cannot be customized by color, arrangement or material – they treat the entire asset as one object even though it may be a group of individual objects such as scattered leaves.
Make sure to use the assets sparingly and to transform them each time. Overusing them will make the render look too perfect and repetitive and thus unrealistic.
A quick sample scene using the Box template, the Enscape Forest background environment, organic materials and Enscape assets:
